Manage document directories
The Manage document directories node is used to display and modify the primary and secondary document directories.
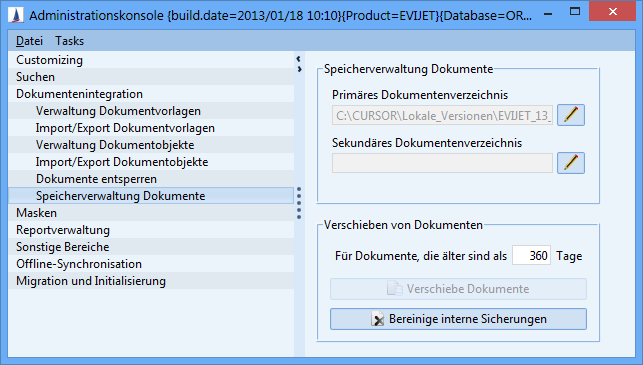
Figure: Manage document directories
In the primary document directory, the internal documents of the CRM application are kept. The secondary document directory contains the older documents of the CRM application. To move the documents from the primary to the secondary document directory, the button of the same name can be used.
-
The stored document directories must be accessible to the application server. For example, C:\DOCUMENTROOT is entered there, this is a directory on the server itself
-
A change in the document directory usually results in the fact that access to the documents stored in this directory is no longer possible
Moving of documents
Older documents can be moved to the secondary document directory.
Advantage:
The weekly full backup removes the documents that have been moved by the administrator.
Disadvantage:
Access to older documents is delayed by approx. 0.5 sec.
Requirements:
-
The secondary document directory is defined.
-
The application server has write permissions in this directory path.
If the secondary document directory is not defined, the ‘Move documents’ button is disabled.
Functionality
All documents older than x days can be moved to the secondary document directory. The user can specify the number of days in the administration console. In the application, the moved documents can still be accessed. The actions ‘Edit’, ‘Save’ and ‘Read’ are still possible.
Technical background:
When opening documents, the document is first searched for in the primary document directory. If it is not found there, it will be searched in the secondary document directory. The return process always takes place in the primary document directory, i.e. there are max. two versions of the document until a move has taken place again. Recently created or changed documents are therefore always in the primary document directory.
-
This process can take up to several hours, depending on the number of existing documents
-
The administrator can continue working after starting the process
-
It is recommended that you do not start this process during productive operation
Delete internally saved documents
Introduction
As part of the return of a modified document, a backup copy of the previous version is also saved internally (stored in the ‘history’ subdirectory). It’s a good idea to clean up these history directories from time to time
Advantage:
From the weekly full backup, the documents that were removed by the cleanup fail
Requirements:
The internal backup is activated by default, unless there is a system-wide property mapping entry <PropertyMapper id: DOCUMENTBACKUP> with property value = 'false'.
If the prerequisites are not fulfilled, the button ‘Clean internal backups' is deactivated.
Functionality
All internally saved documents that are older than x days are deleted. The user can specify the number of days in the administration console.
-
This process can take several minutes, depending on the number of existing documents
-
The administrator can continue working after starting the process
Document handling in the application
Process description
CURSOR-CRM enables efficient document management. ‘Document’ is an application file of any format that can be opened or edited with a system application.
All documents must be checked out before processing and must be returned after processing. This procedure for editing documents is similar to the process when checking out a book in a library. A book is checked out, it can be opened locally (at home) as often as desired and is finally returned by the user. The user decides for himself when he wants to return the book. Only after its return it is available to other users again. This means that while a document is checked out, it cannot be edited by other users. Only read access to the last version of the document is possible.
The following instructions must be followed, otherwise it cannot be ruled out that changes to documents will be lost.
-
After the user closes the document, the changes are not automatically saved in the application. Saving is only done with the return process.
-
If a document is still open after it is returned, then later changes will not be stored in the application.
-
Before returning the document should always be closed.
The menu in the document button
There are 2 variants for how the document button can be configured:
-
Simple document button
-
Pull-Down-Menu
By default, documents in the window
-
Activity
-
Quote
-
Contract
Can be created. It is also possible to generate documents from other entities. The prerequisite for this is that the functionality is enabled.
A detailed description of the activation process can be found in the chapter Editing entities configuration / Enable document generation for entities
How many and which documents can be created for an entity can be configured individually for the application. At the moment it is not possible to make these settings via the administration console.
Simple document button
By default, the simple document button is displayed. After clicking the button
a document selection dialog opens.
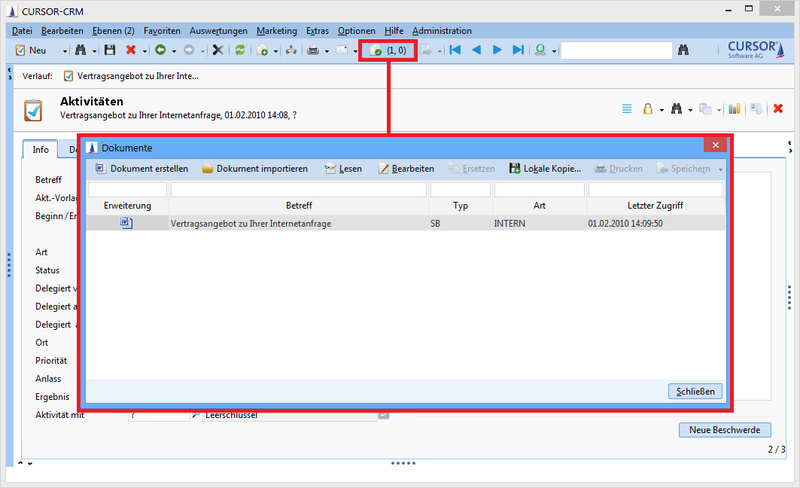
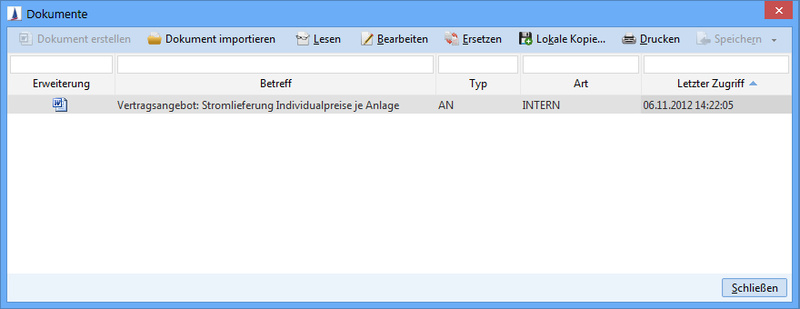
Figure: Document selection dialog as standard configuration
Using the symbols in the toolbar, document actions can be started:
-
Create documents
By default, Word documents are created from templates. -
Importing documents
This button imports files (documents) of any format. After one click, the import wizard starts. -
Read
Documents are checked out from the system and opened for reading. -
Edit
Documents are checked out from the system and opened for editing. -
Replace
A document can be replaced by another. -
Local copy
A copy of the document is created on the local storage medium. -
Print
The standard printer dialog is started. -
Save
If a document is checked out for editing, it must be returned or the changes discarded.
A newly created or imported document is automatically linked to the entity from which it was generated (activity, quote, or contract).
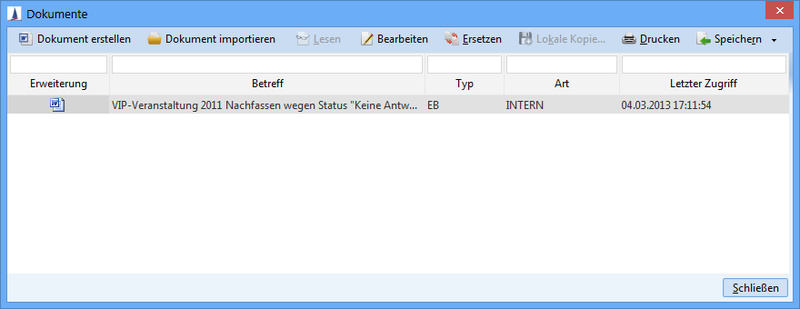
Figure: Example of document selection dialog in the activity
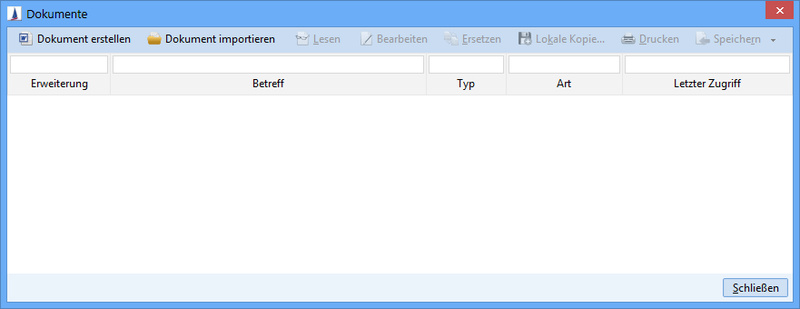
Figure: Example of document selection dialog in the quote
In the case of activities, the standard action is always the creation of single letters, since an unlimited number of single letters can be created for an activity. For offers, however, only one quote document can be created. If an quote document already exists for a quote, the creation of application files becomes the default action of the new button.
Pull-Down-Menu
The submenu for the access to the document can be activated again via the option Submenu in the document button in the dialog window System preferences/Integration.
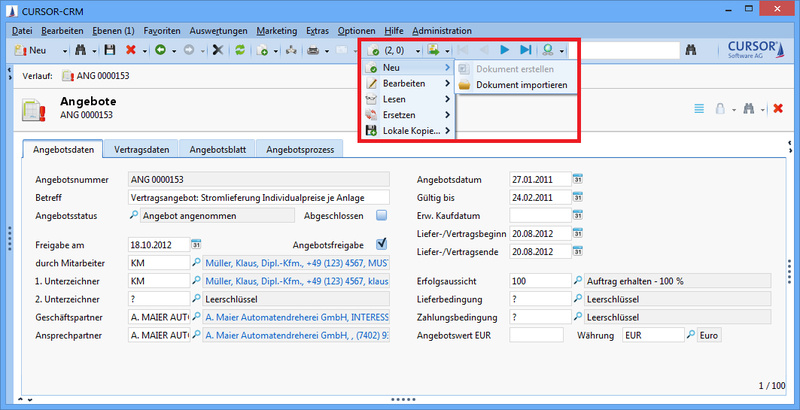
Figure: Multi-function-button (”Pull-down menu")
In this case, the generation of the documents is started via the multi-function button in the toolbar.
Here, existing documents can be replaced, checked out (for editing), returned or re-opened. The adding (importing) of application file (external document) is also possible here.
In the pull-down menu of the button
the status of a document is clearly recognizable via a further submenu.
Example:
-
If the menu item Edit is active, the document can be checked out and edited.
-
If the menu item Return is active, the document can be returned.
The button

is available in the Activity, Quote or Contract mask – not in the Documents mask.
Open and edit a borrowed document
After borrowing a document, it can be displayed and edited as often as you like using the Edit button to enter subsequent changes. After borrowing the document, the Read button is inactive.
Basic procedure:
-
Edit (and Borrow) button: the document is borrowed and automatically opened.
-
The user makes his changes and closes the document.
-
Button Return: the document is returned and available for other users. Alternatively, the return can be canceled via Discard changes and the changes discarded. With the Open button, the document can be opened again. This step can be repeated as often as you like.
Time of return of documents
The time of return can be chosen by the user himself. The documents can remain open during the entire session. When closing the application, the following dialog opens automatically to return all checked out documents.
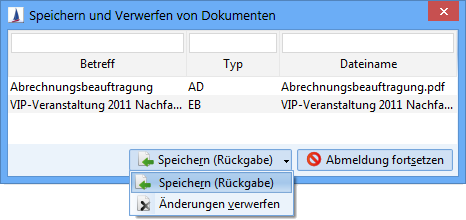
Figure: Save and discard documents
For this purpose, the documents to be returned are automatically marked via the associated selection field and can then be returned via the button of the same name.
The user is not forced to return a document when exiting the application. You thus have the opportunity to edit the document at any time.
The dialog for returning documents can also be accessed via the menu Extras / Borrowed documents.
Extras menu to return borrowed documents
Of course, the borrowed document can be returned immediately after it has been processed so as not to unnecessarily lock the document. You can also use the Return button on the Document or Activity mask.
Release document without saving the changes
The Discard changes button allows the user to discard local changes to the document and make the document available to all users.
To edit the document again, the document must be borrowed again.
Use of the application on several computers
Since the checked out documents are stored locally on the computer, they can only be returned on the respective computer.
When starting the application, it is therefore checked whether the user has checked out documents on other computers. If this is the case, the following dialog appears as a reminder to the user.
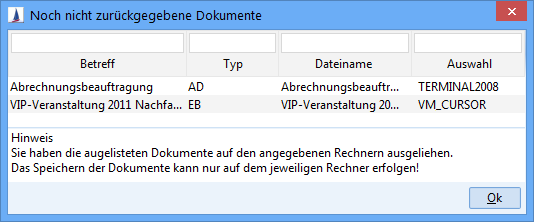
Figure: Reminder dialog for returning documents on other computers
If the user wishes to return these documents, he must start the application on the computer named in the dialog and carry out the return process there, for example via the menu.
Support for Office 2007 (OOXML)
Choice of file format
When saving generated documents, either the OOXML format or the proprietary doc format is used.
Which file format is used when?
-
Document templates based on generation variant NATIVE
In principle, the file format “Save as” stored in the document template is used.
If the user can change the output format, the file format selected by the user will be used.
As OOXML target format only DOCM is available, because the execution of macro code is necessary for the generation of the documents .
-
Document templates based on generation variant COM
-
Use of Microsoft Office until 2003
By default, documents are saved in Word 97-2003 format (DOC). -
Use of Microsoft Office from 2007 onwards
The file format of the selected document template determines the file format of the generated document.
-
|
File format of the document template |
File format of the generated document |
|---|---|
|
dot |
doc |
|
dotx |
docx |
|
dotm |
docm |
Microsoft Office Compatibility Pack
With the help of the Microsoft Office Compatibility Pack (see http://office.microsoft.com/de-de/products/HA101686761031.aspx), new documents (based on OOXML) can also be loaded and saved in older versions of Word. This also makes a mixed operation of older and newer Office documents conceivable, which is supported by CURSOR-CRM/EVI.
Opening document templates based on OOXML is not supported by the current Microsoft Office Compatibility Pack. Therefore, editing OOXML documents in the Admin Console is prevented when using an older version of Office. A message appears.
In order to recognize the format of the document template, its file extension is now also saved (Admin Console / Document Integration / Administration Document Templates).
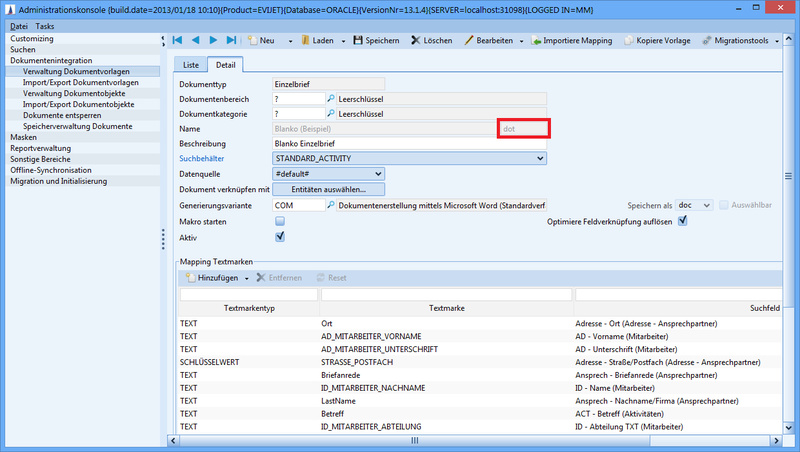
Figure: Format of the document template
Conversion to Office 2007 (OOXML)
When using Office 2007, under certain conditions, the user may be prompted to convert the existing Office 2003 file to the new Office 2007 (OOXML) format. All document types relevant to Office 2007 can be converted.
Hint
The configuration of the link between the file type and the application to be executed is available in Windows XP via the Explorer Menu Extras/Folder Options - Tab File Types.
Password protection for a Word or Excel document should be activated. For example, a doc file becomes a docx file.
Although this happens with a demand from MS Office, it can still lead to incorrect operation. Therefore, when editing or returning a document, it is now checked whether a conversion has taken place. If so, the user can decide which version to continue with.
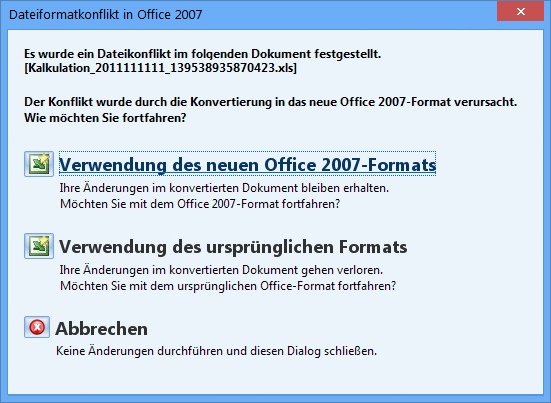
Figure: File format conflict for Excel documents
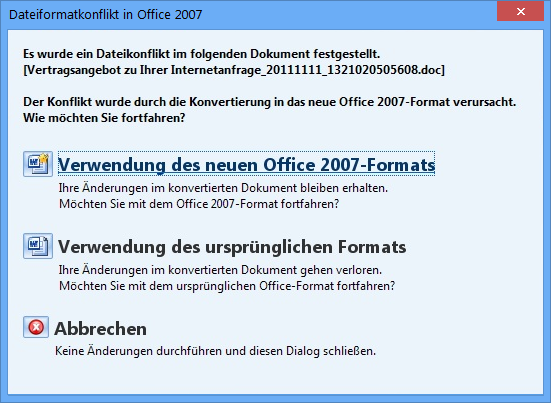
Figure: File format conflict for Word documents
Historicization of documents
The historicization of a document can be activated via the checkbox History activated in the ‘Document’ screen. From this point in time, each time the document is returned, the previous status of the document is stored in the document history.
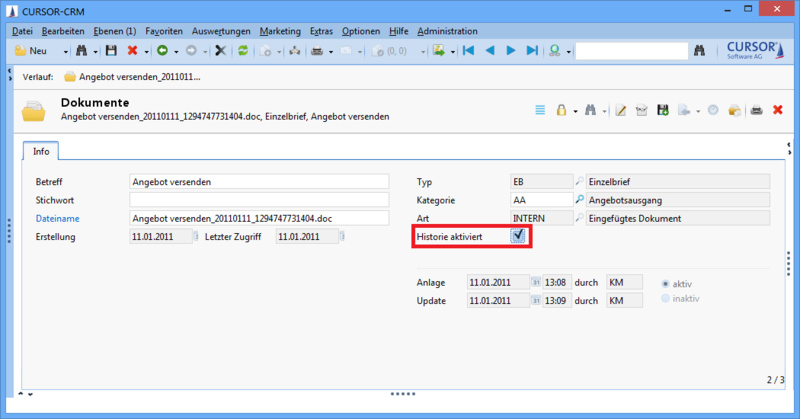
Figure: History of the document is activated
The historicized versions of a document can be viewed via the Document History button. Double-clicking on the selected version entry opens the historicized document for reading.
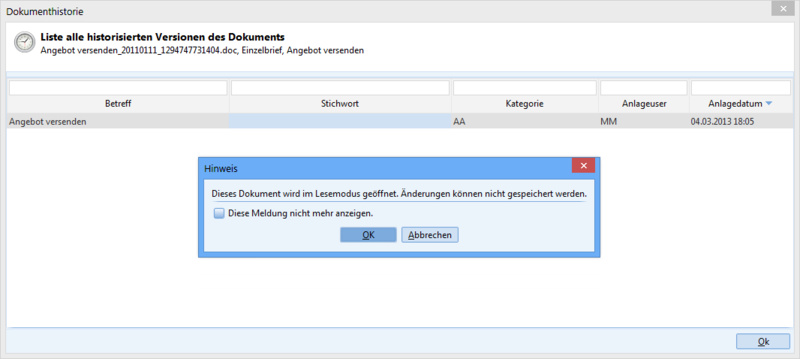
Figure: Document history
The document history button is only available for the History activated button.
The ‘Keyword’ column can be subsequently edited in the view of the historicized documents. In a longer 'living' document, a keyword or comment can then be deposited in the history, which briefly describes the change.
Example: A log is being processed. In the historicization, a specific status can be marked as a direct meeting result.
The historicized versions of a document are stored as inactive documents in the application and therefore do not usually appear in the search result list of documents. If this is the case nevertheless, the historicized document is indicated by a message in the upper area of the screen. In the case of a historicized document, changes cannot be made to either the dataset or the document.

Figure: Inactive documents in the search result
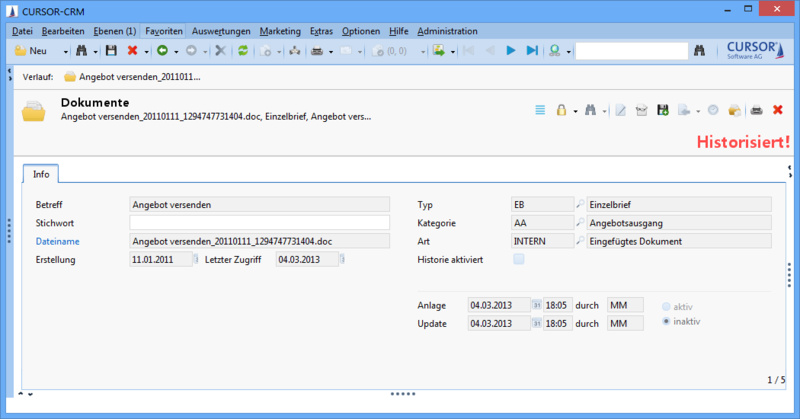
Figure: Historized document
Copy documents via clipboard
Documents within the application can be copied without having to save them as a local copy before importing them.
Copy documents to the clipboard
To copy documents in the application to the clipboard, the following options are provided:
-
In the Main window 'Documents' the switch Copy into clipboard is provided. Clicking on this button copies the document currently displayed in the main mask to the clipboard. The menu item is also available in the context menu of the document window.
-
In the list view of documents (main mask list, sub area list) there is the new context menu entry Copy documents (clipboard). This copies all marked lines (= documents) to the clipboard.
This entry is not present in the search window.
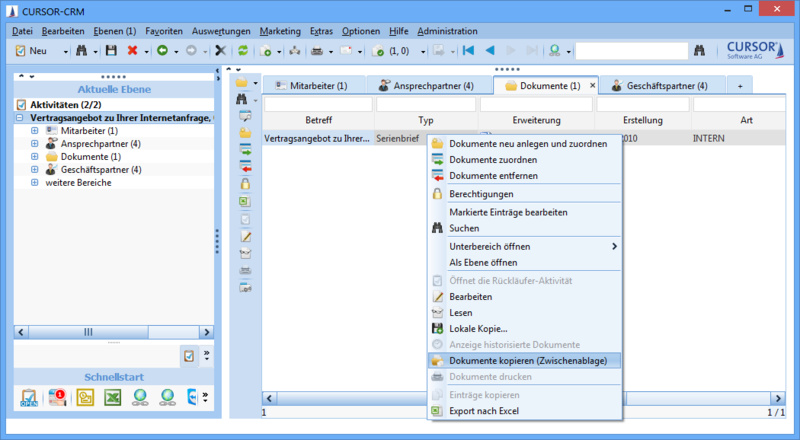
Figure: Copying documents via clipboard - context menu in the list view
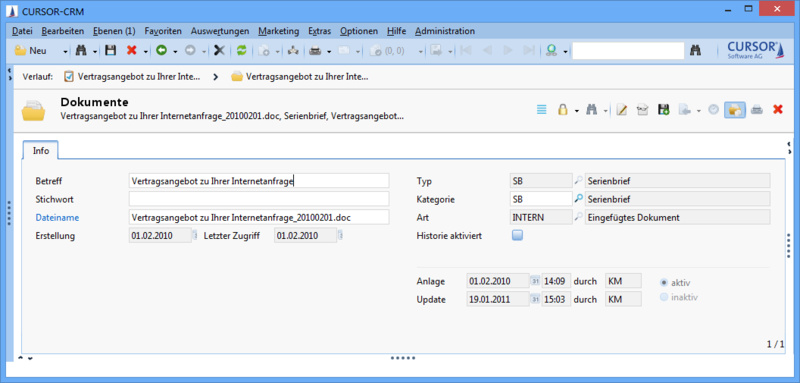
Figure: Copying documents via clipboard - button on the mask
Insert documents from clipboard
To insert previously copied documents, a new menu item Insert documents is available in the context menu entry of a main mask. This menu item can only be selected if documents were previously copied and documents can be assigned to the current entity. If this menu item is selected, a dialog opens asking whether the previously copied documents should be assigned to the current set in the main mask or whether the documents should be copied.
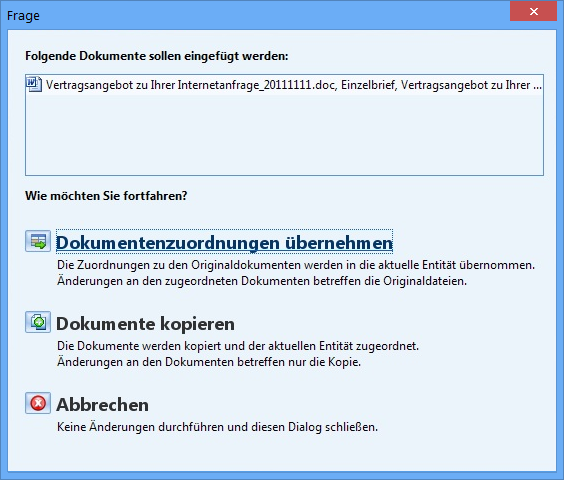
Figure: Dialog while copying documents
-
Adopt document assignments: The current set in the main mask is linked to the previously copied documents, i.e. the documents are only available 1x.
-
Copy documents: The documents are physically copied before being linked to the current sentence.
-
Cancel: Inserting the documents is aborted without further action.
After selecting one of the actions Adopt document assignments or Copy Documents, the corresponding action is performed.
Special cases with insert option ‘Copy documents’
If the user decides to copy the documents, the following special cases may occur. The special cases mentioned can also occur in combination with each other. In such a case, the special cases are processed sequentially.
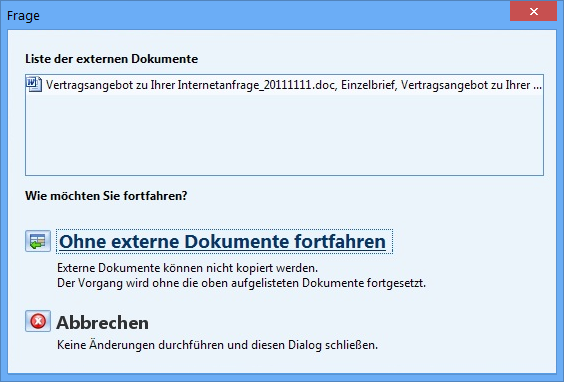
External documents
Given
The clipboard contains some external documents. These are documents that are available in an external document management system.
Result
The user can continue copying without these documents or cancel the action.
-
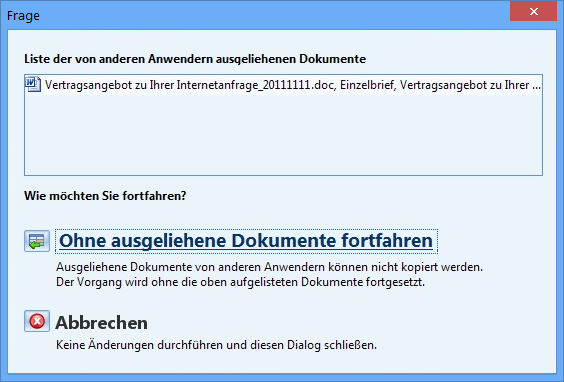
Documents borrowed by others
Given
The clipboard contains some documents that are still checked out by other users.
Result
The user can continue copying without these documents or cancel the action.
-
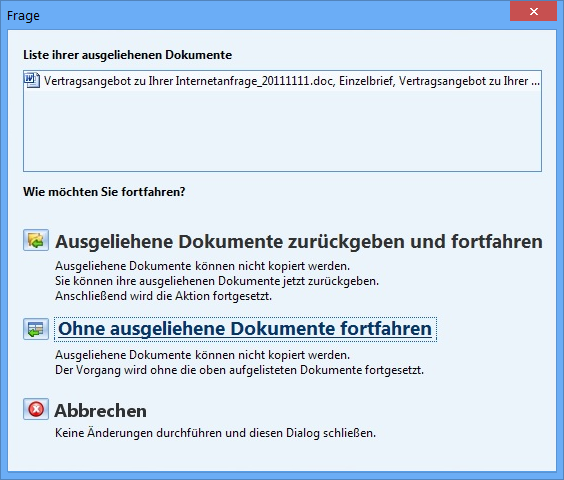
Own borrowed documents
Given
The clipboard contains some documents that are still checked out by the current user.
Result
The user can return the listed documents, continue copying without these documents, or cancel the action.
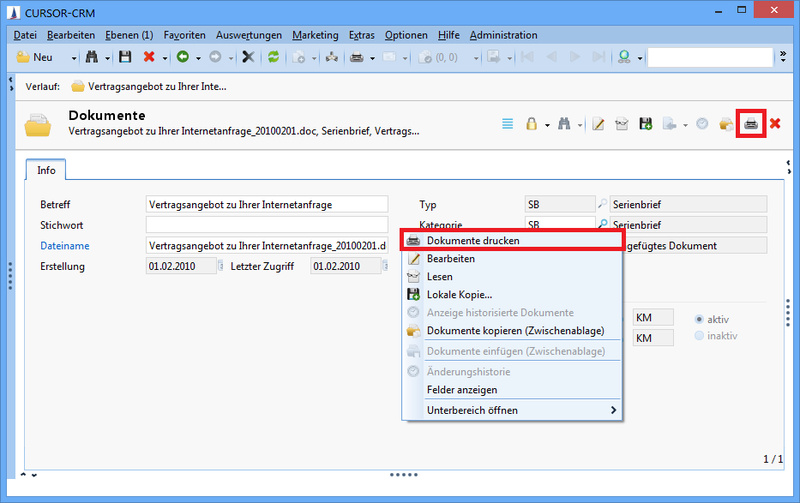
Print in the document main screen
In the toolbar of the document main screen as well as in the context menu of the dataset, there is a button ![]()
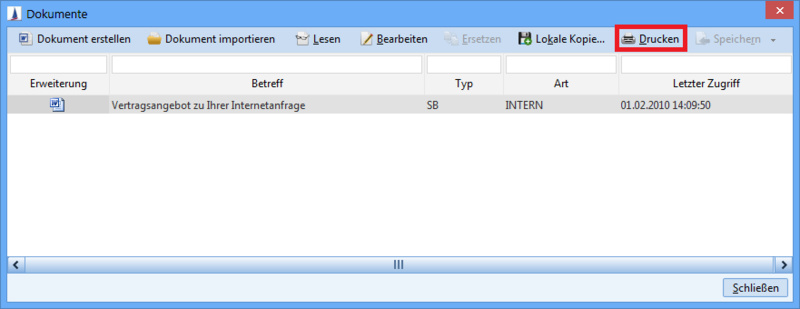
Print the assigned documents
In the dialog for selecting the assigned documents, there is a button ![]()
Direct printing of multiple application files
Both in the list area of the main mask and in the sub area of documents, the direct printing of application files is available.
To do this, highlight the documents to be printed in the list view and start the direct printing function. In the list view of the main mask, the function Print documents is available in the context menu.
In the sub-window, the direct print function is available in the context menu as well as in the form of a button in the vertical toolbar of the sub-window.

Figure: Example of direct printing in sub-section ‘Documents’
Direct printing works only with file types that are linked with a printable application, such as Microsoft Word, Open Office, Notepad, Acrobat Reader and so on. If this is not the case or if the link between the file type and the application to be executed is missing, a message is displayed stating that the document cannot be printed.
Import and link application files via the assistant
General
The assistant for the new application files has the option to individually link the application file (document) with contacts and business partners.
Purpose
No random linking of application files with contacts or business partners from the parent entity.
Given
Activity X with 10 contacts and 5 business partners.
Action
A new application file is created in the activity X via new creation or Drag and Drop.
Result
When editing the assistant, the user now has the option of selecting individual contact persons and business partners. Only these are linked to the application file (s).
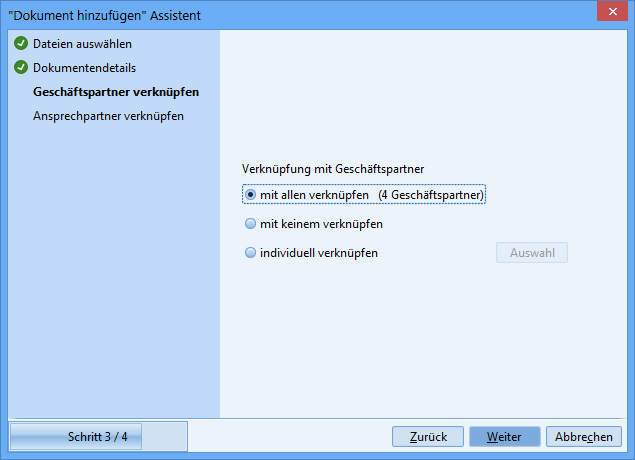
Figure: Available options for linking business partners
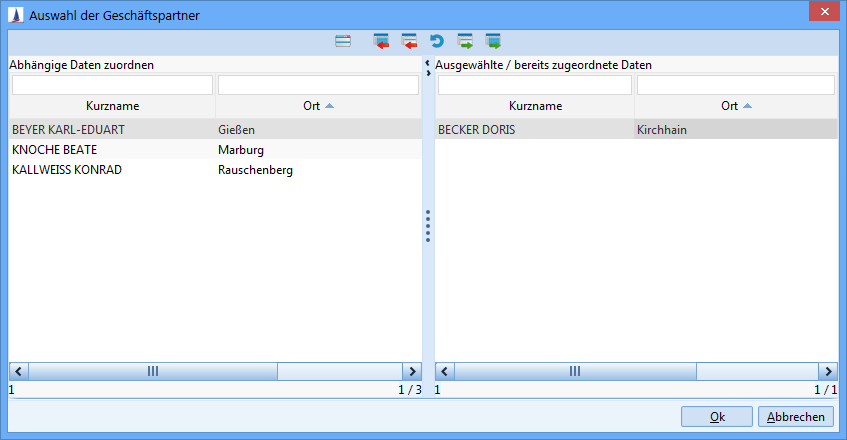
Figure: Selection page for linking business partners via button selection
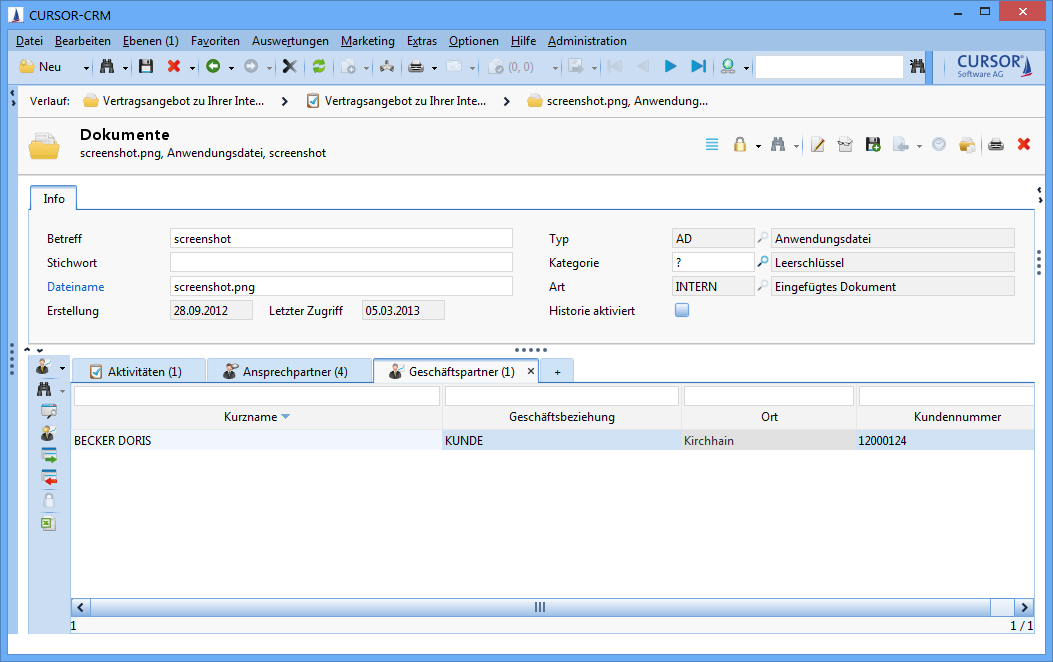
Figure: Result of the individual link with business partners in the sub-window of the imported application file
-
The assistant pages Link Business Partner and Link Contact Person are automatically hidden under the following conditions:
-
The document’s parent entity (e.g., activity) does not yet have any associated business partners or contacts.
-
The document’s parent entity cannot be assigned to business partners or contact persons (missing relations)
-
Depending on the case, only one of both assistant pages will be displayed.
-
-
If an existing document is assigned to an activity, it is not automatically linked to the contact persons and business partners of the activity.
System default for linking variant of application files
The link variant on the assistant pages ‘Link Business Partner’ and ‘Link Contact Person’ can be preassigned in the system settings in the ‘Integration’ area.
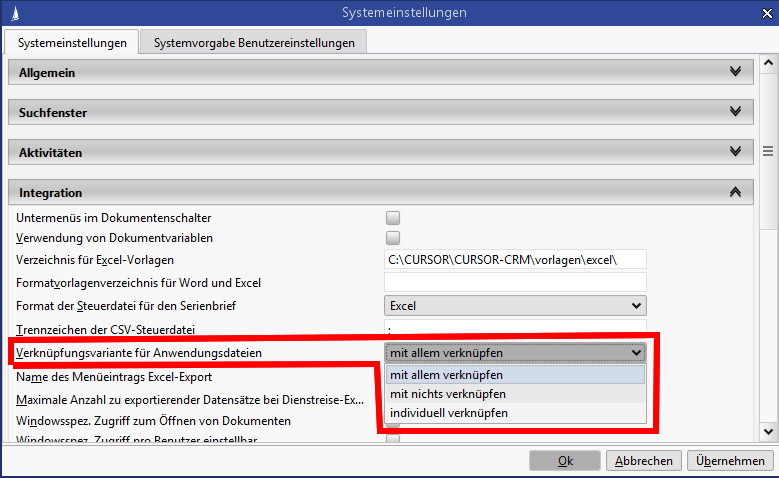
Figure: System default for linking variant of application files
Generation of document names
Document names for generated documents (single letters, etc.)
For generated documents, such as single letters, offers, form letters, contracts, a cryptic document name was specified by the system, e.g. 1232544413620.doc.
Especially when sending an email with a generated document as an attachment, this property has a negative effect because the recipient cannot work with the cryptic name. Instead of the cryptic file name, this is now generated from the subject of the assistant and a time stamp.
Examples:
Subject = Contract quote 65485
Document name = Contract quote 65485_20090123.doc
Invalid characters in the document name are replaced by the character _ (underscore).
Subject = Contract quote <65485>
Document name = Contract quote_65485_20090123.doc
Document names in application files
When adding an application file (external file), the name of the file is taken over directly as the document name (no change!).
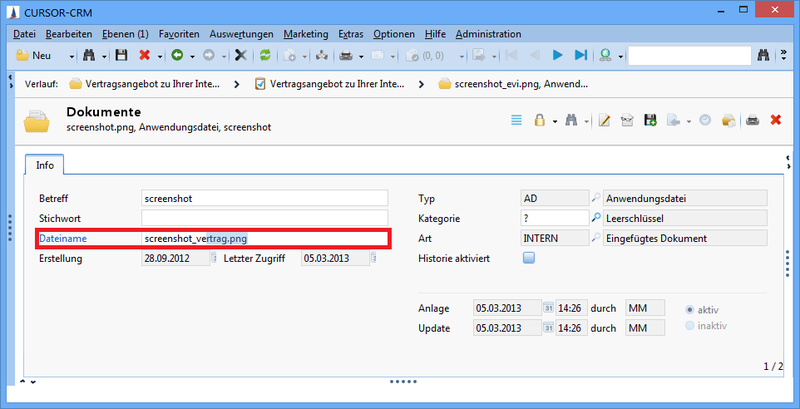
Individual assignment of the document name
The document name can be subsequently edited by the user. The change takes place directly in the document screen in the field File name. To open the document directly, the link is now available on the label field of the document name (previously on the document name).
-
The following characters are not allowed when assigning the document name: " * / : < > ? \ |
-
The number of characters in the document name is restricted to 100.
Explanation:
Under Windows, the file name including path should not exceed 255 font properties, since most programs cannot process longer file names, including Microsoft Office.
Why 100 font properties?
In the database, the maximum number of font properties in the document name is limited to 255 font properties.
During editing, the documents are copied to the local CRM directory, e.g. C:\Documents and Settings\[Username]\CARMEN\[Application Server_Port]\tmp\document\readOnly
Depending on the length of the Windows user name and the name of the application server, the path usually requires between 80 and 100 font properties - but it can also be longer. Therefore, it is recommended to keep a buffer.
Formula: 255 (DB) - 100 (path) - 55 (buffer for path) returns 100 characters for document name -
Changing the document name is only available for internal documents. In the case of external or linked documents, the field remains read-only.
Output formats for documents
Selection of the output format in the assistant
In case of native document templates (single letters, offers, contracts, enabled entities) the user has the possibility to change the output format in the assistant. The default output format is the selected format from the document template. The template is selected on the first assistant page where the template is selected.
As possible save formats are available:
-
DOC
-
DOCM
-
PDF
If the document generation is started by a mask script command with a defined output format, the subsequent change of the output format is prevented in the assistant.
Extension of the selection of the output format in the administration of the document templates
You can configure per template whether the user may change the output format in the assistant or not.
Background:
Making a pdf file from a doc file is not critical. From a pdf-file a doc-file can be critical if the user is not allowed to change the content explicitly.
This configuration option is only available for native document templates.
Borrowing documents in PDF format after document generation
The created document is borrowed and displayed directly for editing right after it is created.
In the case of non-modifiable documents (PDF), there is no subsequent editing, so that a return of the document after its creation is no longer necessary.
The possibility to edit the documents in these formats remains. There are software tools that can handle such files as well. If for e.g. a PDF document is checked out for editing and opened with the program Adobe Acrobat, then the document can be edited as usual in Word formats, stored and returned.
Unlock documents
The administrator can selectively release or return locked documents from all users. The necessity of this functionality results from the following example:
A user goes on vacation and does not return his documents despite being prompted while leaving CURSOR-CRM/EVI. The locked documents are needed in the meantime by other users.
In the Unlock Documents node, you access the mask for managing the locked documents.
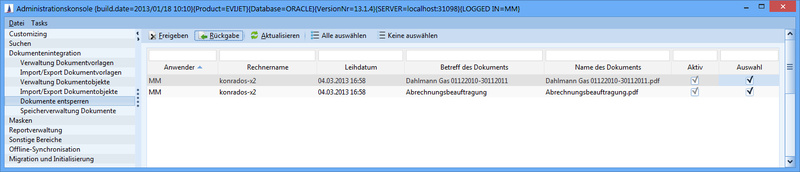
The table lists all currently locked documents. Via the column filter, the selection quantity can be restricted to individual users or documents.
|
Column: Choice |
Before the release or return, the corresponding documents must be marked in the ‘Selection’ column. |
|
Column: User and Computer name |
This information can be used to determine the user’s local CURSOR-CRM/EVI document directory. Example:
CURSOR-CRM/EVI-Dokumentenverzeichnis =\\TERMINAL2003\C$\Dokumente and Einstellungen\MAS\EVIJET\AppServer_11098\tmp\document (Structure: \\Rechnername\[Anwenderspezifisches Verzeichnis (Windows)]\[Versionsname]\[Name des Applikationsservers_Portnummer ]\tmp\document) |
|
Column: 'Subject' and 'Name' |
The information in this column is used for identification of the documents. |
|
Unlock |
All marked documents are enabled. Here possible changes in the marked documents are irrevocably lost! |
|
Return |
All marked documents are returned, i.e. the changes in the documents are retained.
The following conditions must be fulfilled:
During the return process, the administrator must select the document directory containing the user’s locally edited documents. Only the documents of one user can be returned on one computer during each return process. Example:
If an incorrect directory is selected or the local file is no longer in the directory, the return will not be performed on the affected document. In such a case, the document remains locked. |
|
Refresh |
The lists of the currently locked documents are updated. |
|
Select all Select none |
All documents are selected or the selection for all documents is cleared. Existing filters are not taken into account here. Documents that are not displayed due to a filter setting are also selected or deselected. |