Advance information
In this section, the configuration of Microsoft Azure AD for using SAML 2.0 with CURSOR-CRM is demonstrated. This configuration corresponds to the recommendations of CURSOR Software AG. However, the configuration of the NameID attribute in particular should be coordinated with an Azure AD administrator on a case-by-case basis.
Preconditions
-
The CURSOR Single Sign-on module must be imported in CRM
-
The "SAMLLoginName" field must be present on the "Employee" entity mask
-
The value of the configured NameID attribute must be entered here
-
We generally recommend using the email address (the documentation below is based on this choice)
-
Important: the value entered here is case-sensitive, i.e. the value must be found identically in the attributes of the Azure AD user
-
Information from CURSOR to the customer
The data mentioned in point 5 of the "Step by step instructions" can be read out via the system information or based on
-
Identifier (Entity ID)
-
Web Client URL:
https://crm.example.com:18443/webclient
-
-
"Reply URL (Assertion Consumer Service URL)"
-
SAML URL:
https://crm.example.com:18443/webclient/samlLogin
-
Information from the customer to CURSOR
The "App Federation Metadata Url" specified in point 3 of the "Step by step instructions" must be communicated by the customer to CURSOR after the Azure AD application has been created so that it can be entered in the system settings.
Step by step instructions
To use SAML 2.0 with CURSOR-CRM, the CURSOR-CRM installation must first be registered as an Enterprise Application in the Azure Active Directory admin center. These steps must be performed by a person with appropriate Azure AD administration permissions.
-
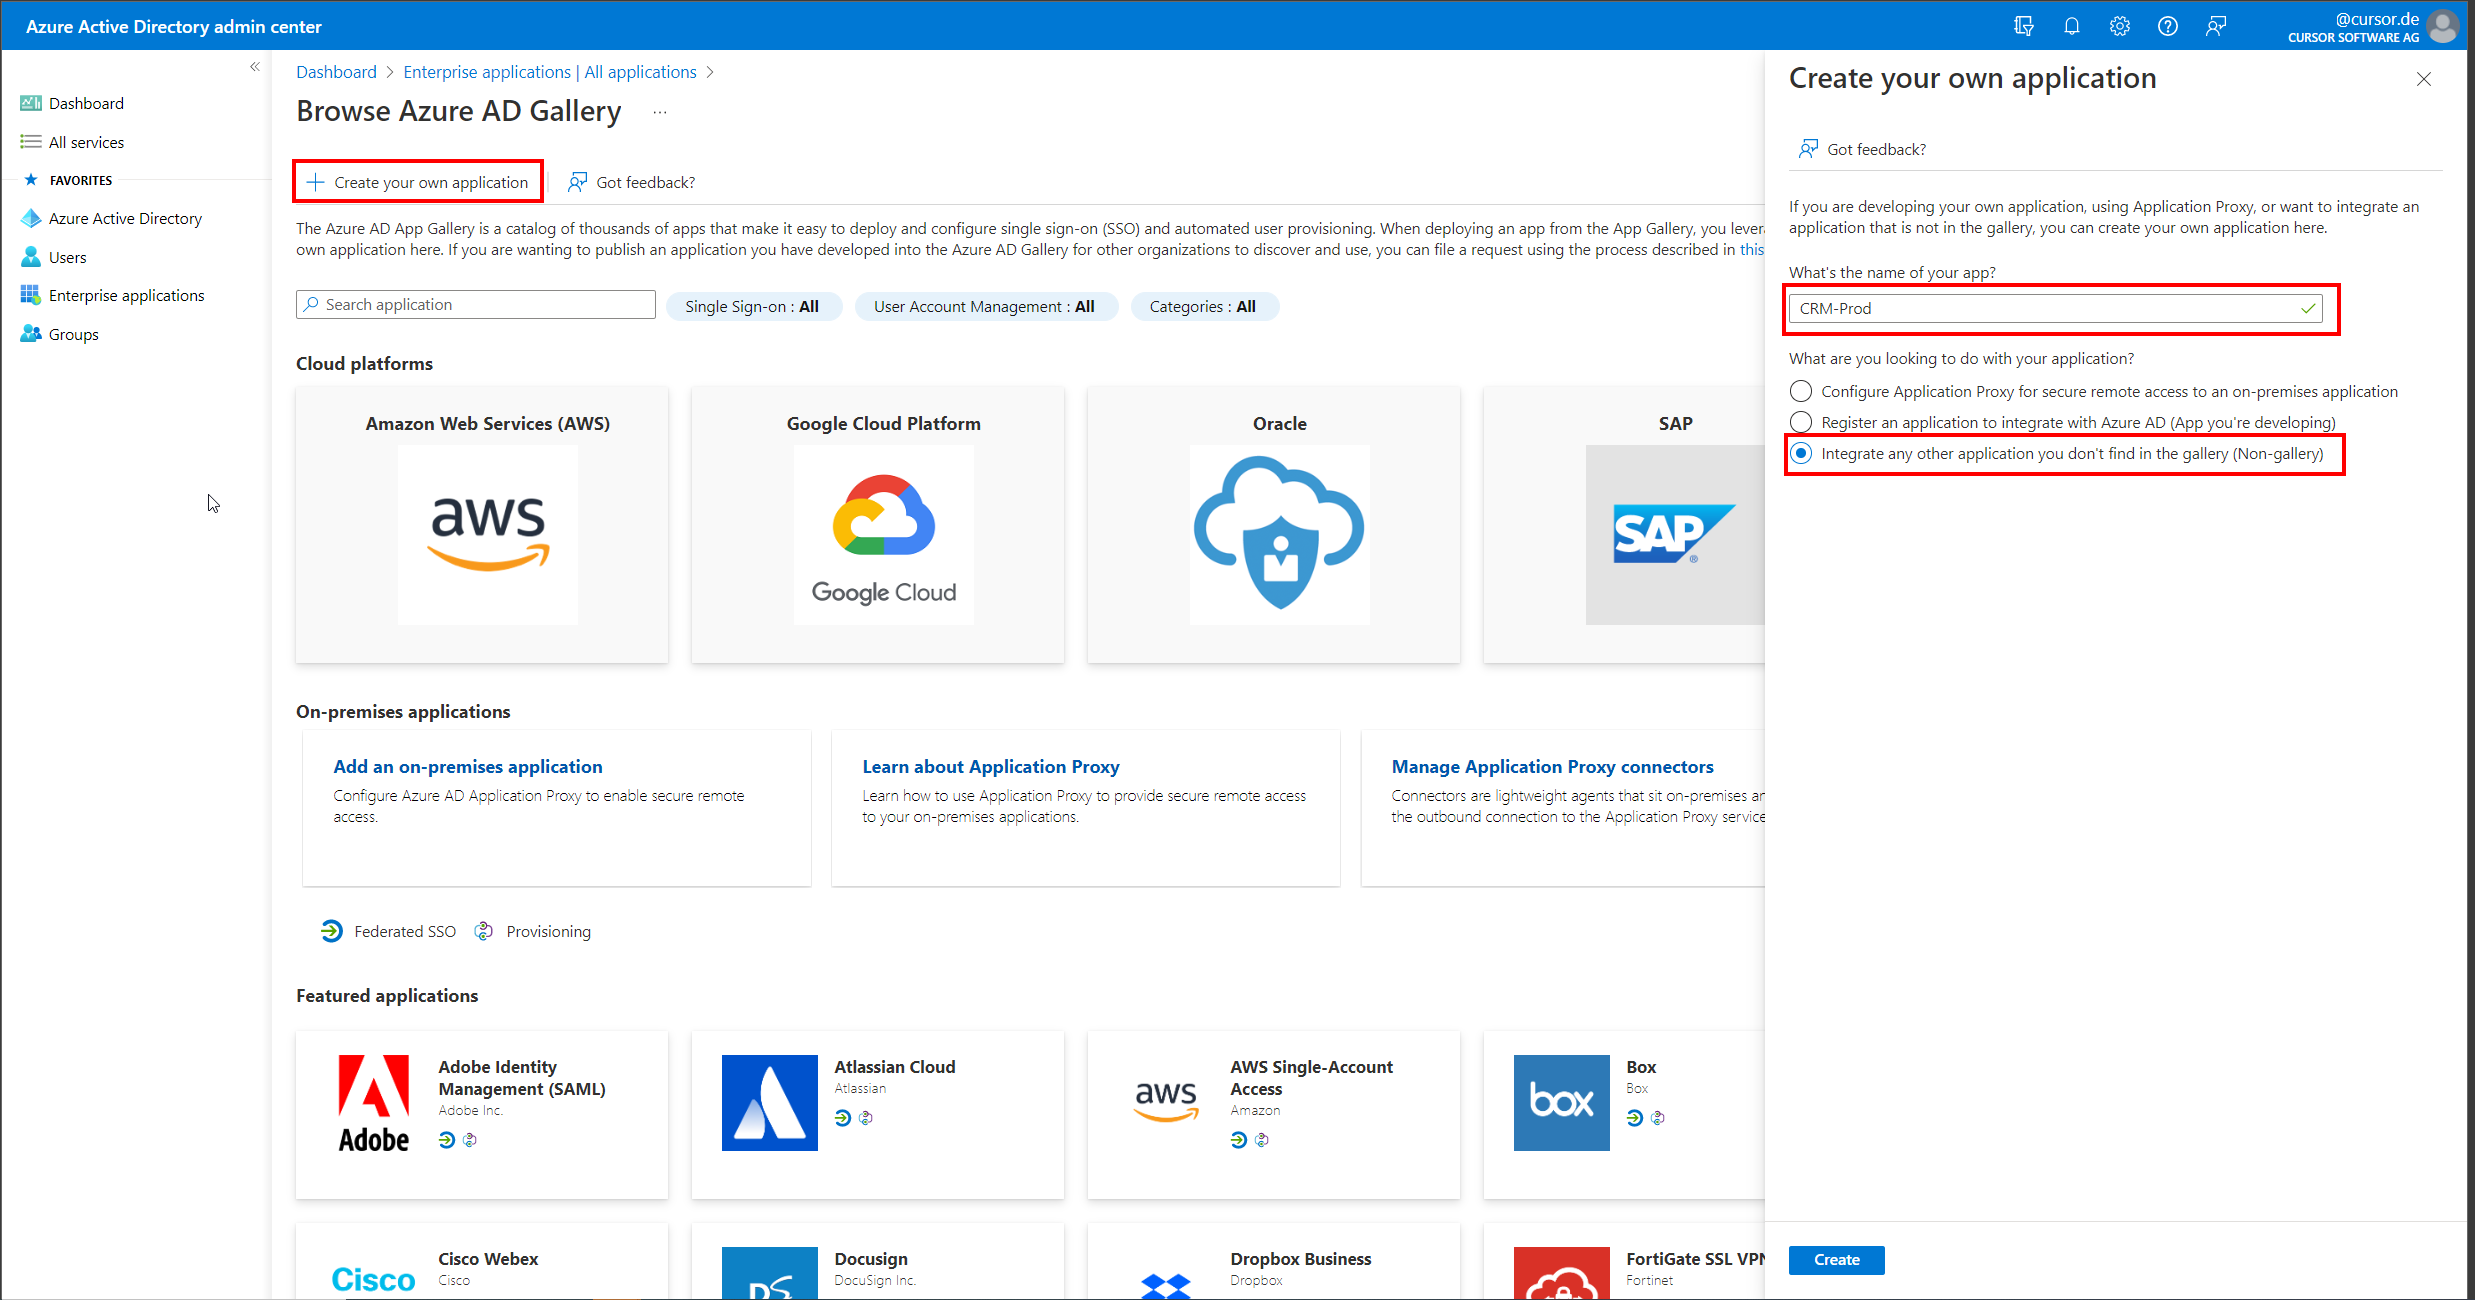
In the "Enterprise applications" section, select "Create your own application" from the menu. A new area will open where the name of the application (in this example "CRM-Prod") must be specified. In addition, the use case "Integrate any other application you don't find in the gallery (Non-gallery)" must be selected.
-
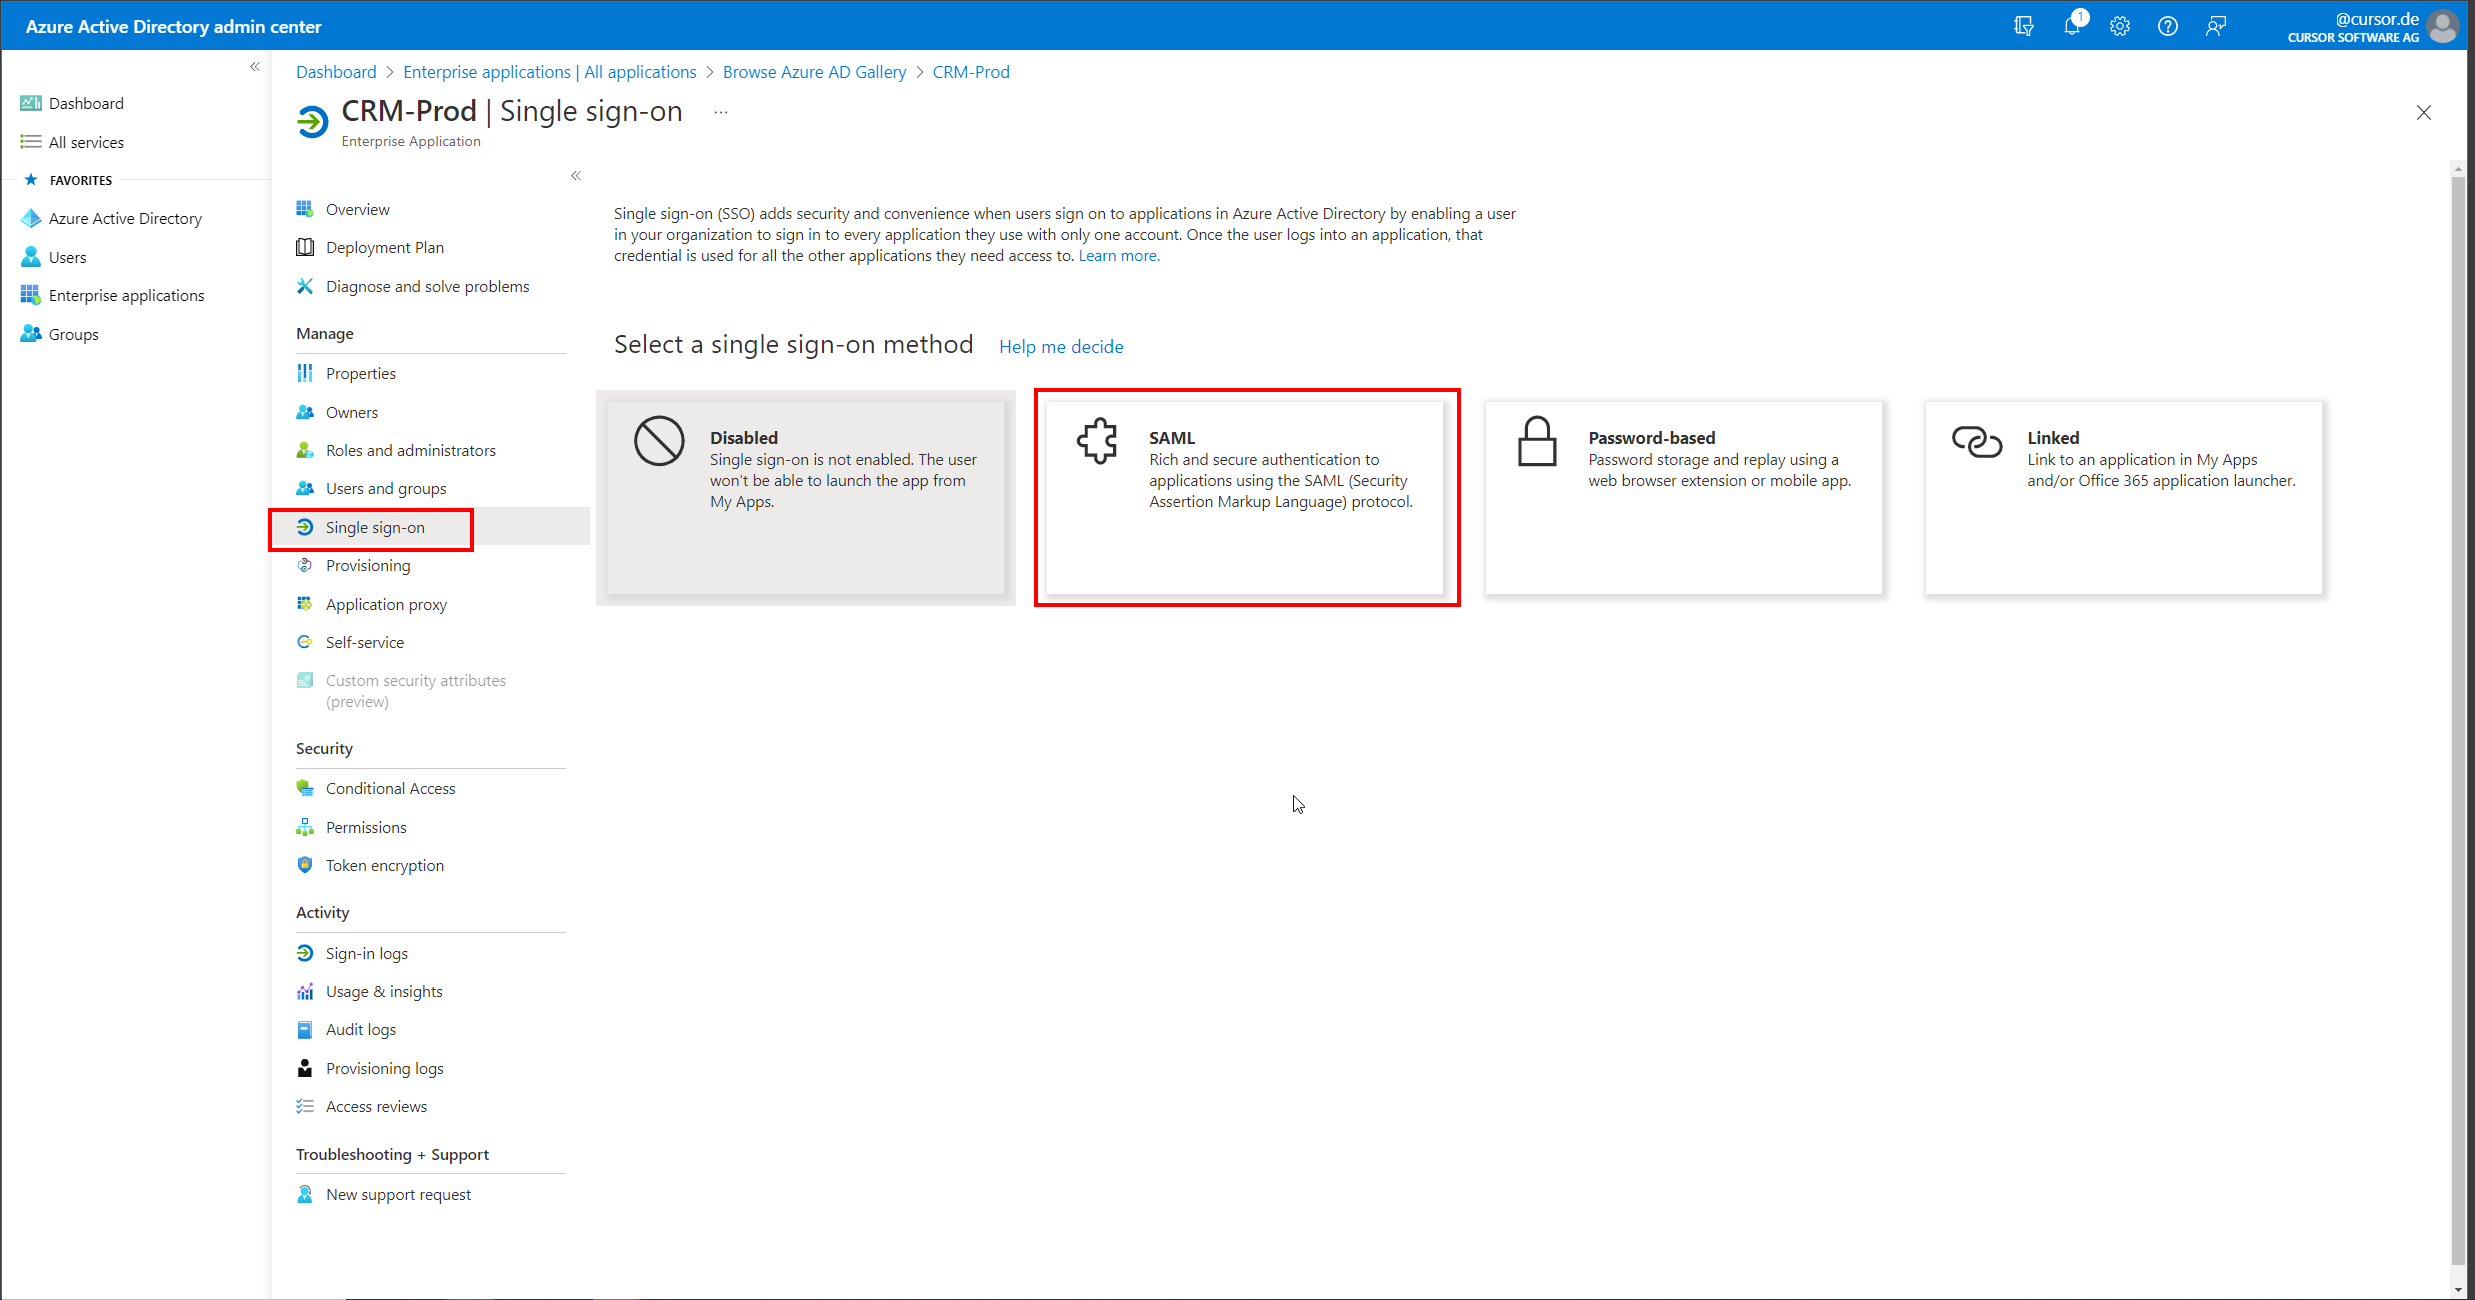
In the new Enterprise application, open the "Single sign-on" area and select "SAML" as the method.
-
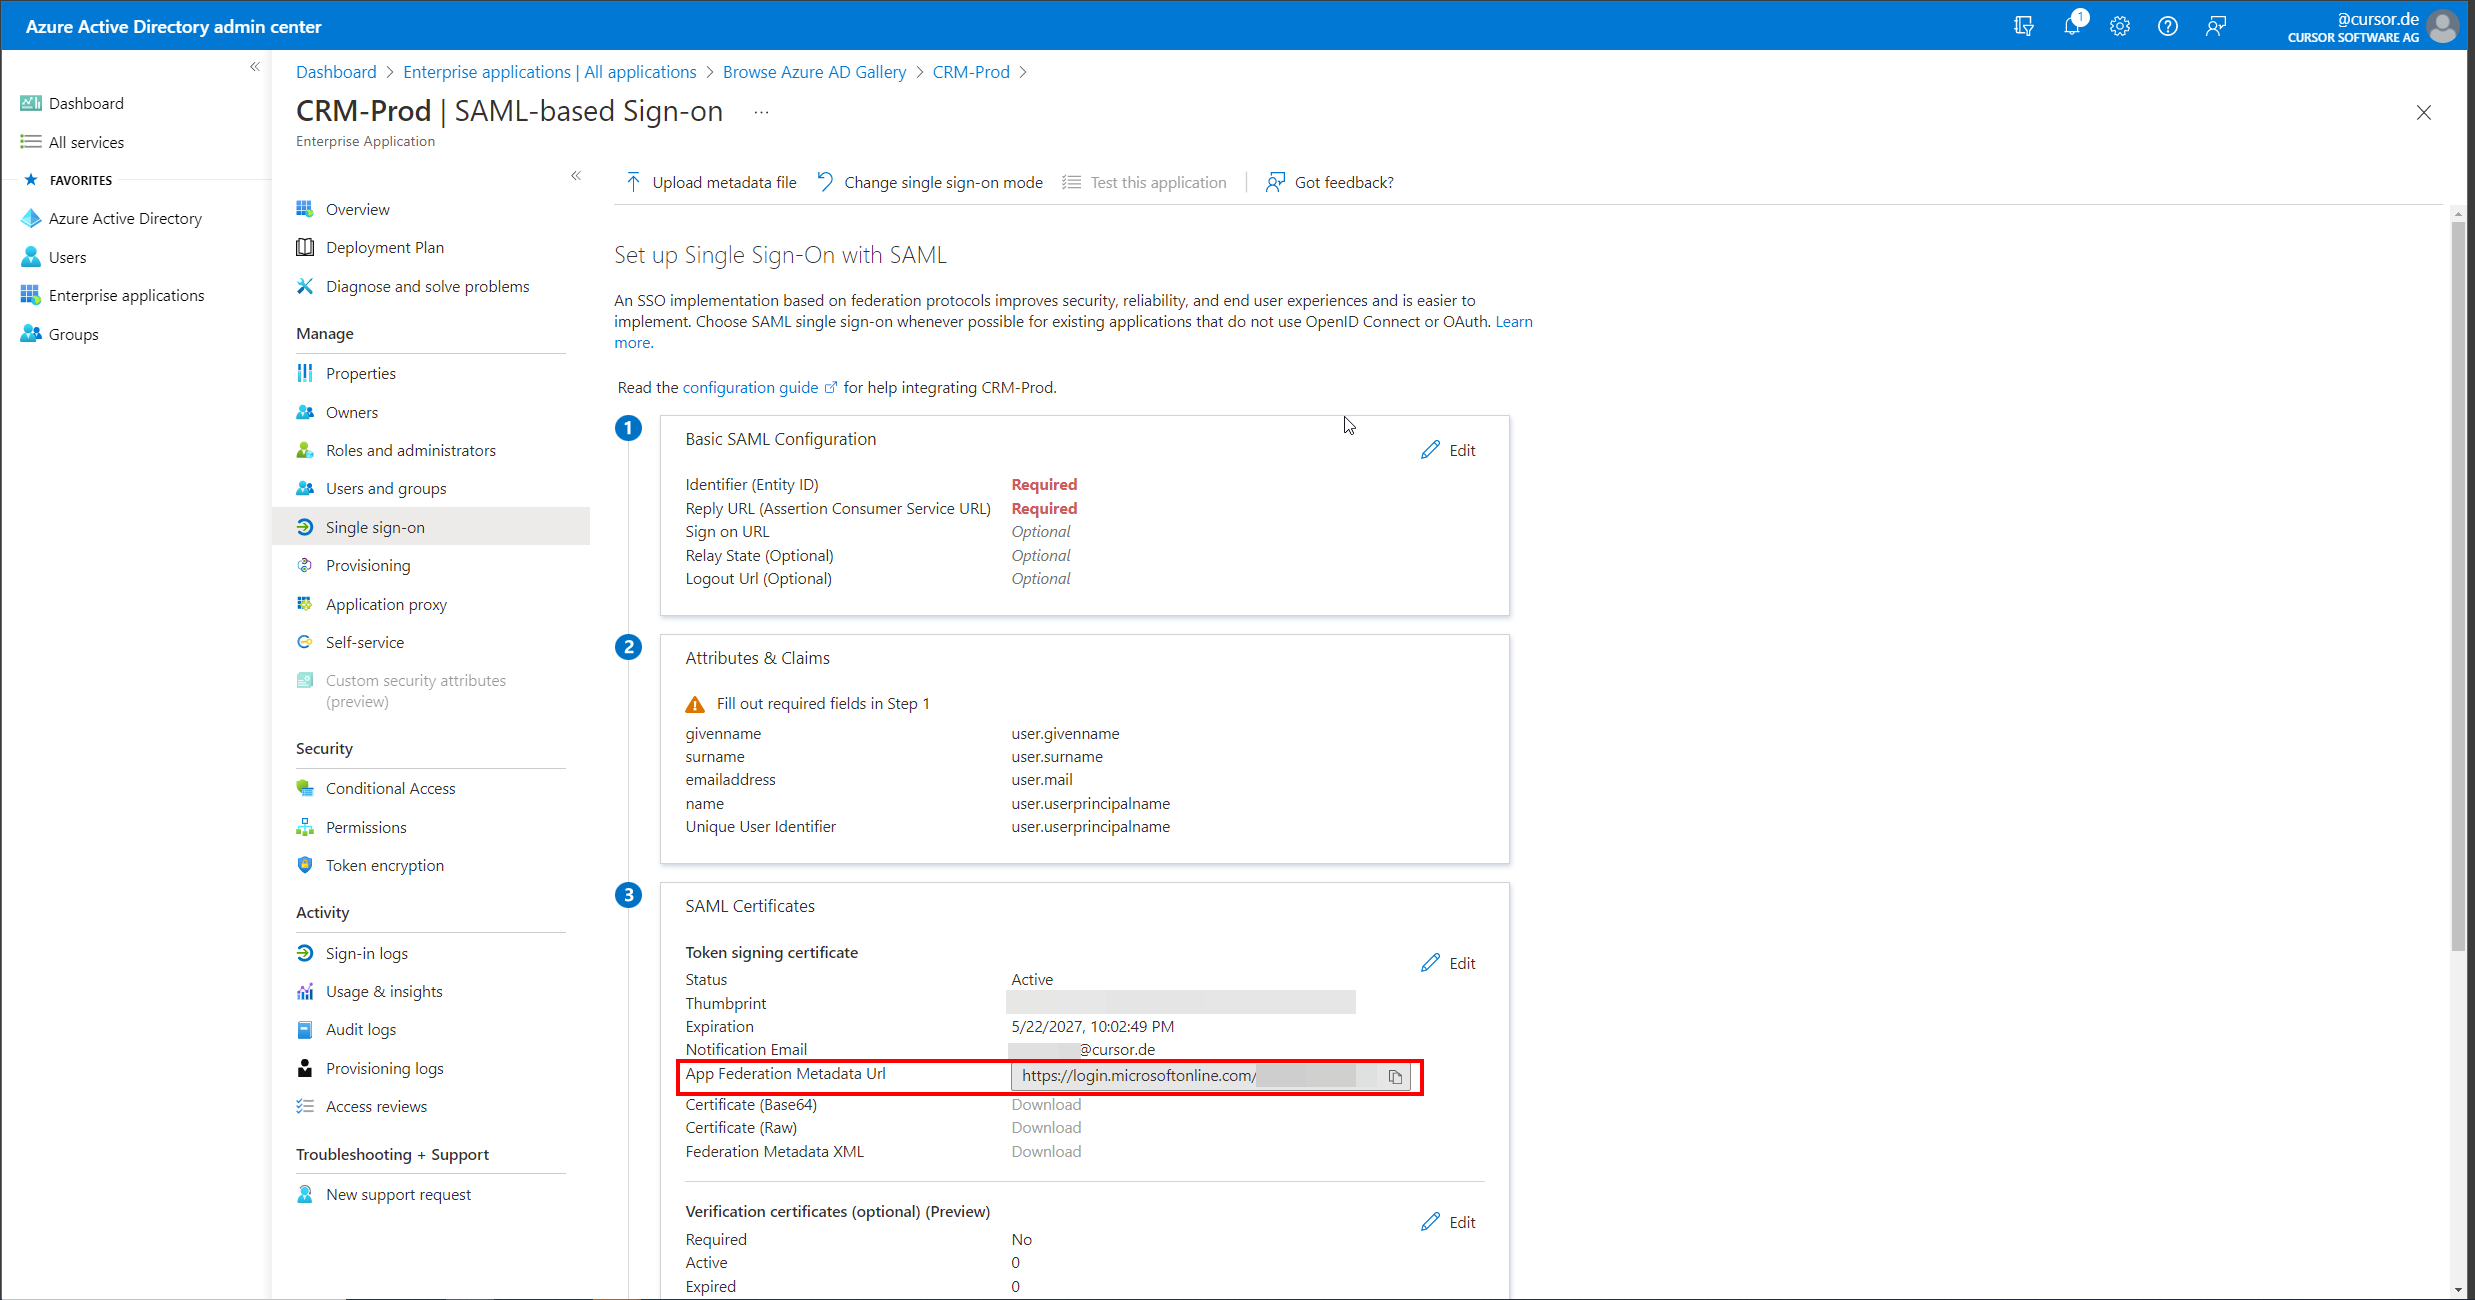
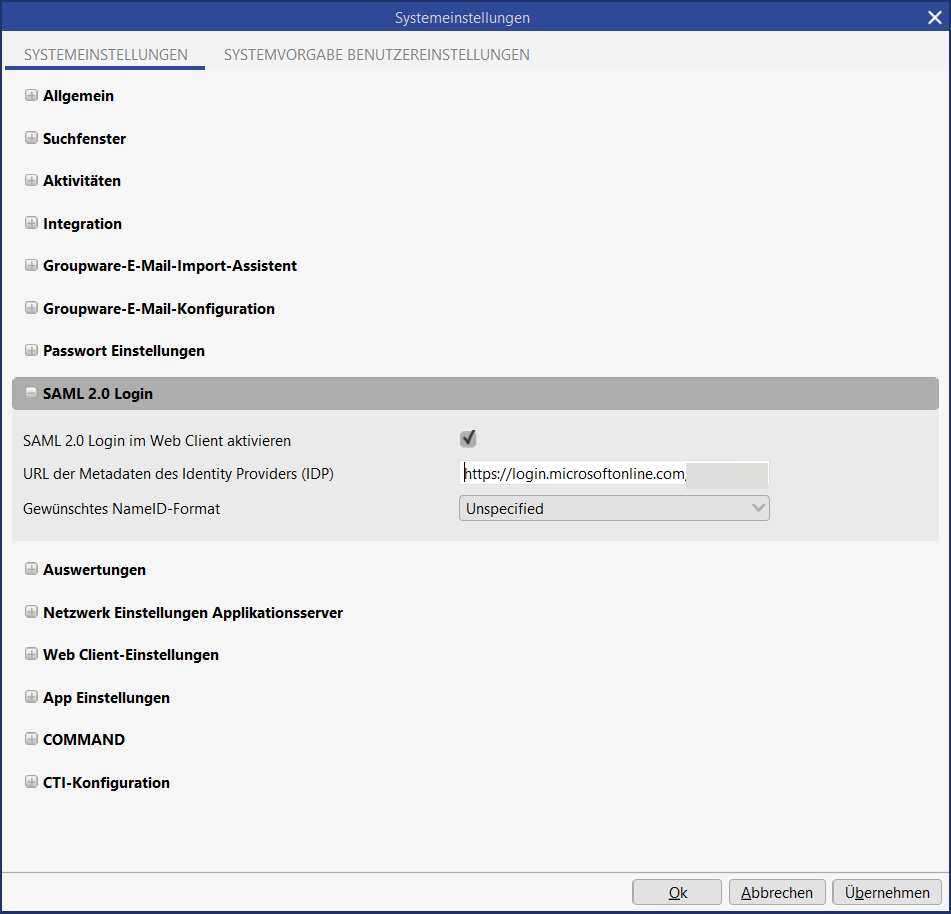
Now the mask for configuring the SAML details opens. Here the "App Federation Metadata Url" can be viewed and copied. This value must then be entered in the system settings of the CRM system in the "SAML 2.0 Login" area in the "URL of the Identity Provider (IDP) metadata" field.
-
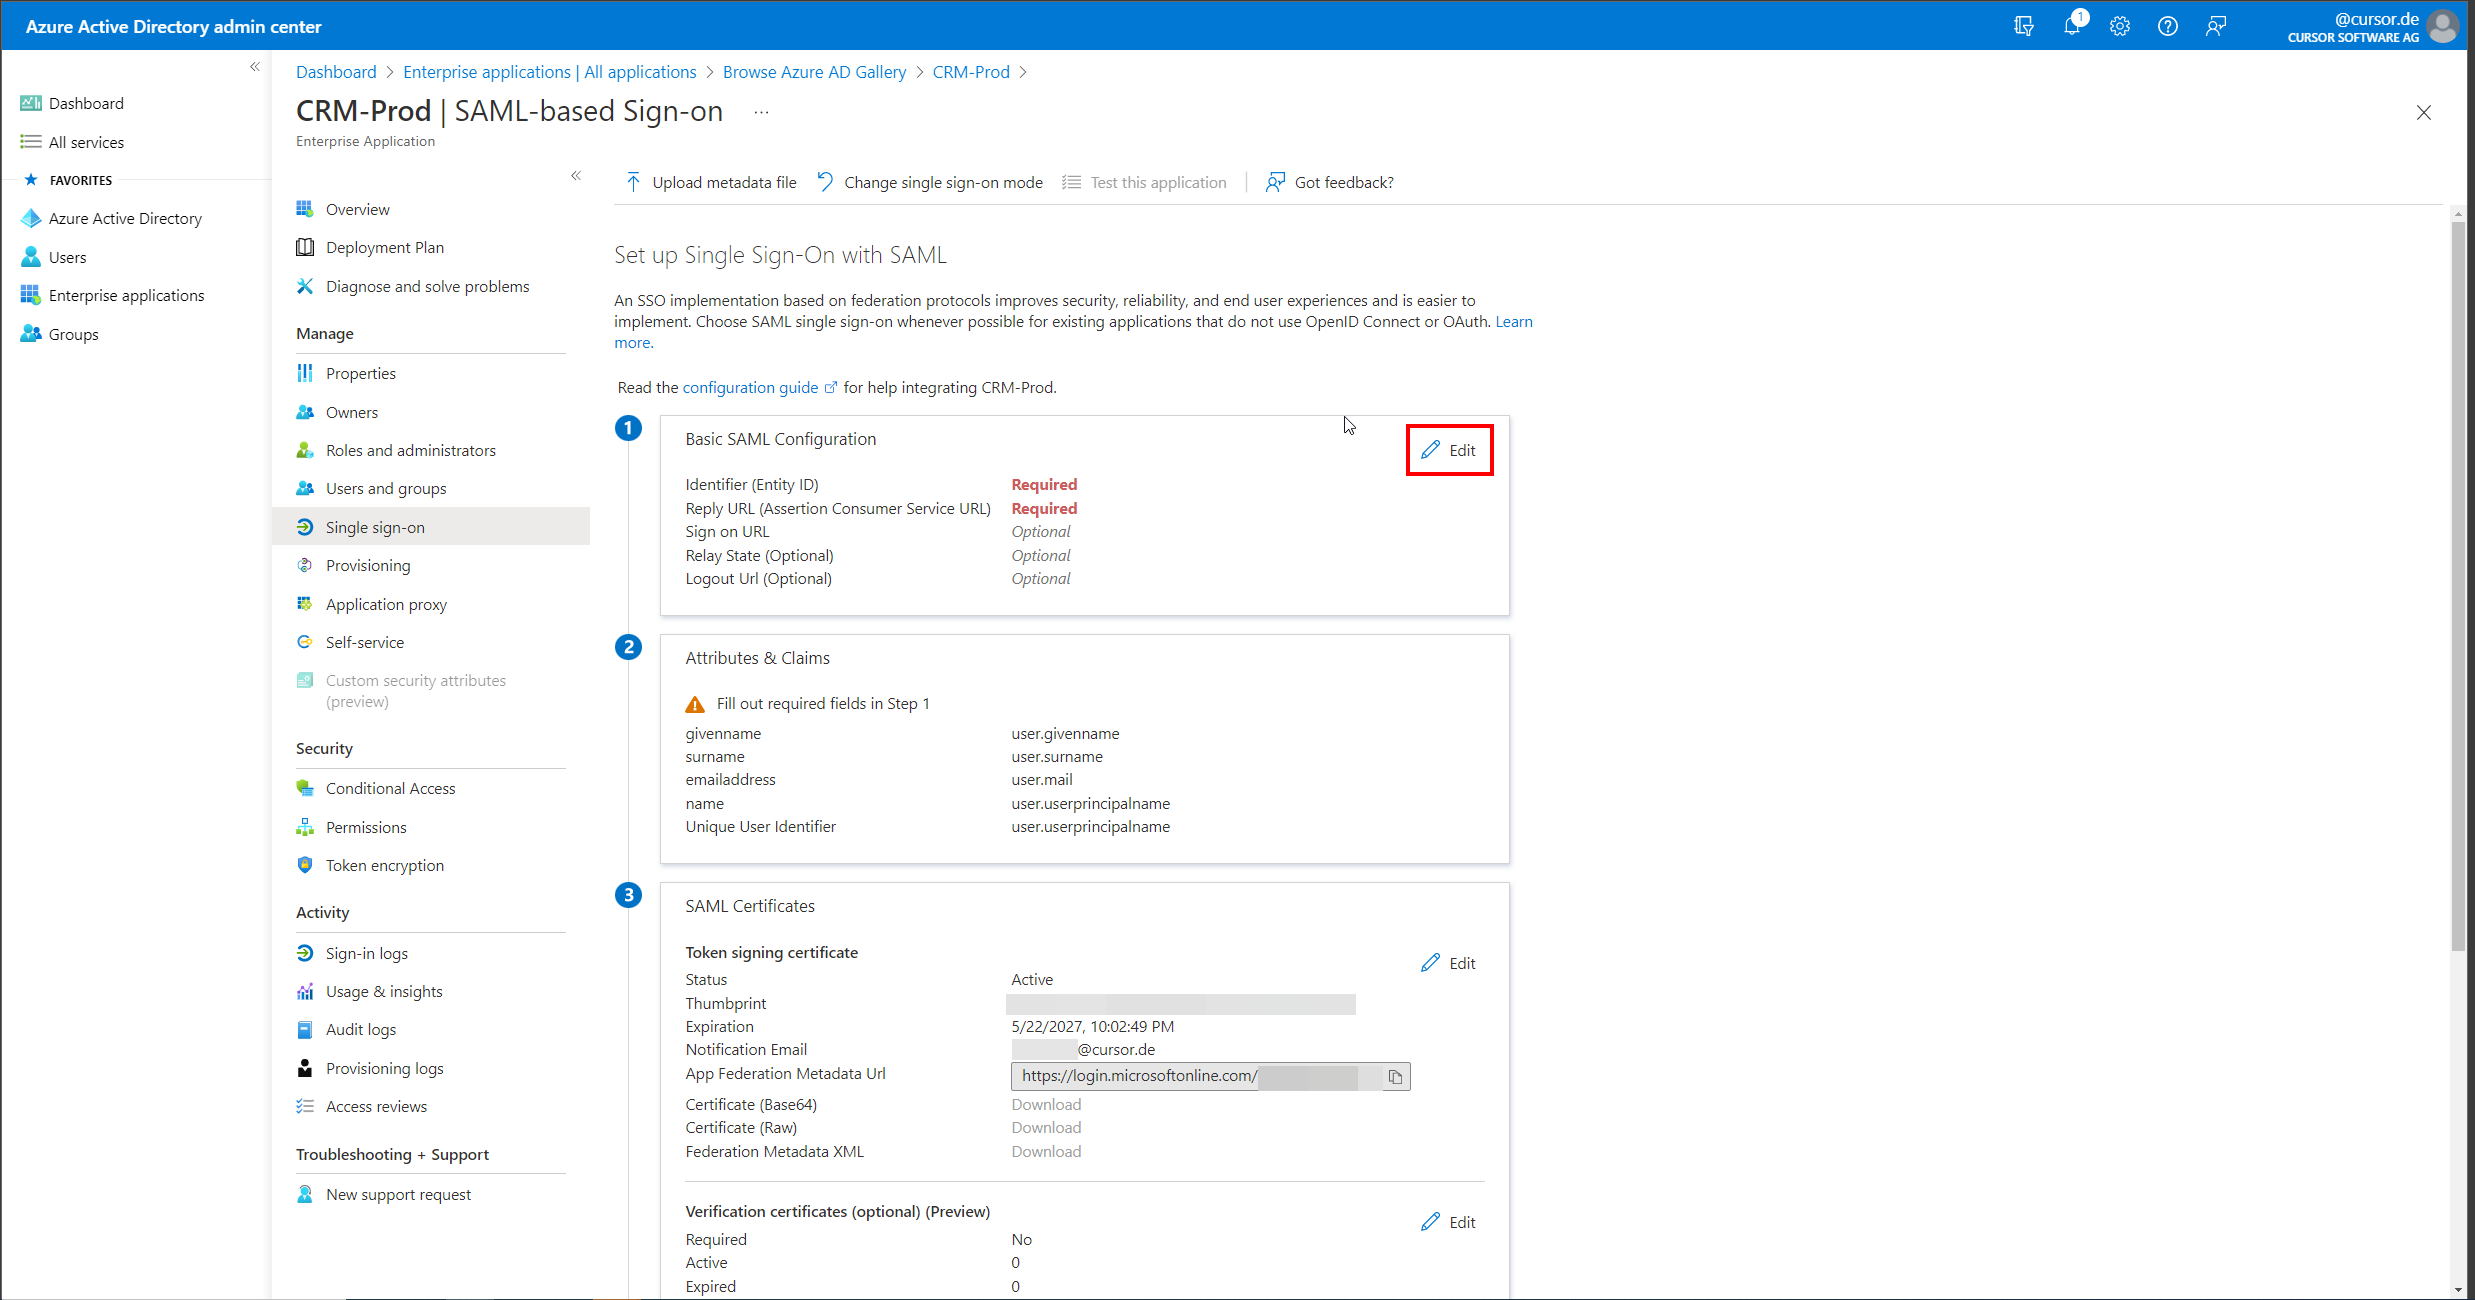
In the SAML settings in Azure AD, click the "Edit" button in the "Basic SAML Configuration" section.
-
Now a dialog opens where the values "Identifier (Entity ID)" and "Reply URL (Assertion Consumer Service URL)" have to be entered.
The Web Client URL of the CRM system must be entered here as the entity ID, for example https://crm.example.com:18443/webclient.
The value of the Reply URL is composed of the Web Client URL and an appended/samlLogin, so for example https://crm.example.com:18443/webclient/samlLogin
After entering these values, the dialog can be closed by clicking "Save".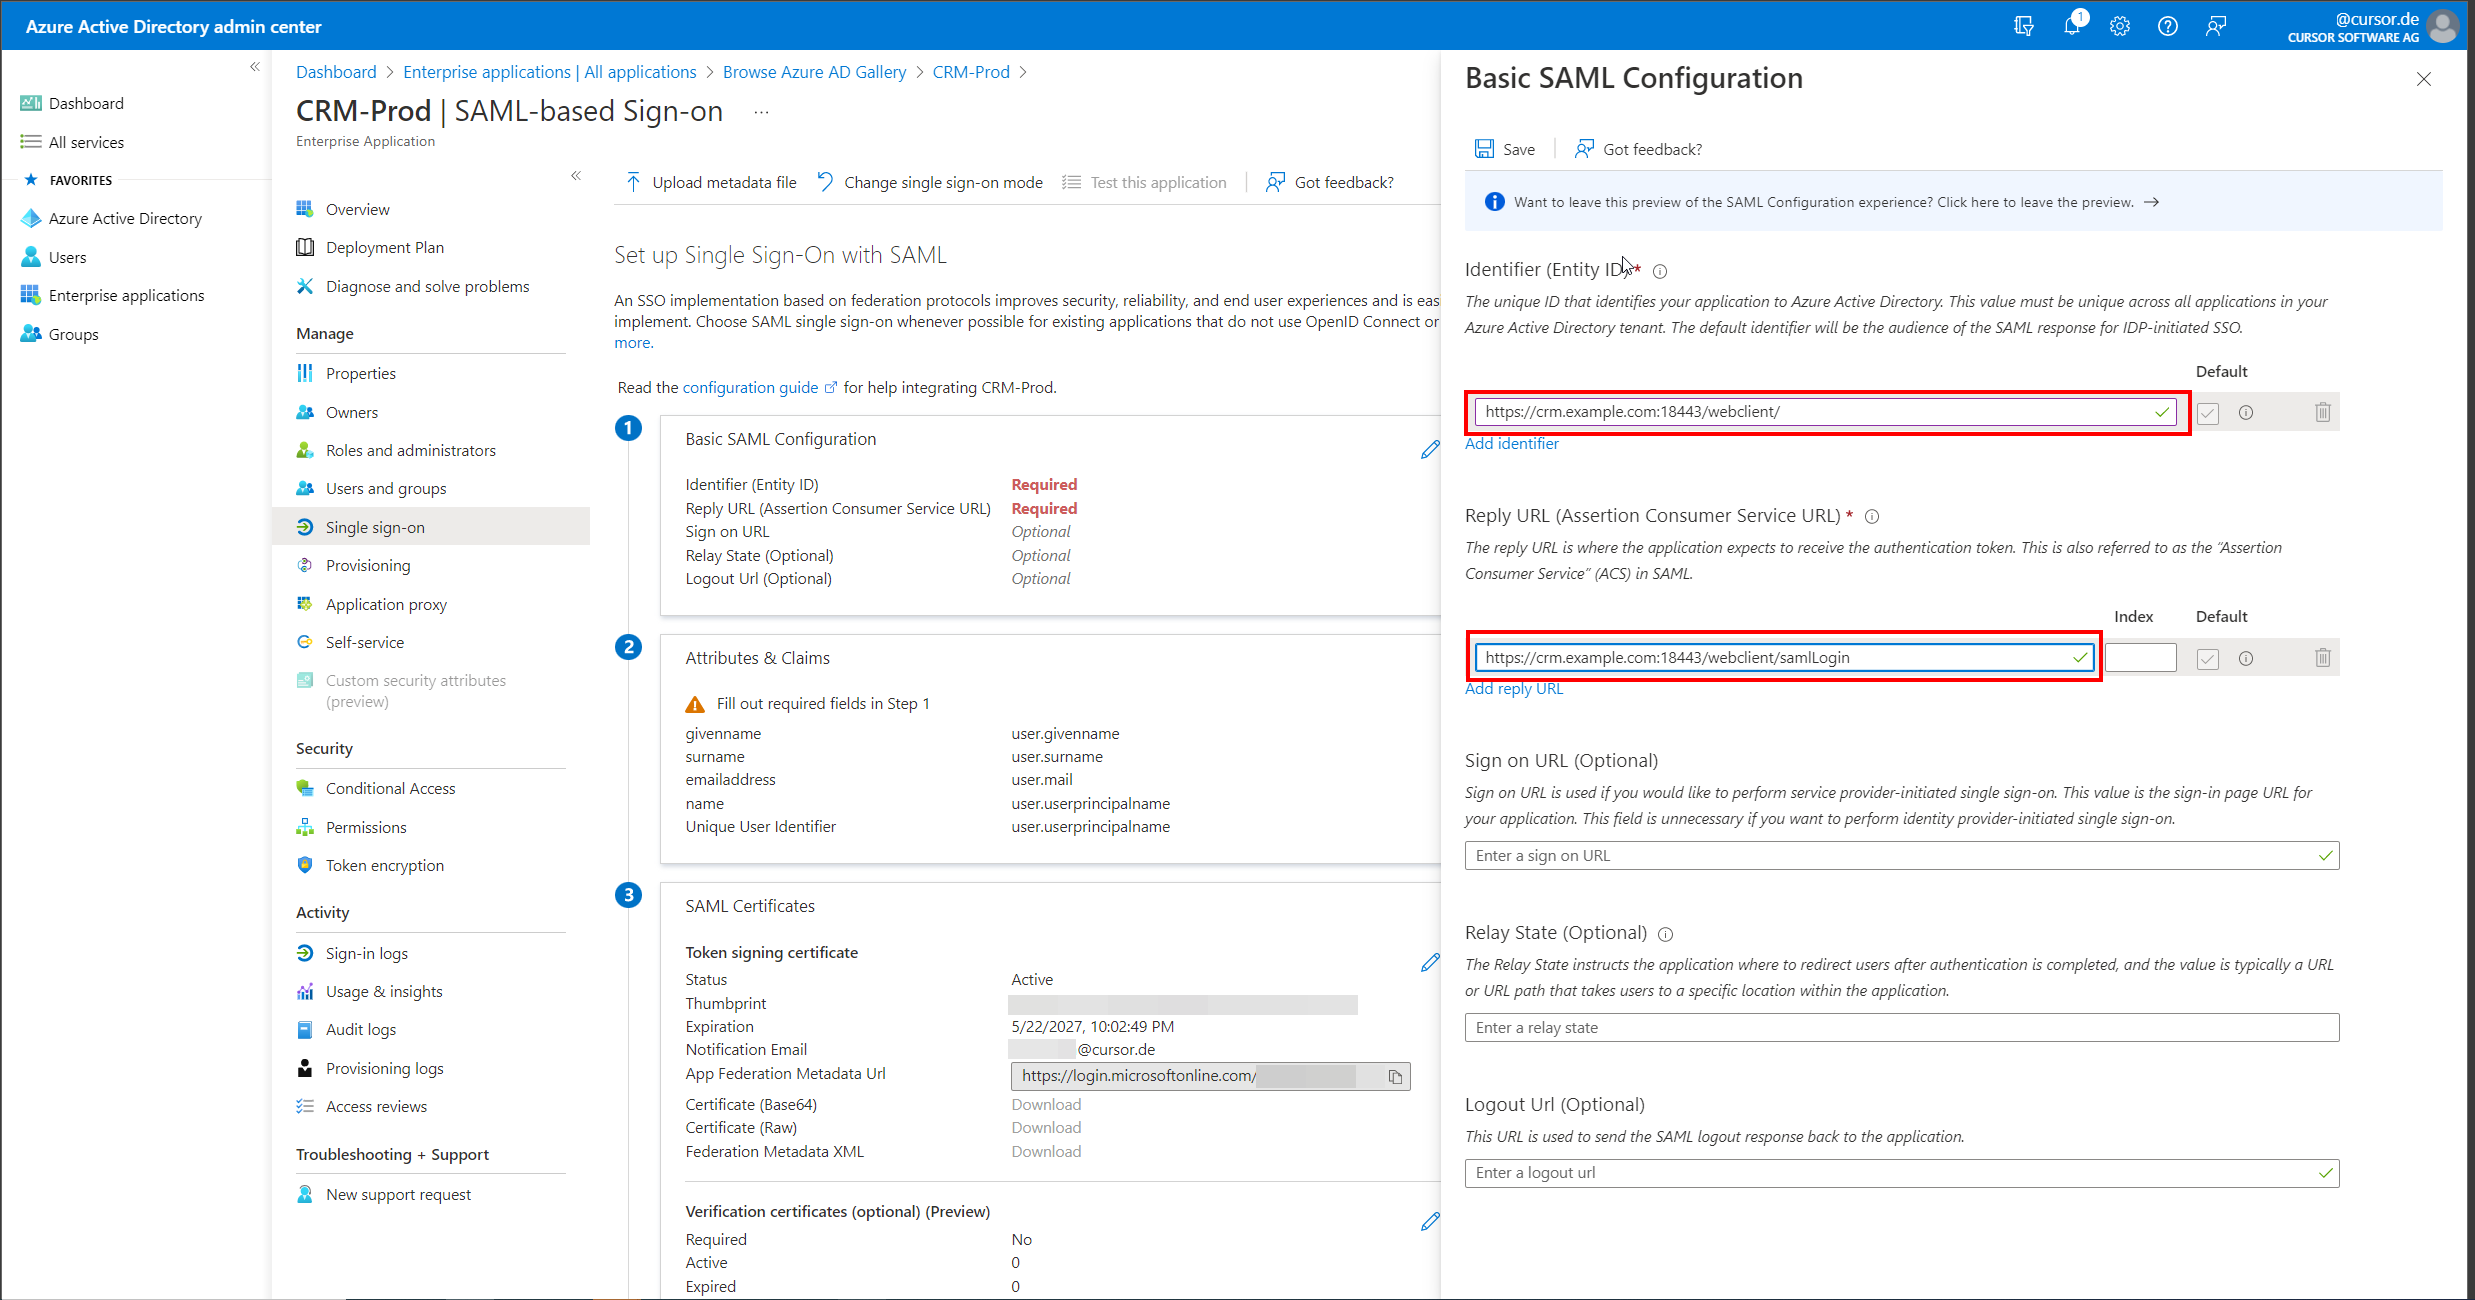
-
Now the "Attributes & Claims" section must also be edited by clicking on "Edit". This will open a page for editing the claims.
On this page, the claim "Unique User Identifier (Name ID)" must now be edited by clicking on the associated button.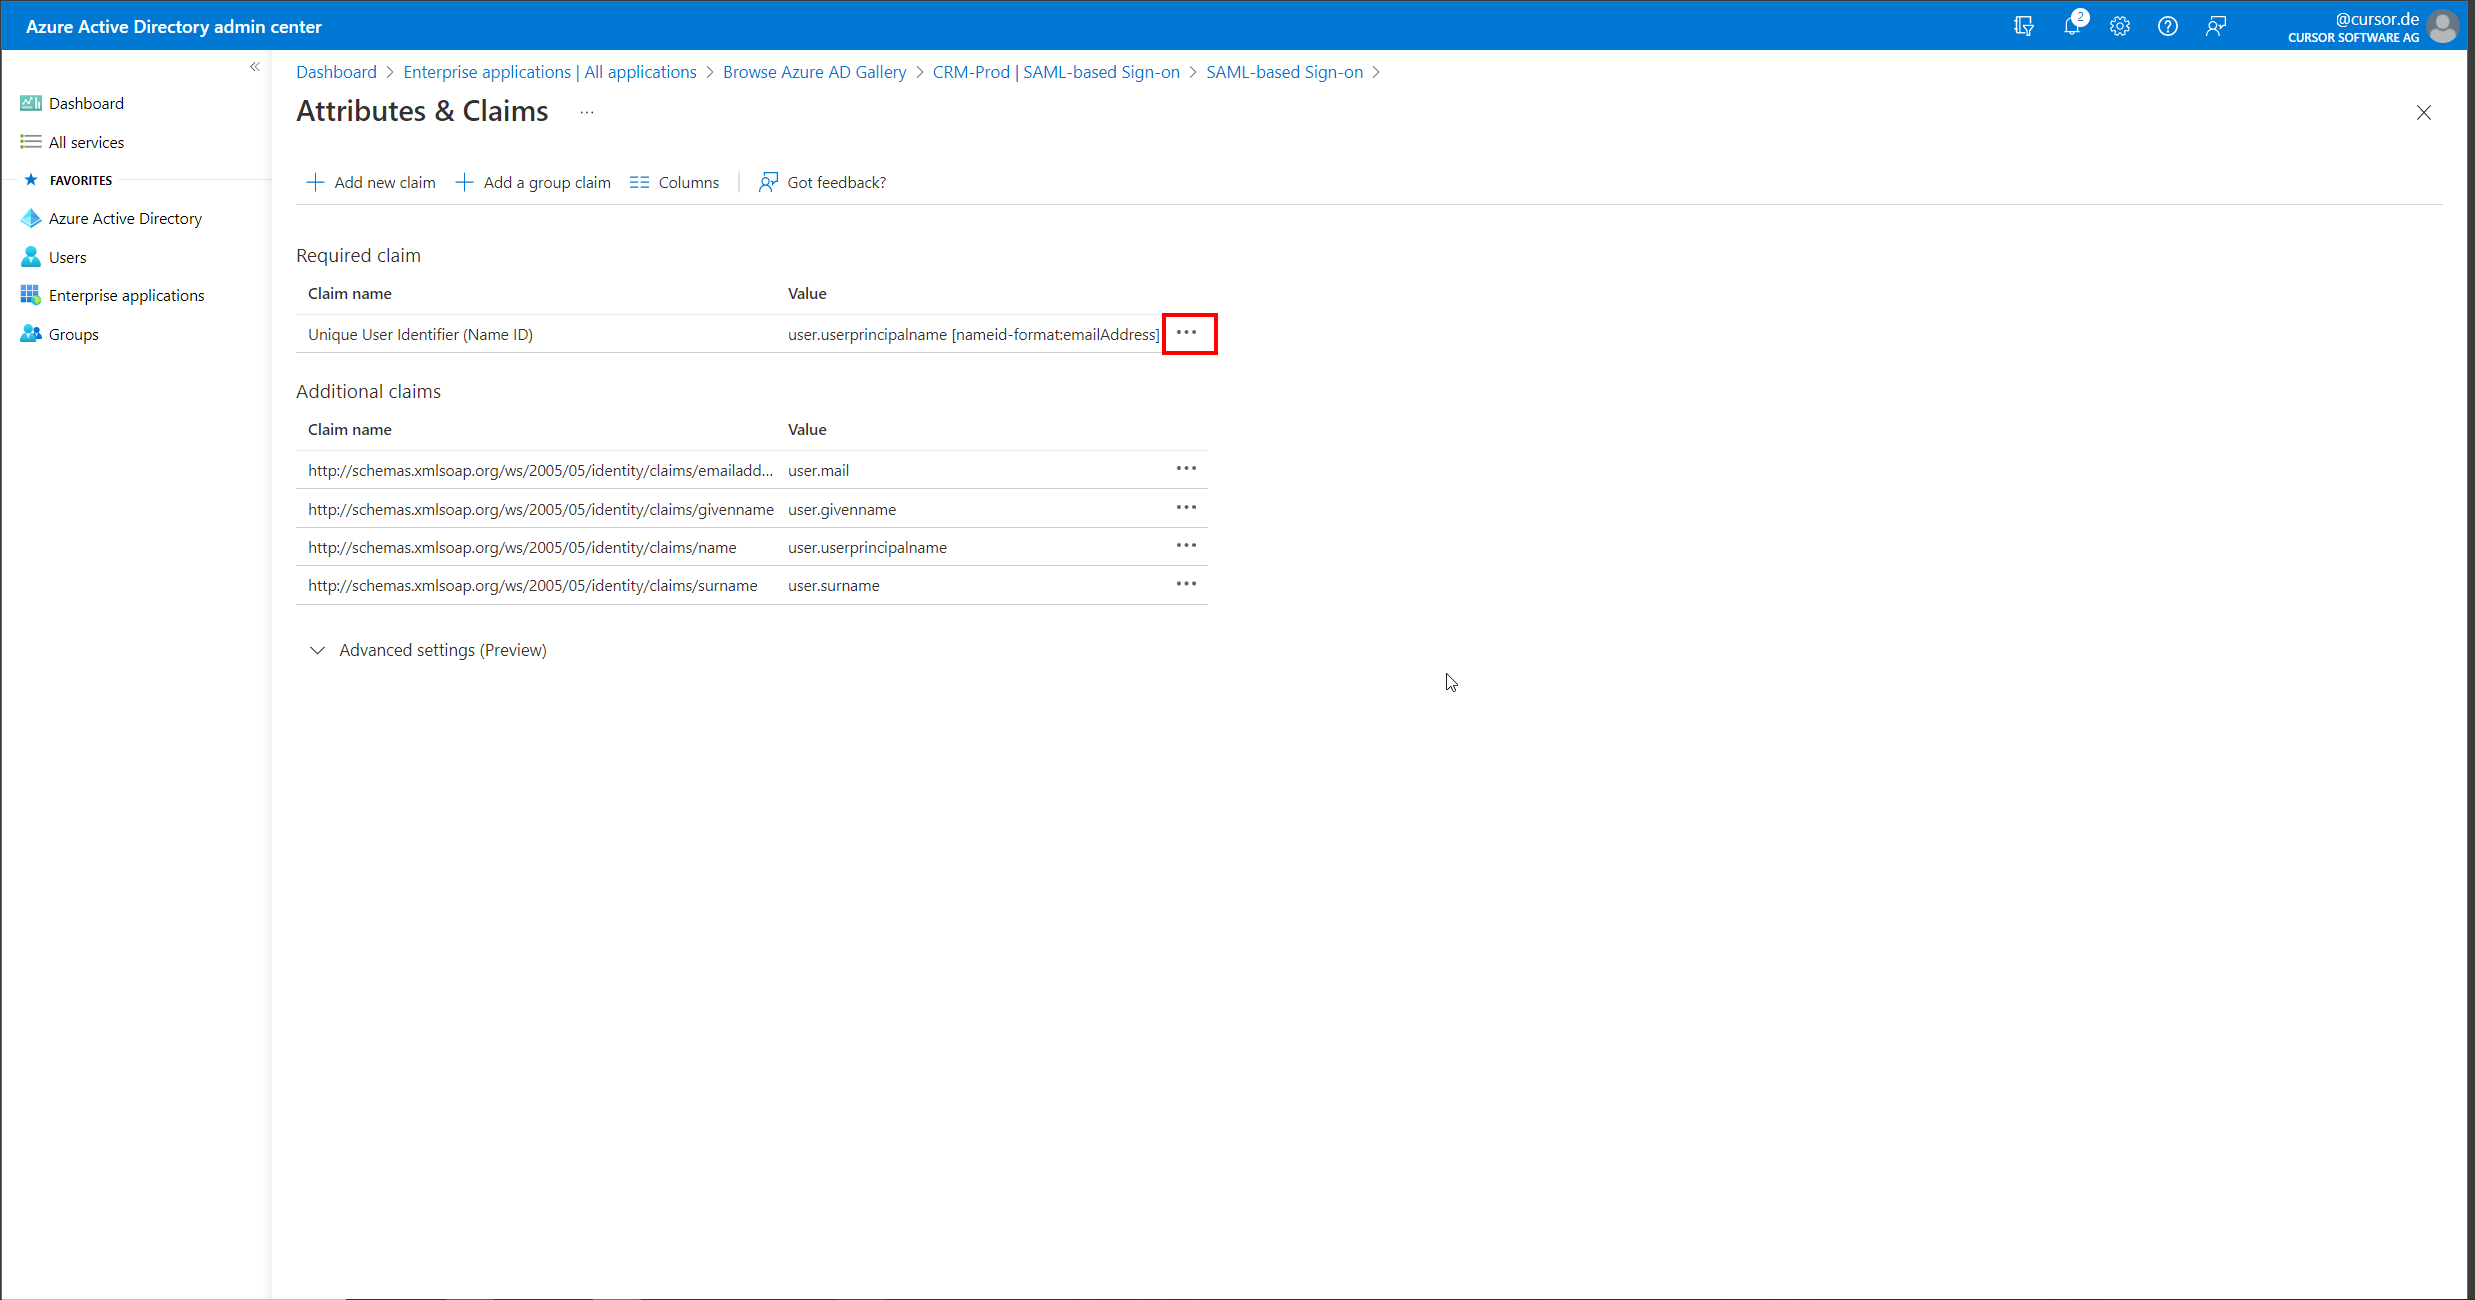
-
In the claim settings for the Name ID, the preferred format for the Name ID can now be specified, as well as the Active Directory attribute from which this value is formed. We recommend "Email address" as the format here and "user.userprincipalname" as the "Source attribute".
This attribute is used to identify the associated employee when logging into CRM. The name specified in the "SAML Login Name" field on the employee dataset (SAMLLoginName.Employee) must exactly match (case sensitive) the value transferred from Azure AD in order to perform user mapping.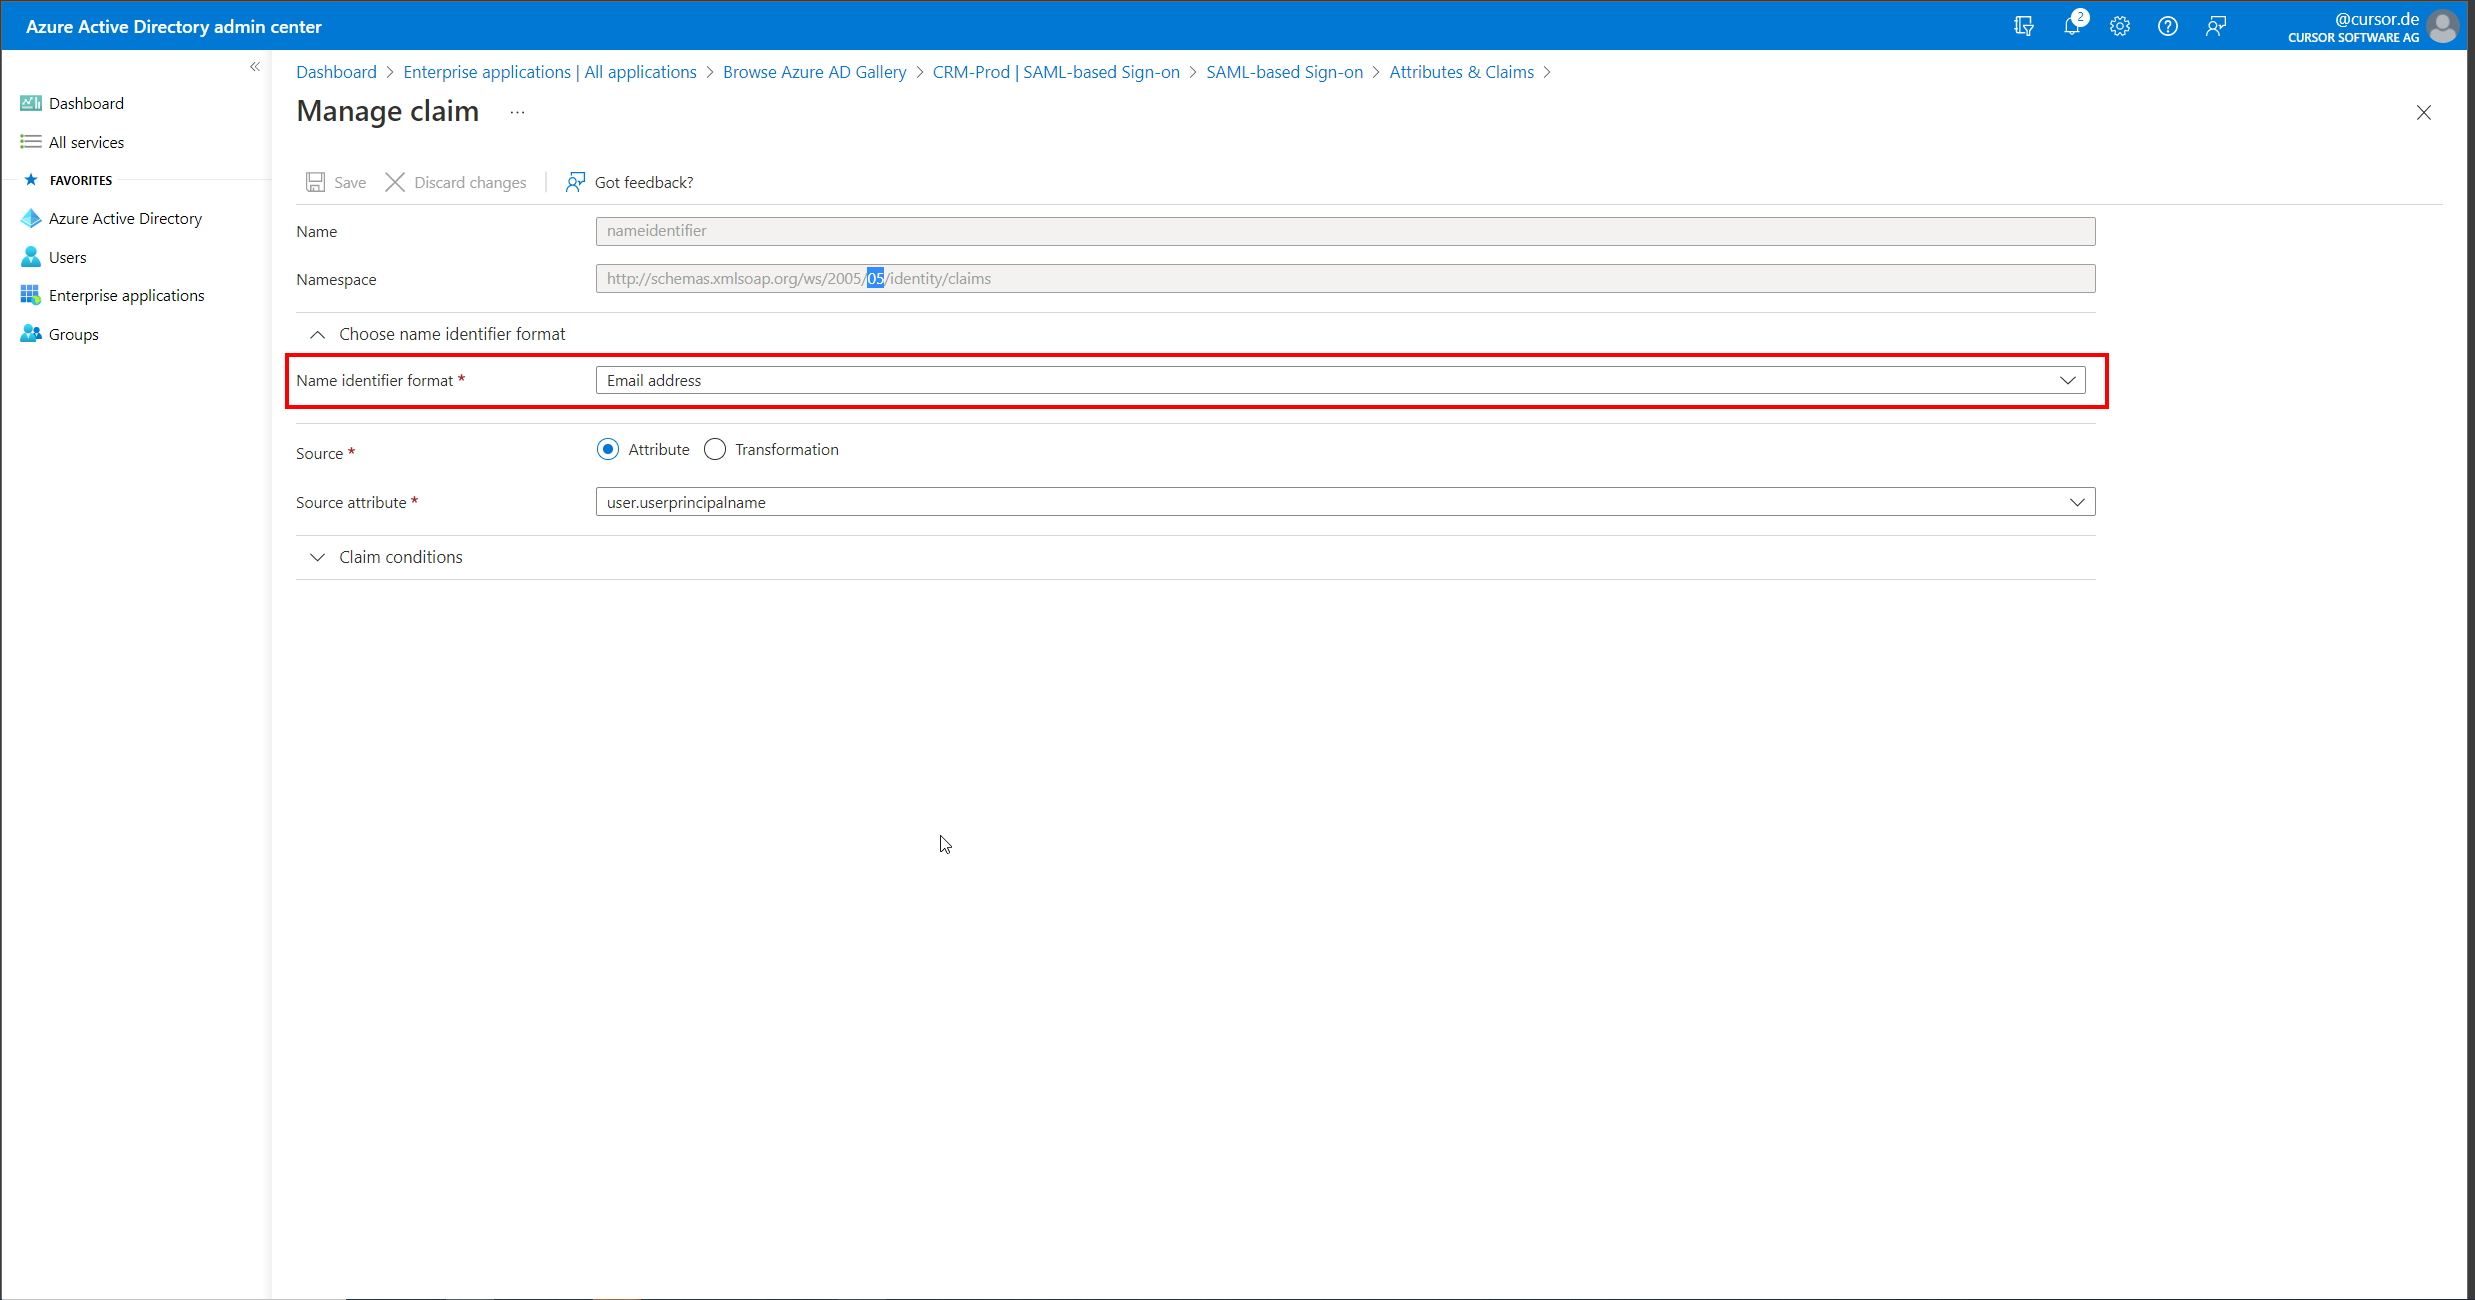
-
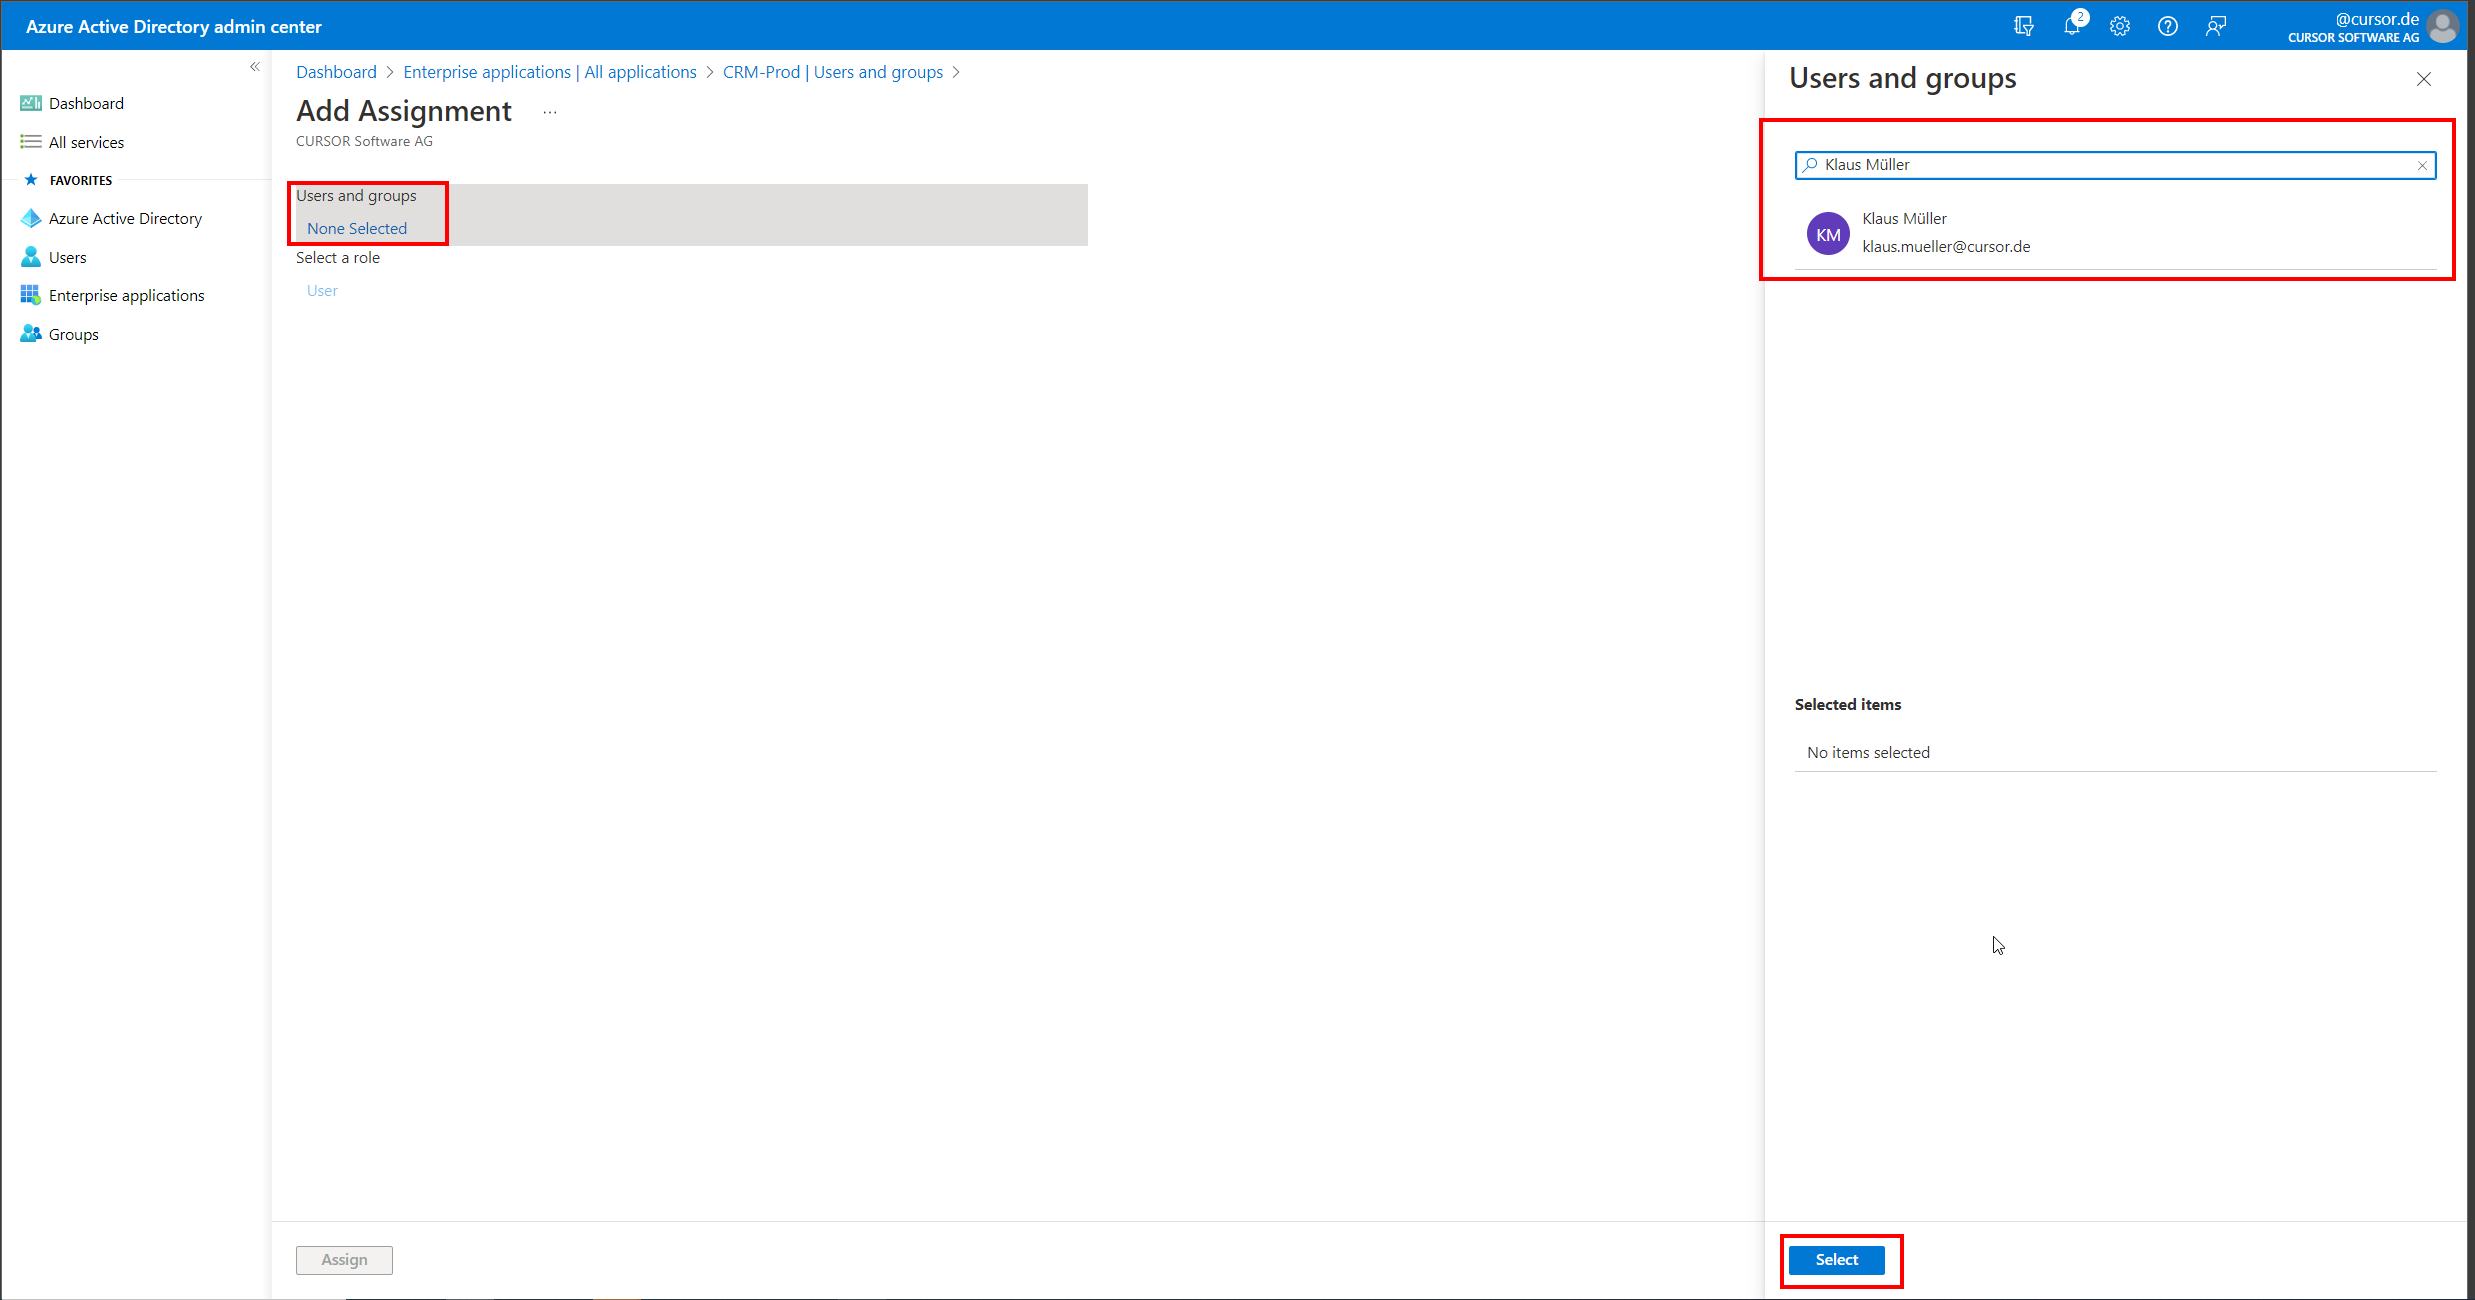
In order for users or user groups to be allowed to authenticate themselves on the Enterprise application that has now been set up, a user assignment must now be made in the "Users and groups" area. This can be newly created with the help of the "Add user/group" button.
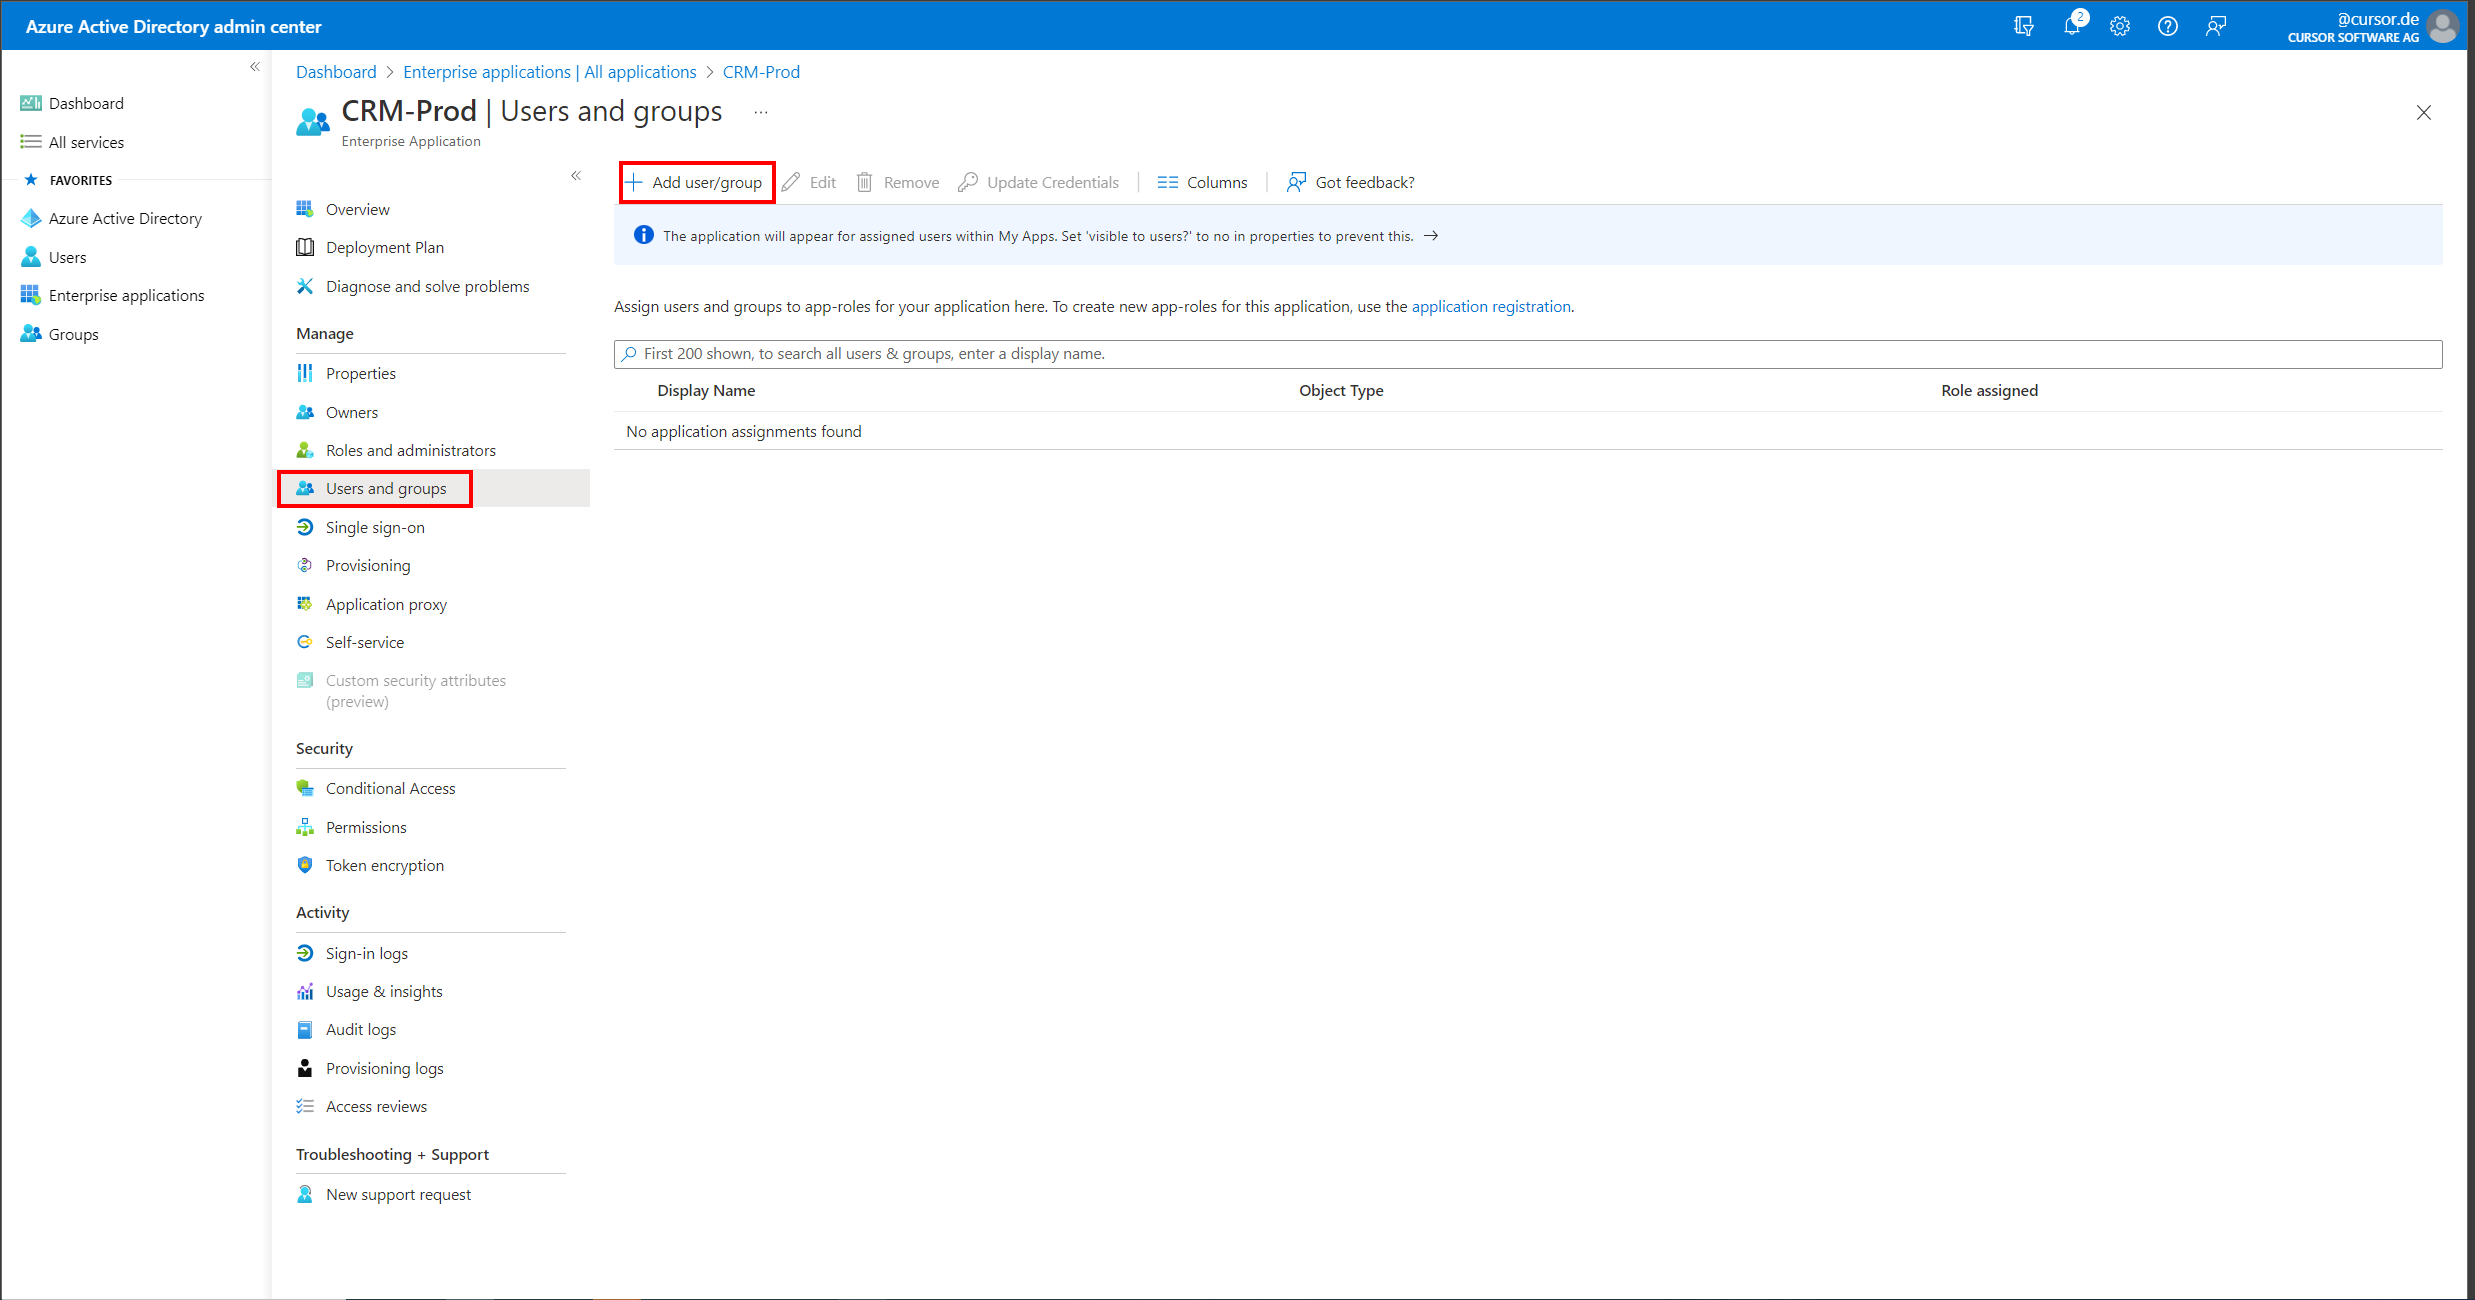
-
On the now opened mask, individual Azure AD users as well as user groups can be authorized to authenticate themselves against CURSOR-CRM using SAML 2.0. Suitable groups should be coordinated with an Azure AD administrator for this purpose.
After performing these steps, the configuration of Azure AD for using SAML 2.0 with CURSOR-CRM is completed. The next steps should now also be to configure the CRM system to use SAML in the system settings. Also, in the employee datasets, the "SAML Login Name" field (SAMLLoginName.Employee) must be set to exactly match the Name IDs sent from Azure AD so that user mapping can be performed.
After that, the login with Azure AD via SAML is ready for use.