Overview
OpenID Connect (OIDC) is a layer on top of the OAuth framework that allows clients to verify a user's identity using an authentication server and to obtain basic profile information in an interoperable way. The implementation of OpenID Connect is based on the HTTP protocol with REST mechanisms and on the JSON data format. In CURSOR-CRM, OpenID Connect can be used in conjunction with Azure Active Directory to integrate the Web Client into an existing environment for Single Sign-on.
The authentication of users with OpenID Connect is only possible in the Web Client. Other clients, such as the Windows client or the apps, do not currently support this login procedure.
Assignment of identity provider users to CURSOR-CRM users
OpenID Connect Provider and CURSOR-CRM each have separate user administrations. CURSOR-CRM manages users via employee datasets. Without further configuration, these initially have no relation to the users of the identity provider. For the login with OpenID Connect to CURSOR-CRM, it is therefore necessary that users of the Identity Provider can be assigned to CURSOR-CRM employee datasets.
Depending on the OpenID Connect provider, different name identifiers are used. Whether these are meaningless character strings, long columns of numbers or structured data depends on an implementation detail of the OIDC provider. In the case of Azure Active Directory, the UserPricipalName is used for the assignment. This must be clearly stored in the employee in the "OpenID Connect login name" field. In contrast to SAML 2.0, no distinction is made between upper and lower case.
System Preferences
Configuration in CURSOR-CRM
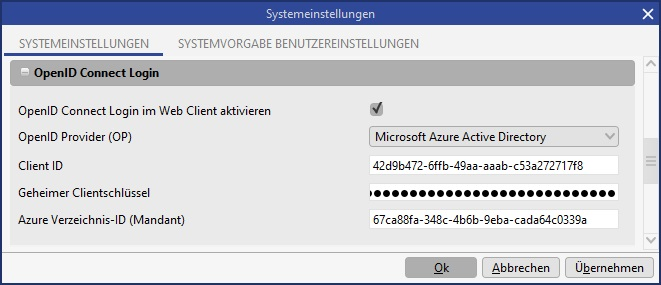
In the system preferences, the settings relevant for OpenID Connect are located in the OpenID Connect Login area. The following settings are available here:
|
Option |
Description |
|---|---|
|
Activate OpenID Connect Login in the Web Client |
This option switches the OpenID Connect login in the Web Client on or off. |
|
OpenID Provider (OP) |
Configuration of the supported OpenID Connect providers. Only Microsoft Azure Active Directory is currently supported. |
|
Client ID |
The Client identifier of the application. The application ID (Client) must be entered for Azure Active Directory. |
|
Secret Client key |
The secret key for the Client application. |
|
Azure directory ID (Client) |
The directory ID from Azure Active Directory for the application. |
Configuration per CURSOR-CRM User
For each CURSOR-CRM user for whom the login with OpenID Connect should be possible, the correct OpenID Connect Login Name must be stored in the employee dataset in order to be able to assign users of the identity provider to the CRM users. The correct name depends on the configuration of the identity provider.
Use in the CURSOR-CRM Web Client
General notes on use
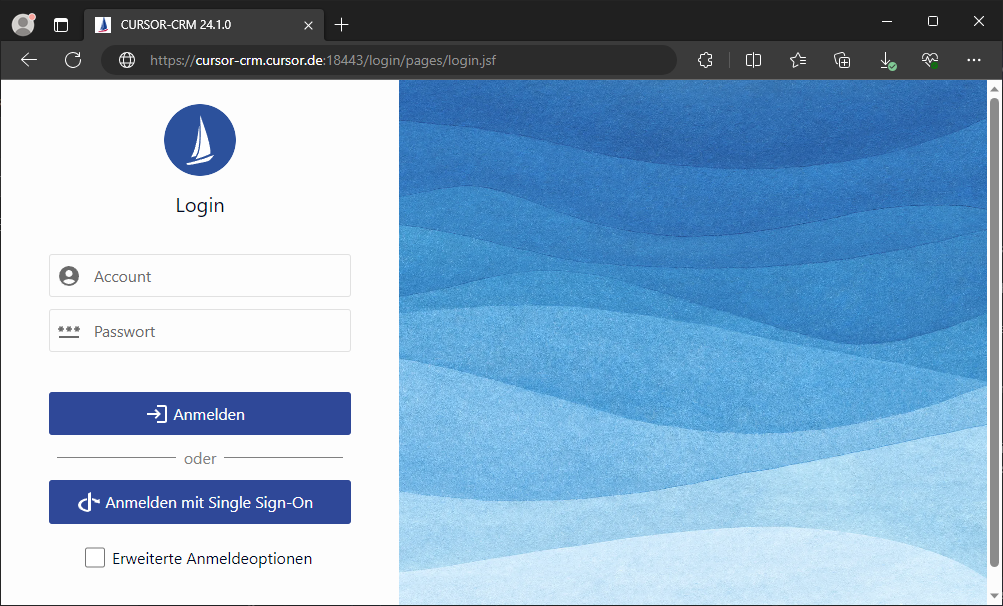
If OpenID Connect is configured correctly, it can be used in the CURSOR-CRM Web Client. The new login page must be used for this purpose. The new login page can be accessed under the path /login, i.e. in a complete URL, for example at https://crm.example.com:18443/login.
Registration CURSOR CRM in the Microsoft Azure Active Directory
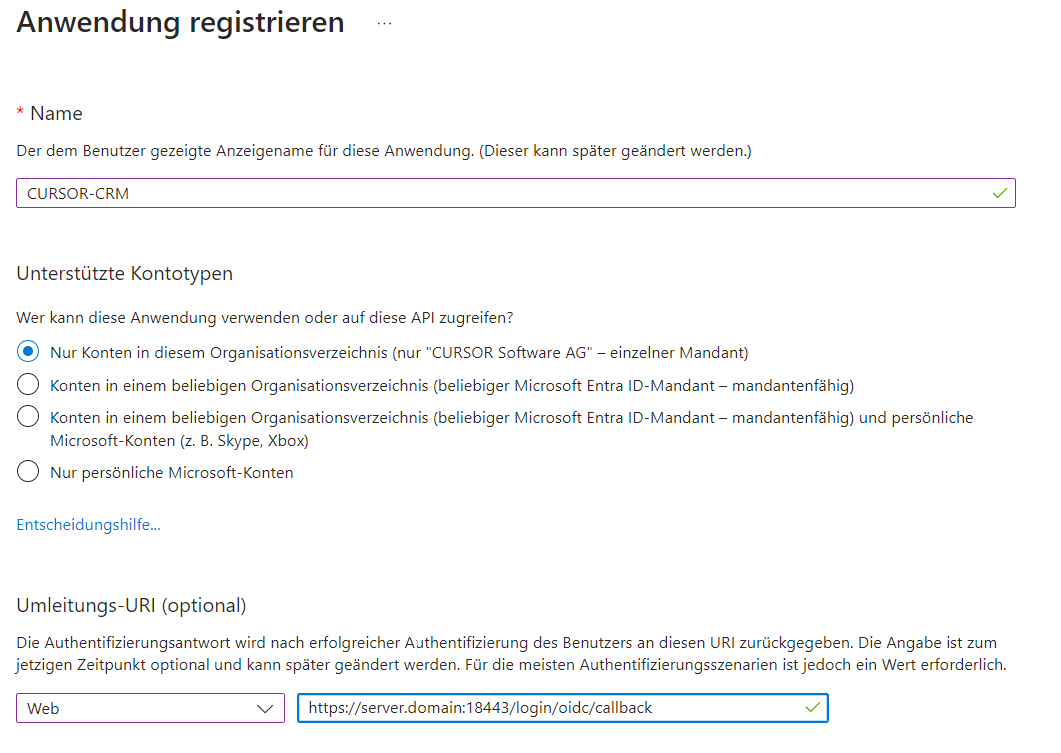
To connect OpenID Connect to the Azure Active Directory, CURSOR-CRM must be registered as an application. Here it is sufficient to create an app registration, assign the necessary authorizations and generate a Client key.
-
Log in to the Microsoft Azure Portal with the administrator for your organization. Select the item App registrations.
-
Add a new registration here. Select the 1st account type.
-
Add the redirect URL https://server.domain:x8443/login/oidc/callback.
-
To enable login with OpenID Connect and Azure Active Directory, the following authorizations must be enabled:
- OpenId permissions > openid
- OpenId permissions > profile
- User > User.Read
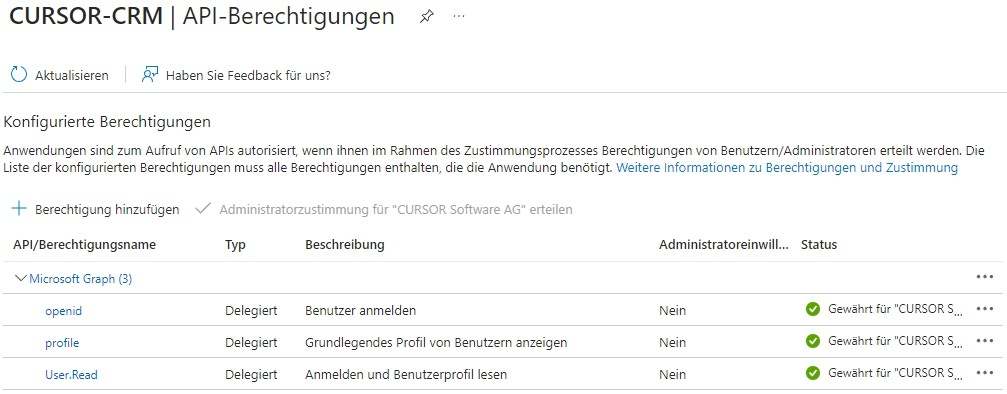
Then click on “Grant administrator approval for 'CURSOR Software AG'” above the table.
-
A secret client key must be generated for access.
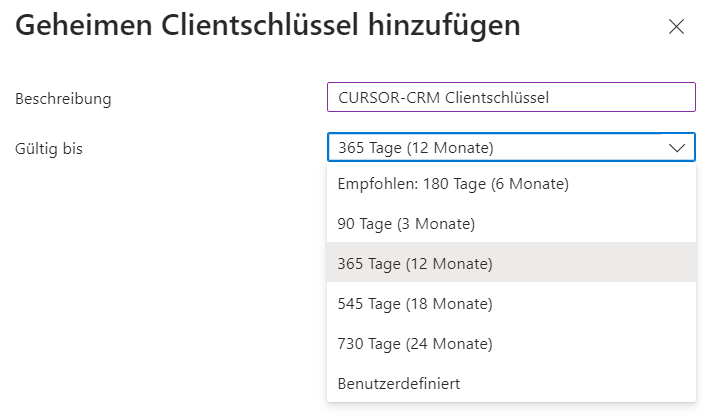
Because the client key can only be viewed within the installation, it must be saved separately or stored directly in CURSOR-CRM.

-
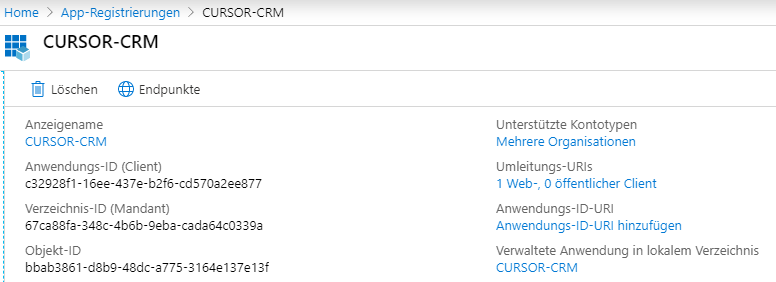
The information can then be viewed in the overview page. The application ID (Client) and directory ID (unit) must be entered in the system settings.