Row selection using check boxes
-
By clicking on the icon

Hide row selectors to show or hide the checkboxes.
Instructions for usage:
-
If the check box is visible, every click on the box will lead to the selection or deselection of the current line.
-
When you check the box, the row is colored as if you had select it with CTRL + <mouse click>. In return, the check mark appears automatically when you select another row with CTRL + <mouse click>.
-
The box remains checked until you leave the level.
-
Another checkbox appears above the new column. It is used for global selection/deselection of all table sets
(corresponds:

Select all/
Deselect all).
Selecting all datasets
Clicking once on one row in a table will select it. To select multiple datasets, hold down the CTRL key and click on the desired dataset.
This function is available for all tables where further functionalities (e:g: Excel export) are made possible by the selection. Selected lines are highlighted in color. Clicking again on one selected row will cancel the selection. All rows of a table can be selected simultaneously using the button Select all from the drop-down menu. The selection can be canceled in the same way. Use the button
![]()
to toggle between Select all and Deselect all.
Select all
-
If no rows are selected, all rows are marked.
-
If one or more rows are selected, all rows are selected.
-
If all rows are selected, the function is deactivated.
Deselect all
The selection of all lines is canceled, regardless of the selection of single rows.
Editing several selected lines in a list (Windows Client)
Field value changes affect several selected lines, for example:
-
Set multiple selected activities simultaneously to DONE.
-
Assign several marked activities to a person (DELEGIERT_AN).
Selecting at least one list line makes the multi-action "Edit selected entries" available. Selecting this multi-action opens the wizard described below. The wizard for editing several selected rows of a list first opens a view of all columns available in this context. Here the user can now activate one or more columns to be edited.
In the next wizard step, the selected columns are displayed with the aim of entering the new field values.
The process is finalized by clicking the READY button, which will start the processing of the changes for the selected lines. When saving, the entryBeforeSave, fieldValueChanged and the entrySaved mask script are triggered for each dataset or field.
Editing several selected lines in a list (Web Client)
Multiple processing is triggered in the Web Client via the multi-action button in the toolbar. A complete wizard is not required in the Web Client. Instead, the fields are selected and edited on a unified site. All fields that were used as search result fields in the search are available in this dialog.
When opening multiple processing, the system checks whether fields exist that are read-only for the user in all selected datasets. If this is the case, the checkbox for selecting the field is deactivated and processing is not possible. The following note is also displayed at the top: Some fields have been disabled, because the marked cells in list view are read-only.
Copying contents from table cells to the clipboard
Content of table cells can be pasted to the clipboard in the Web Client. Examples of use: The name of a search from the search administration or the PK of a key in the key maintenance. On tables there is a context menu that can be used to copy the cell contents.
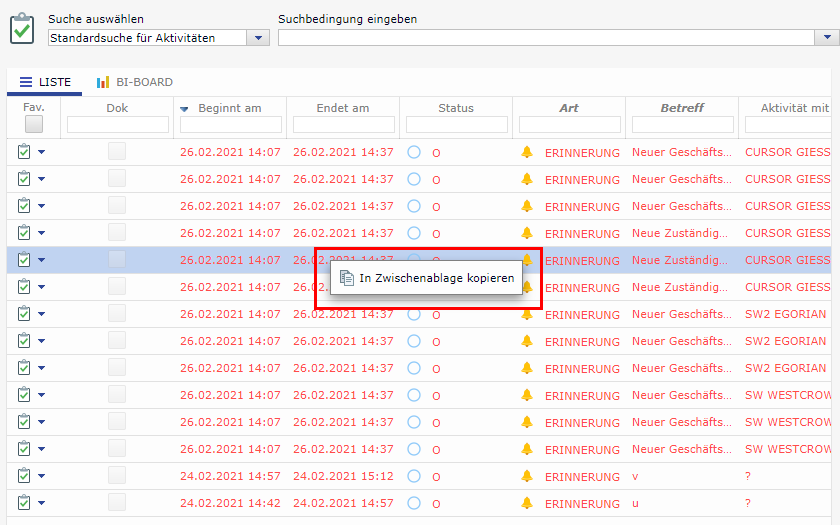
Figure: Context menu on a table
The key combination CTRL + c cannot be used because it is already occupied by the browser.