Basics
With the Outlook add-in, emails can be conveniently imported from Outlook into the CRM system or tickets can be generated (if the module is licensed).

In the ribbon bar of Outlook there is a new category "CURSOR-CRM" after installation of the add-in. This section contains the buttons "Create activity", "Create ticket" and "Settings". The buttons are active if exactly one email has been selected by the user.
As long as an add-in action is running, a hint is displayed in the email window.
The actions can take a few seconds depending on the size of the email and the load on the application server. You can continue working in Outlook during this time without any problems.
The hint can also only be displayed for a very short moment if the action was finished quickly. Even if the action is executed several times as a result, only one activity always occurs in CRM.
To enable the add-in to connect to the CRM system and perform actions on behalf of the user, it is necessary to log in to the CRM system. If Kerberos (Single Sign-On) is used in the CRM system, no additional login data needs to be entered. If the user has a browser that does not support Kerberos login, or if this is not configured in the CRM system, a login dialog appears.
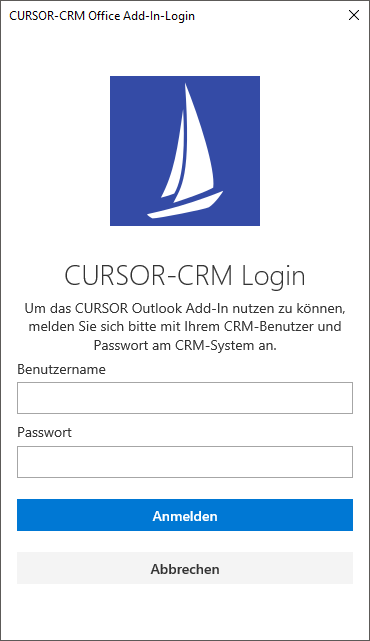
The login data for the CRM system must be entered in this dialog. After logging in, the session is valid for 24 hours. If the session has expired, a new login is necessary. This can happen if no action was triggered in the add-in within the session time (24 hours), or if the CRM server was restarted.
Create activity
When you click on the button, the selected e-mail is transferred to the CRM system. This creates an activity in the CRM, as if the user had imported the email into the CRM system via drag & drop or via the activity synchronization. The CRM-side import takes place without an assistant according to specifications in "Settings".
Create ticket
It is not possible to deactivate the button Create ticket if the module was not licensed. In this case, the user is therefore notified of the missing module in the CRM system.
When you click on the button, the email is first imported as described under "Create activity". Subsequently, a ticket is created for this activity using the BPM process "Create ticket". Thereby the fields are preset according to the specifications in the "Settings" available in the add-in.
Selection of priorities A, B and C
The user can select the priority for the email with a separate button "Settings".

Figure: Selection of the priority
Settings
These settings are saved individually for each Outlook user. The default values can not be set by the administrator.
Clicking on the button opens a panel in which various settings can be made.
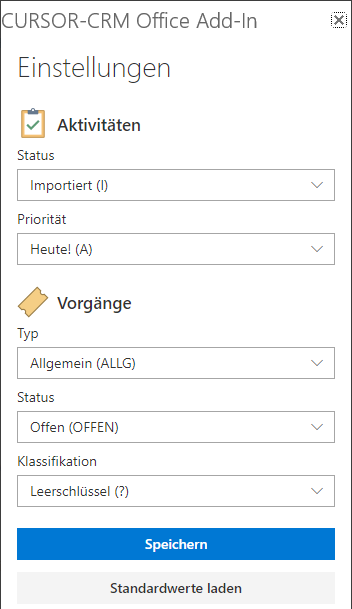
Different default values can be stored for the three buttons, which are then taken into account when clicking on the buttons. The entity and field names displayed and the available keys are determined from the CRM system.