Basics
Mass data serial letter (>100.000) are single documents created out of the CRM-system. Through an assistant the user can configure the actions to be made, like for example selection, activity generation, document generation or document export and send them to the application server as task. The actual implementation is made on the application server (preferably mass data server). The actions can be sent by the Client bundled or individually to the application server. Once an action has been sent to the server, the assistant is closed - the user can go on with his / her work in the system. As soon as the action is completed on the application server, the user receives a message through the task list and can open the assistant and proceed with the serial letter procedure.
This interplay between Client and server goes on that way until the user has exported the documents. With the export of the documents to a defined transfer directory on the application server, the serial letter action can be quit by the user. The documents from the transfer directory can now be transmitted to a print service for example.
Significant characteristics of mass data serial letter
-
Selection of any data volume
-
Supports table display in documents (e.g. positions)
-
Sorting of the selection result according to numerous criteria (e.g. ZIP code, company name)
You can also sort the results in the table output. -
Selection of document output format
The following formats are available:-
pdf
-
doc
-
docx
-
-
Generation of test documents for verification of generated documents
-
Generation of individual protocol- and reminder activities
-
Generation of individual documents
-
Export of generated documents to transfer directory
Pre-conditions
The functionality Serial letter (mass data) is optional and not part of the standard. The following two modules are required:
-
Mass data server
-
Serial letter server
When the modules are imported, the menu item is visible under Marketing / Serial letter (mass data). CURSOR Software AG also provides a set of patterns.
The memory directory has been configured by your administrator. For that directory you also need reading rights. Ask for the path before you start to create the documents.
Compared to the "classical" serial letter:
-
the document template does not need to be edited in the assistant
-
there's no preview of the recipients
-
addressees are not changed manually
Procedure
Click on the icon

Serial letter in the quick start bar to start the serial letter creation. The template selection dialog opens.
The assistant and the menu bar guides you through the complete serial letter process.
Template selection
How to select a template:
-
Click on the icon
Serial letter in the quick start bar.
-
Click the desired template.
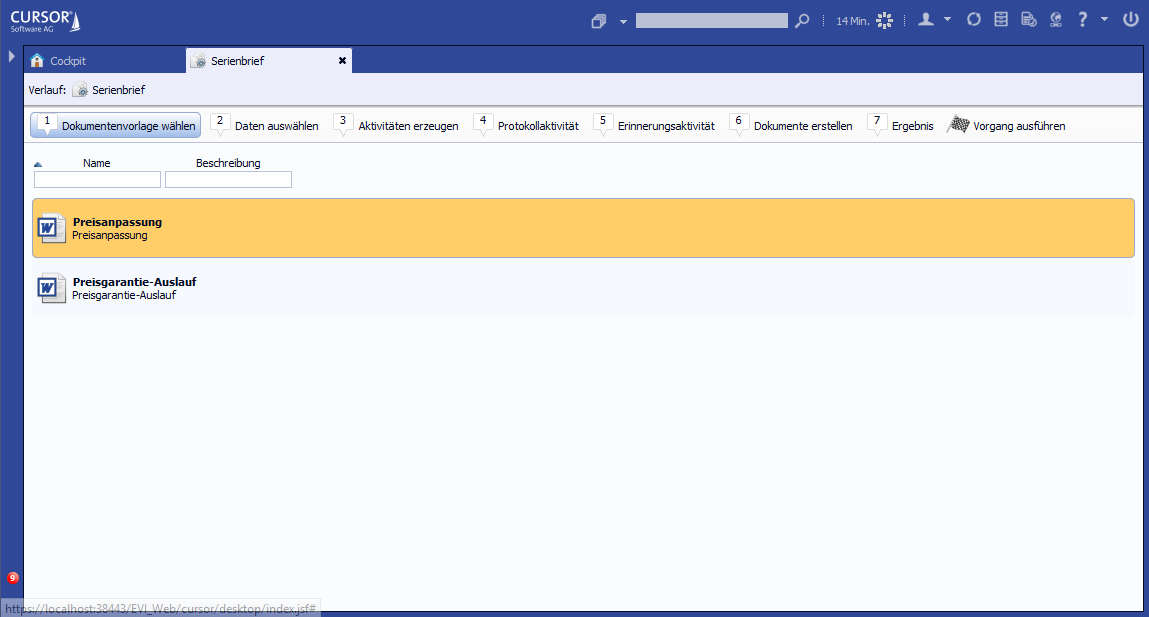
Figure: Default templates for mass data serial letters
Data selection
The step Data selection is used to generate the number of selection results.
The following functionalities are available:
-
Search criteria input
-
Single data sorting
-
Conducting a search
-
Control sample documentation for verification of created documents
-
Document subject input
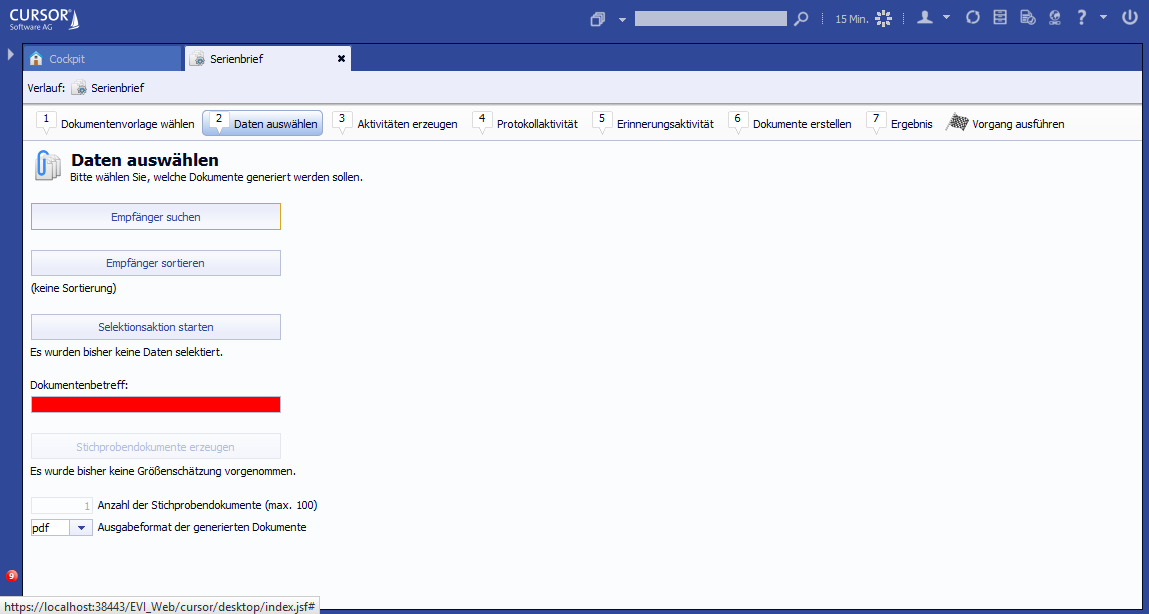
Figure: Wizard Step 2 - Data selection
Search recipients
To search for the letter recipients:
-
Click on Edit recipients. The search dialog opens.
-
Enter the search criteria.
-
Click

Apply and close. The search configuration is saved temporarily.
OR
In the history menu, also click
Serial letter to abort search criteria input.
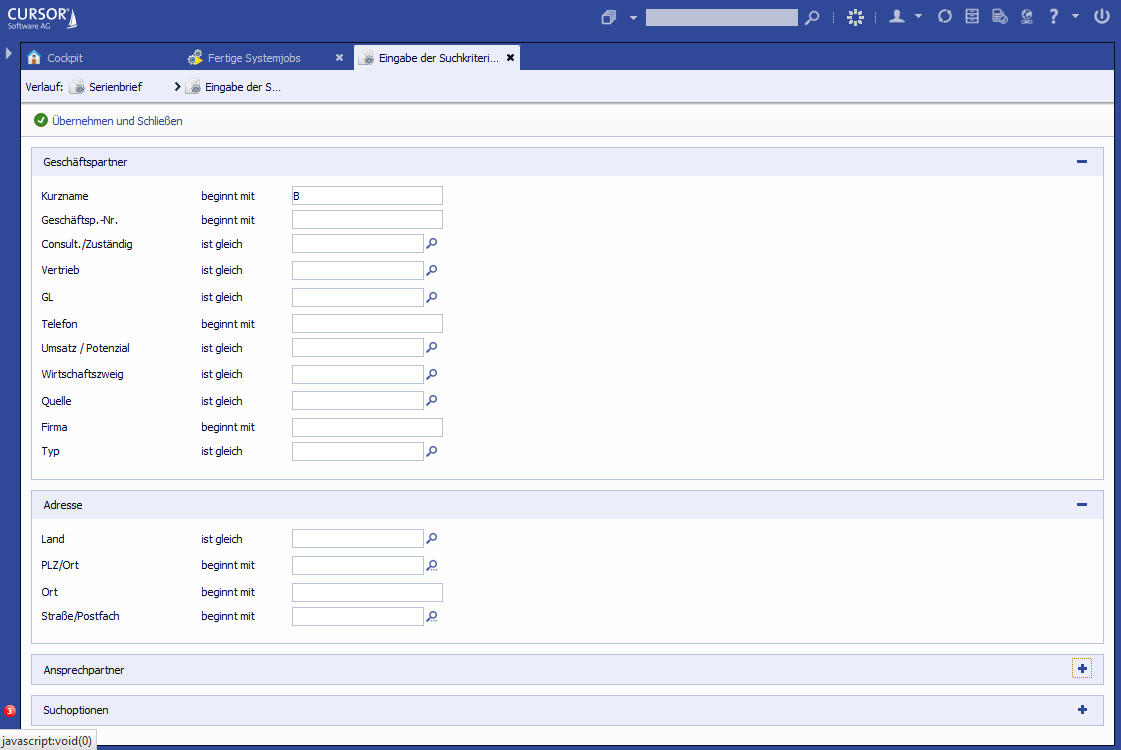
You can use the search dialog as you would for default searches.
Sorting recipients
To influence the sorting:
-
Click Sort recipients. The dialog with available fields opens.
-
Select one or more fields and drag them onto the Selected sort fields column.
OR
mark the fields in the left column with CTRL +mouse click and click on the icon → . -
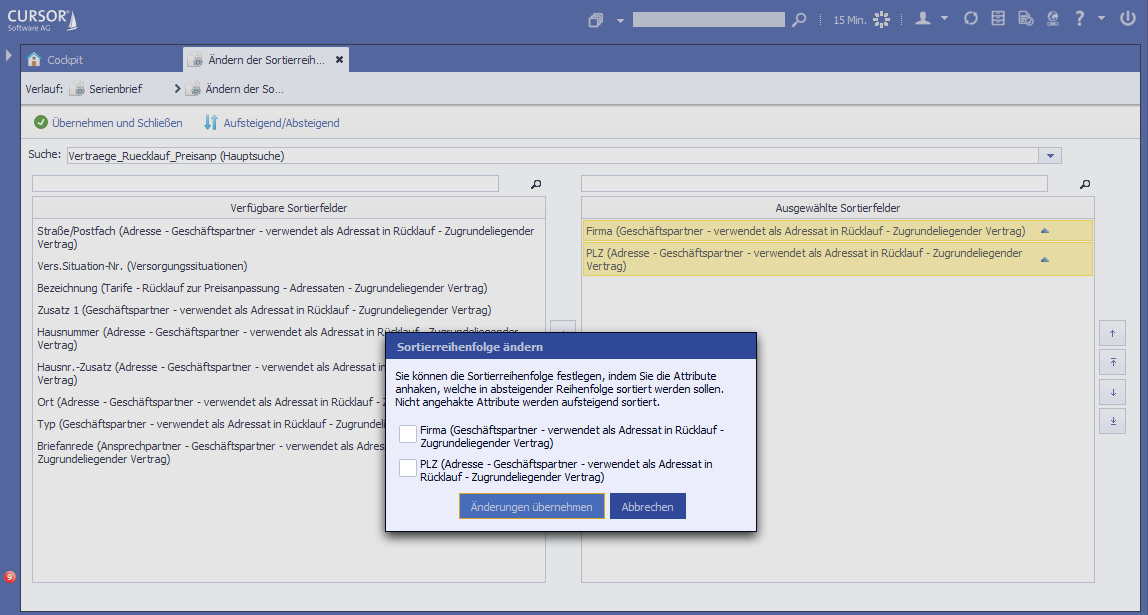
Adjust selected sort fields.
If required, you can change the sorting by shifting the fields up ↑ or down ↓ .
If you want to sort in descending order according to a criterion, activate the fields and click on
and mark the corresponding checkbox (sort order descending). Default is set to ascending.
-
Close the sorting dialog by clicking on Apply changes.
With several thousand single files, it makes sense to sort them. The sort criteria (fields) depend on the underlying search and can be combined.
In the example, it is first sorted by the Company field and then by the ZIP Code.
If the sorting is set, it will be displayed in the wizard.
The search criteria and sorting can also be optimized later.
Once the search criteria and the sorting are defined, the command can be passed to the application server.
Start selection action
How to start the selection action:
-
Click Start selection action. The command is transmitted to the application server and the assistant closes.
-
The search is started on the application server. The duration depends on the capacity of the server capacity and the data volume.
-
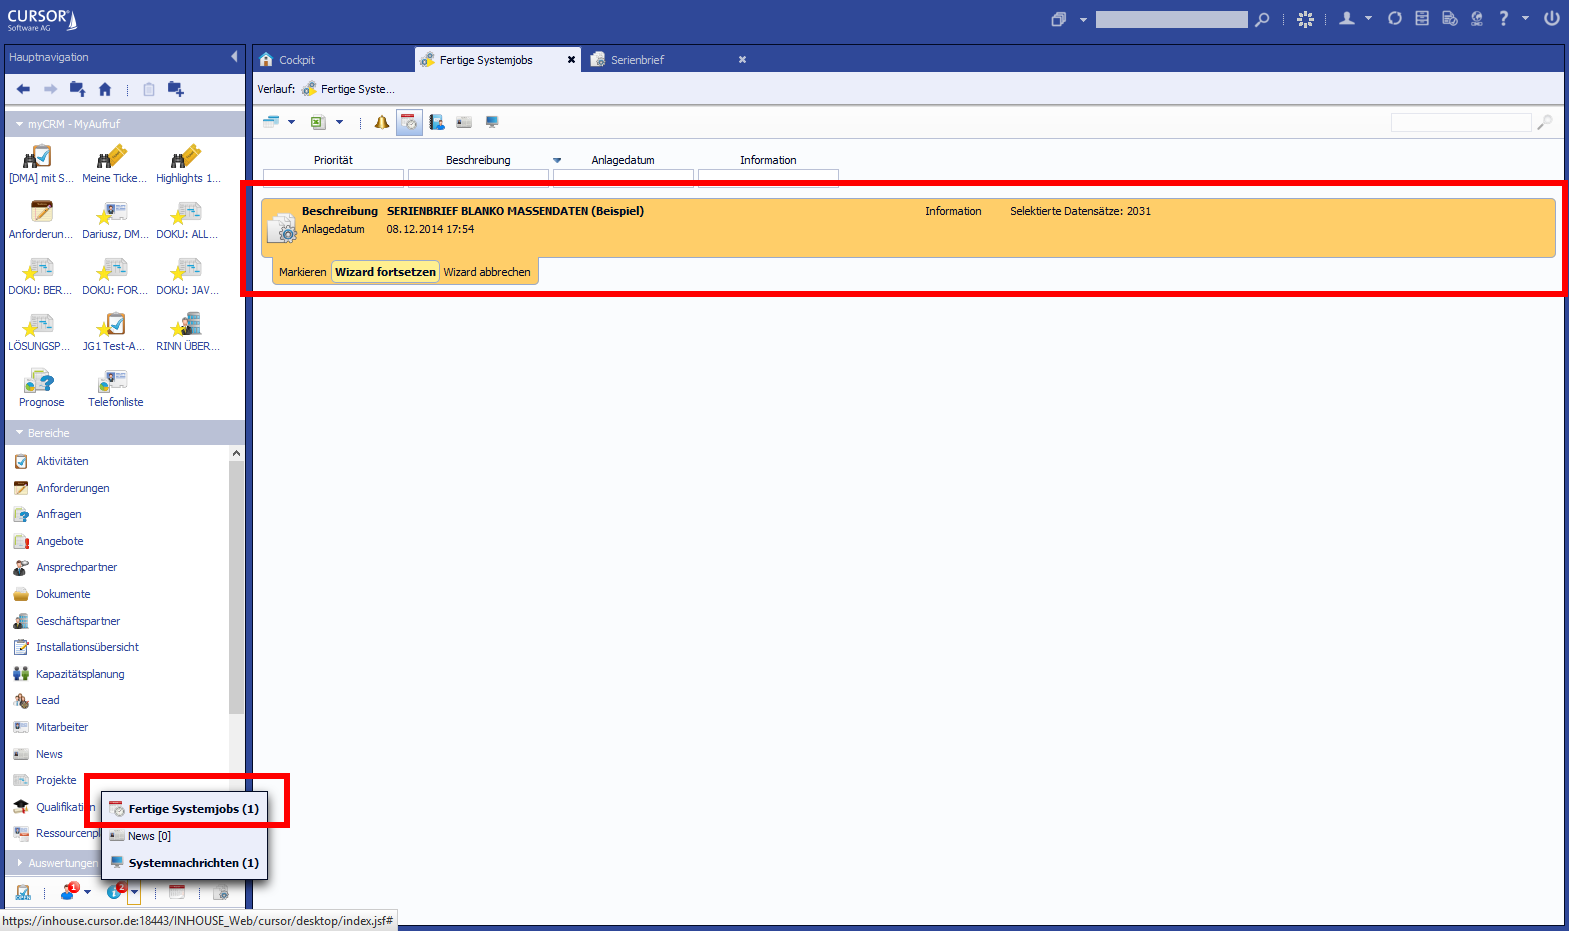
Once the server task is completed, you will be getting a system message. Alternatively the quickstart bar displays a completed task.
With a click on the symbol Completed system jobs you open the level with all completed tasks. -
Move the mouse to the serial letter job and click Proceed wizard. The dialog is opened and the number of datasets found is displayed.
Clicking on Cancel Wizard deletes all configured search criteria and the sort order and aborts the entire process. In this case, creation of serial letter must be triggered again.
Once the selection action is completed, the prepared data are on the server. With these data the document template is filled in the following step.
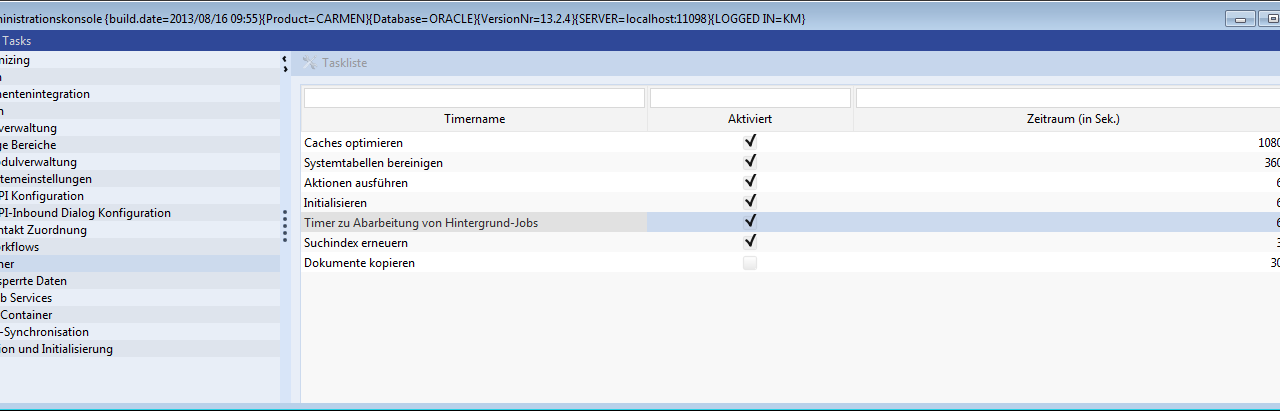
The wait time does not only depend on the data volume, but also on the setting in the timer. If the selection is made quickly, the message on the quickstart bar is shown according to the processing time configured in the admin console. (Here: Here: 60 seconds)
All settings are kept in the dialog of the assistant. Additionally you can see the number of datasets found. Here: "X records were found". The search results are written to a temporary table. Every serial letter action is recorded in the entity serial letter mass data.
Generate test documents
How to create control sample documents:
-
Select the desired document format from the selection menu (pdf, doc, docx)
-
Enter the number of control sample documents
-
Click Create control sample document.
-
Confirm the download with OK.
-
Open the zipped file to view the documents.
On touch devices, only one test document is generated, since the zip file cannot be opened by default.
If you would like to test the serial letters, you can create a sample of a maximum of 100 documents. The control sample is taken equally from the complete found datasets. When you have 200 datasets and take 25 control samples, every eighth document is generated. If you have 1000 datasets and 100 control samples, every tenth is generated a.s.o.
Create activities
This step is similar to the classical serial letter creation. Compared to that there is no possibility, however, to create the collection activity. Only single activities are generated. Activity creation is optional and can only be conducted once.
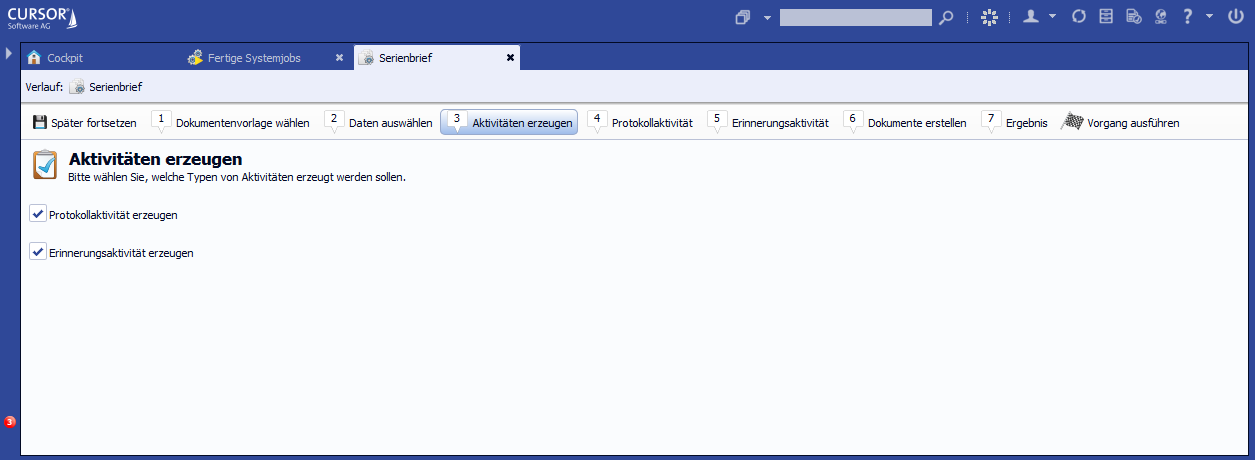
In the description, we assume that these options have been activated.
If in the serial letter assistant the checkbox 'Reminder activity' or 'Protocol activity' are deactivated and activated again, both activity sides keep the former entries (field values and employee allocation).
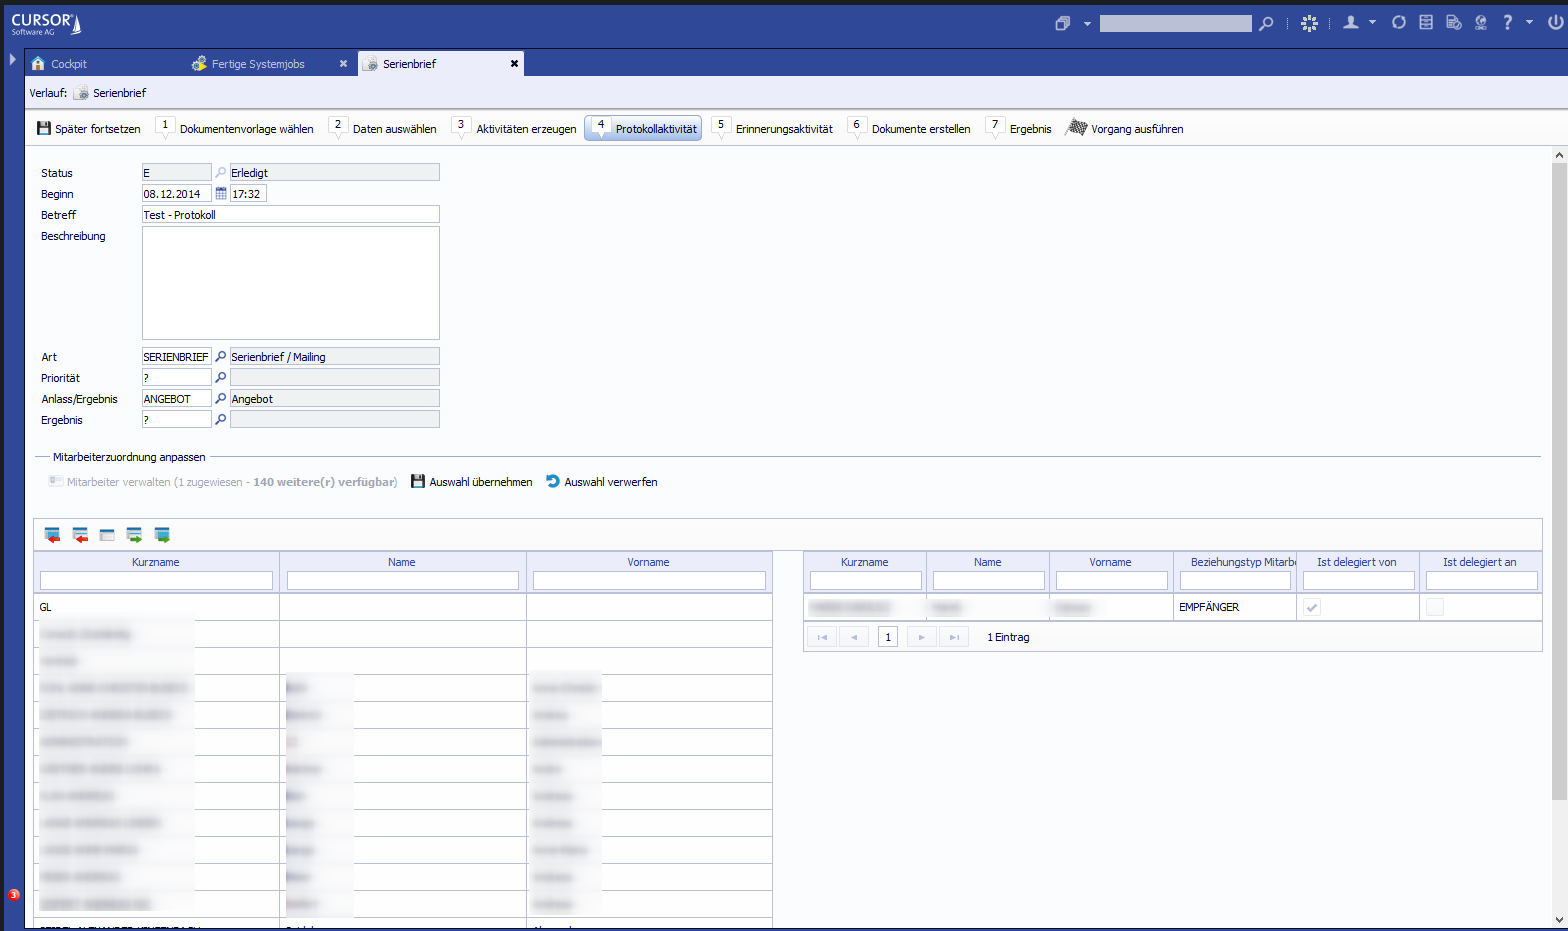
Protocol activity
Enter the data relevant for the protocol activity. The field Occasion must be filled.
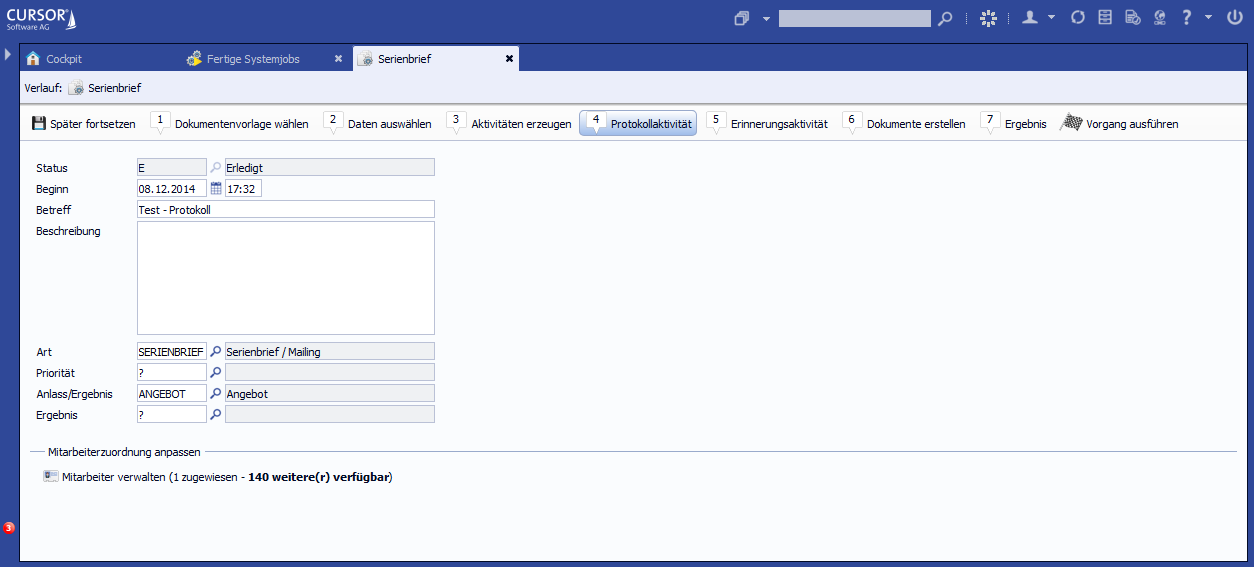
Employee allocation
Like in the classical serial letter the serial letter creator is always the one who delegates and can, for example, delegate the activity to staff members.
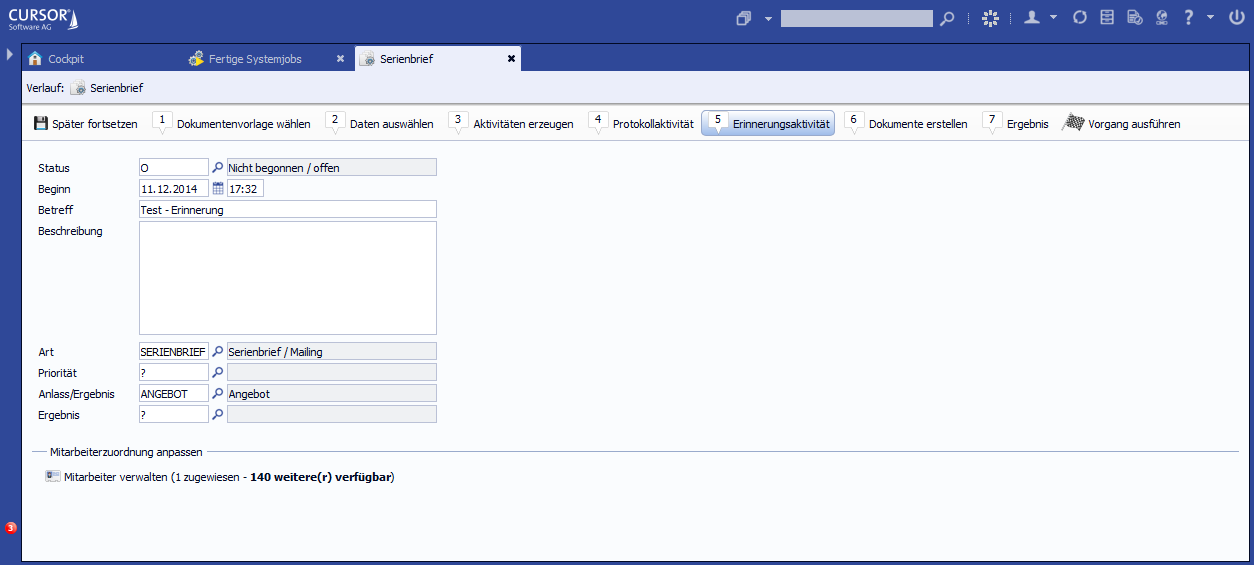
Reminder activity
You set the reminder activity when you want to create a return date
Create documents
The configuration in this step refers to the form of the serial letters and to the optional export function of the generated individual documents.
-
At first only the single documents are generated. This option cannot be changed (this is for further development).
-
In this step also the user can export (copy) the single documents into a sub-directory to have direct access to the copy-files. The originals are still in the document directory of the application server.
Enter the name of the export directory to copy the single files into it.
You can ONLY enter the name of the sub-directory located in one of the paths defined by the administrator. Ask your administrator about the path. Image:
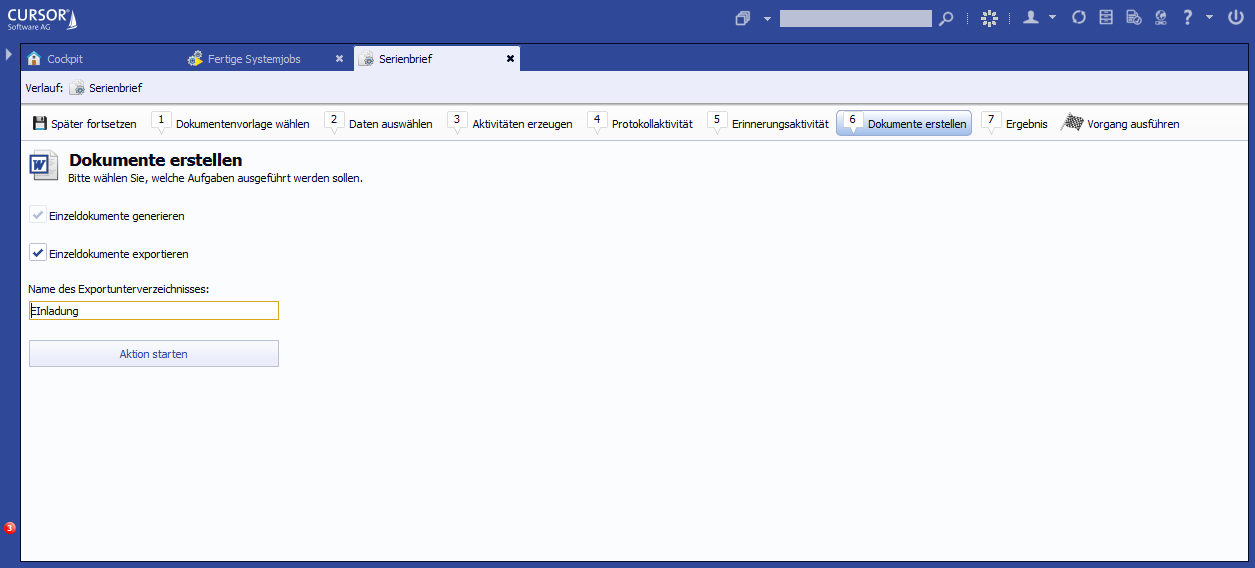
To start mass generation, click Start action. Before the action is started, you will get a message about which partial actions are executed.
With the confirmation Yes it is not possible any more to navigate back in the assistant and adjust the configuration. At this point, select No and you can still change any setting (except: deleting activities, if created). How to navigate in the assistant is precisely described in a separate chapter.
By clicking on YES, the command is sent to the application server. The already implemented data selection (from step 2) provides data to the template. Depending on the data volume the wait time can be several hours.
Once the task is completed, you will be informed via system message or quickstart bar.
Result
If the serial letters have been successfully created on the server, you will be getting a dialog with a list of all actions made resp. a message on the quickstart bar through which you can open the assistant again.
If an error has been made in the configuration and the single letters do not meet the expectations, the entire process has to be repeated.