Basics
The Interaktive Charts feature opens up unimagined possibilities in the representation of your data. As an administrator with the necessary authorizations, you have the option of configuring charts and distributing them to defined user groups. The charts are always configured for the “parent entities for sub-section” constellation. It follows that you can configure multiple charts on each parent entity for example, for the sub-section entity Activity.
The following chart types are possible:
-
pie chart
-
doughnut chart
-
Bar charts
-
Line charts
Depending on the chart type, you can configure the underlying chart data and appearance: Field, chart axes, color, pattern filling or interpolation.
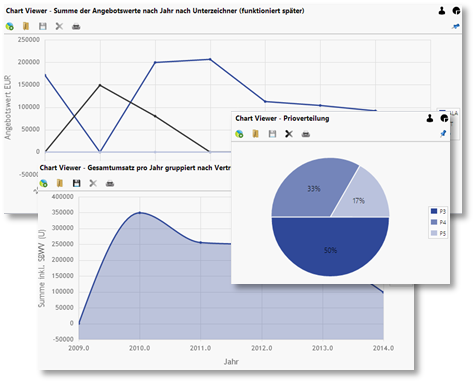
Figure: Chart types
Requirements
Permissions
You need administrative authorization to configure interactive charts for:
-
The configuration of actions requiring rights (Menu Configuration Administration / Actions requiring rights)
-
The control of the customizing packages (Menu Administration / Customizing Package)
Before you configure and distribute the charts company-wide, you should think about which actions on the interactive charts should be allowed for the users.
In the initial configurations after the installation (from Version 15.1), each user can configure his user-specific charts himself. The right to configure your own desktop in the previous versions also includes the right to create and edit your own interactive charts (configure.own.desktop.permission is deactivated, i.e. allowed for each user group). The option of distributing the charts group-wide and system-wide is reserved for the admins only (see admin.desktop.permission).

Figure: Initial authorizations for the interactive charts
If the users are only allowed to view or create the charts depending on their group, then the configure.own.desktop.permission action right must be activated and appropriate rights distributed to the groups via the Rights manager.
Users without the right to process can only open the existing charts. No other actions or than Open and Print are possible in the toolbar.
Figure: Chart without right to process
Module Customizing transport
In order to be able to generate and distribute interactive charts system-wide, you need the Customizing transport module. This module allows the export and import of customizing packages with charts, created in the development system, and tested in the consolidation system. See the details in chapter Customizing transports.
The creation of interactive charts for system-wide use without Customizing transport module is not possible.
Server path configuration
It may be necessary to maintain the following global variables in order to store the path to the server. This is in the case when instead of charts, an error message is shown and this refers to a URL which does not match the server URL.
|
Variable name |
Field type |
Data type |
Possible values |
|---|---|---|---|
|
C0CursorDefaultServerProtocol (up to 19.2 cursor.default.server.protocol)
|
|
STRING |
Protocol for application server (generally https) |
|
C0CursorDefaultServerBaseURL (up to 19.2 cursor.default.server.baseURL)
|
|
STRING |
Basic URL of the application server (e.g. crm.meinefirma.de) |
|
C0CursorDefaultServerPort (up to 19.2 cursor.default.server.port)
|
|
STRING |
Port of the application server (e.g. 18443) |
Procedure for the configuration of the system-wide charts
Step1: Create a new customizing package in the development system
As already mentioned, the customizing packages with charts are created b an administrator in a development system. Click on Customizing transports 
![]()

Figure: New creation of a customizing package
Step 2: Select the area
Now select the area in which you would like to configure the charts. In the scenario, we place charts in the activity sub-section to the parent contact.

Figure: Configuration of the interactive charts for activities to contact persons - select the customizing package.
In the initial state, you will find no system-wide charts. A pre-configuration is not possible because your development system - in which you create the charts - once and the package export is only possible in your production system.
Step 3: Creation of charts in the charts area
If you have already opened the chart area, you can switch between the work modes and view which can be recognized by symbols.
-
Work modes:
-

Administrator
-

User
-
-
View:
-
Layout
-
Edition
-
Procedure:
-
To edit system-wide charts, you must switch to the Administrator work mode and to the Edition view (see figure).
-
Sect the previously created Customizing Package from the drop-down menu.
-
Click the Add chart button
-
Assign a corresponding name, select type, field, colors, tonality or interpolation. The result is displayed as preview.
-
Click on

Clicking

After saving, you can view the charts from two views: the user and the administrator.
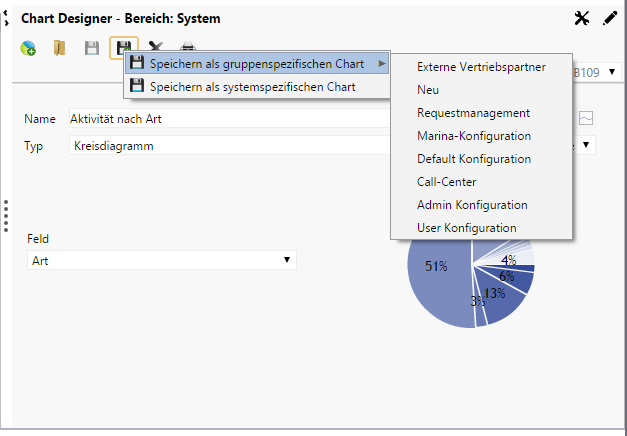
Figure: New creation of system-wide charts
In the administrator view, you can only see charts that you created for other system users. Each individual configuration group with the associated charts are listed.
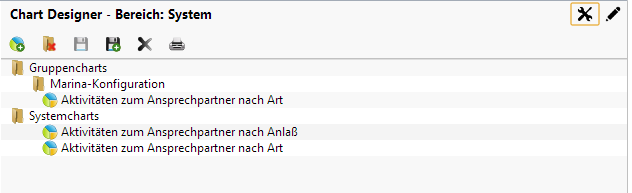
Figure: Administrator view for available graphics
You can see only “Your group charts” from the user view, since you yourself belong to the group Marina-Configuration.
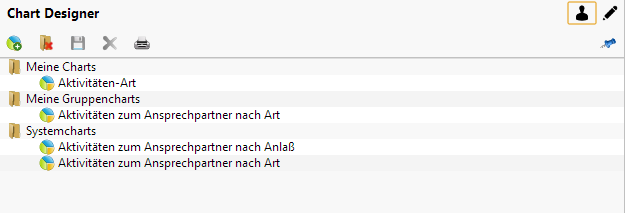
Figure: User view for available graphics
You have no influence on the user-specific charts as an administrator, provided that the user has the right to create them himself.
Configure other graphics in other areas and save them in the same customizing package. As soon as you have finished the configuration, you can export the package in the consolidation system.
Step 4: Export the customizing package with charts into the production system
The export of the customizing packages into the production system is done in 2 steps: first, an export from the development system into the consolidation system. Once the results were tested and found good in the consolidation system, the package is exported again and then transferred to the production system. The import and export modalities are dependent on the configuration of the Customizing transports module in your company. At this point we refer to the documentation in the chapter Customizing transports.