Showing and hiding application areas of Web Client
Operation
In order to make the most of the working area of your display device, you can show and hide certain areas of application with one click.
| Click the button to hide the navigation area. |
|---|---|
| Click the button to display the navigation area. |
| Click the button to hide the sub-data area. |
| Click the button to display the sub-data area. |
Separator | Application areas of the Web Client can be increased and decreased by means of a movable vertical and horizontal separator using drag and drop. Just drag the line with the mouse to the right or left, down or up. This feature works - for technical reasons - not on touch devices (such as iPad or Galaxy Tab). The state of the page area is not saved and returns to the default value after exiting the application. |
Double-click within the main area | The area is maximized by double-clicking on the mask background of the main area. In this case, the sub area returns to the initial position (only the tab headers are visible) and thus returns the full area of the screen to the main area. |
Overlay menu
If the main navigation area is hidden, an overlay element opens when you click on the menu margin. The overlay element contains the main navigation area. If you select a menu item, it is executed and the overlay element retracts itself.
Configuration of the main navigation
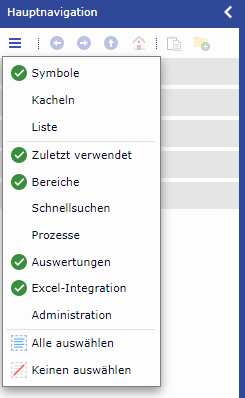
You can control the display in the main navigation via the check box in the main navigation header. The entries of the myCRM area can be displayed as symbols, tiles or list. Elements: Areas, Quick searches, Processes and Reports can be shown or hidden.

Figure: Configuration of the main navigation


