Authentication routine
The authentication routine for CURSOR-CRM and the operating system (and the domain) runs basically independently. Each system has its own users and passwords. The autologin functionality allows a one-time, central authentication (locally, Windows domain) to be recognized transparently by other systems (CURSOR-CRM) as an authenticated user. Alternatively, the Kerberos authentication can be used.
Login with password input
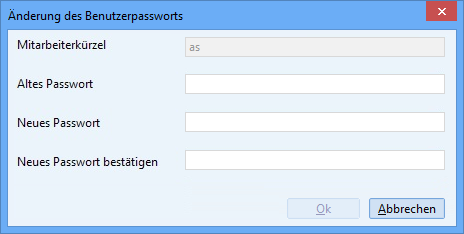
Once you have started the application, a login mask will appear, via which you can authenticate. The assigned password does not have to be the same as the one for your operating system. You can, however, use the same one if you want. Prerequisite is that the autologin functionality is deactivated in the configuration tab for the user.
If you want to log in as another user on the same machine (e.g. as administrator on a user computer to solve a problem or to change settings), then you can do so via the main menu File / AbmeldenLogout and Login.

Figure: Logout/login without application restart
Selecting an identity at login (Log in as)
As part of the login process, the system will check if the current user is listed as deputy at least once. A dialog will appear if that is the case, in which you have to select the permissions you want to work with. The first entry represents yourself, after that, all employees are listed, for whom you are defined as deputy.
If there is no deputy arrangement done for you, then the dialog will not be displayed and you will be logged in with your own permissions.
Comments
-
If there are many representative regulations, you need to scroll the list in order to select the desired representative.
-
The visualization text for the possible deputy identities is created after the schema Deputy of <first name> <last name>.
-
When creating new data or editing existing information, the token of the actual user will be entered into the fields Create user / Update user and explicitly NOT the token of the deputy. Should e.g. Mr. Baumann log in as deputy for Mr. Muller and he changes a dataset, then the field Update user will contain the token of Mr. Baumann and not that of Mr. Muller.
-
You would have to remove the assignment of the relevant employee dataset (just like the selection process) to remove the deputy arrangement.
-
Employees can only add o remove deputies for themselves, i.e. it is not possible for a deputy to specify other deputies for the user he represents. The exception are employees, who have specific function rights. These users can add or remove deputy assignments for all employees. In the delivery version, only administrators have this right.
Login configuration
The login configuration for an employee is done in the Configuration tab.
000330.png?cb=4fc1acc39c6ade7c8ea07acf51ec8e28)
Figure: Login configuration
Autologin
The Autologin function using the Single Sign-On principle (in short SSO, "One time login") can be activated for users. That means that the user will be able to access all computers and services for which he has rights via a single authentication, without having to log in again every time. Each employee (user) can decide for themselves if they want to use this method. The checkbox Autom. Login in the Configuration tab must be selected.
Procedure
The main issue is database access. In the "Employee" table, the information for the autologin is stored in the fields "Autologin" and "Autologin name". As only the server can access this information, but it is also needed for logging in to the (JBoss) server, a way had to be found to make this information available without server access. This issue was resolved by having the server create a property file (autologin.properties) by the server, which contains the necessary information (the assignment of a Windows login name and the CURSOR-CRM/EVI user token). Example "XYZ=XYZ" means that the Windows (domain) client defined with the token "XYZ" in the first column is mapped with the CURSOR-CRM/EVI user (in this case: also the token "XYZ"). Names are freely selectable, they just have to be relevantly mapped (e.g.: Xz7ugH=HM).
Hint
Assign the same user name (token) for CURSOR-CRM/EVI you have used for the Windows system. That will make it easier for the user to remember.
Token guidelines for CURSOR-CRM/EVI:
-
only CAPS are permitted
-
max. length 35 characters * spaces are permitted
-
Umlauts are permitted
Avoid excessively long tokens to make sure they fit into the mask fields.

Figure: Accessing the configuration file
In order to ensure the validity of the information at all times, this file will be updated for the employees with every change. The same will occur if password encryption or system initialization is done.
The application's password protection is bypassed in an autologin. It is presumed that the authentication for he OS (for the domain) will be sufficient security.
-
Server-side configuration
The complete path for the property file must be stated in the table Property mapper under the entry AUTOLOGIN.PROPERTY to make the autologin information available to the client. Example: c:\\temp\\autologin.properties (note the '\\').
-
Client-side configuration
The client must have read access to this property file. We therefore recommend a read-only online storage location for the file. In the checkAutologin.bat file, the path to the autologin.properties file must be entered from the client's point of view. Adjust the variable "-DAutologin" below the area ":localAutologinPath" accordingly. For the client, the variable Autologin must be set to the complete path of the property file. e.g. -DAutologin=c:\temp\autologin.properties.
Login security
The Employee entity contains the field locked. This field can be fond on the tab Konfiguration in the mask by default.
-
Login security is activated
The account will be locked (and no longer deactivated) after a set number of incorrect password attempts. The checkbox can also be set manually by the administrator to lock the account. The user will no longer be able to log in to the system and a message will be displayed that the password is incorrect. The application will then close.
The user will be forwarded to the login dialog if Autom. Login is activated. The user will get the same response and the application will close if he attempts to log in with the same token manually.
-
Login security is not activated
The checkbox can be set only manually by the administrator to lock the account. The user will remain locked in the login dialog. A detailed description is not possible here, as it requires functionalities from login security.
Password settings
Configuration in the system settings
As administrator, you can define the password guidelines. These are configured via the Password settings dialog mask, which you access via the menu item Options / System Settings. Alternatively, you can access the mask via Administration / Administrator Console / Miscellaneous / System Settings.
Notwithstanding the administrative requirements, the user can change his password at any time via the menu item Options / Change Password.
Password guidelines
A system authentication via user name and associated password is required to work in CRM. The passwords of the individual user accounts are encrypted and stored in the CRM application database. The assignment of passwords is subject to the following guidelines, which can be configured individually by the system administrator of the CRM application:
-
Compliance with the following password criteria:
-
Min. character count (e.g. >= 8 characters)
-
Use of upper and lower case required
-
The new password must contain at least one numeral
-
At least one special character must be contained
-
-
Password renewal requirement: The password becomes invalid after X days, with configured warning message Y days before invalidation
-
A password history is logged, which will ensure that the past N passwords cannot be reused. At the time of password renewal, the system will check, whether the new password is not the same as the current password and is not listed in the password history. The user will not be able to re-use his current password or the last N passwords use.
-
Account locking, when a max. number of login attempts is surpassed (e.g. after three failed attempts)
An empty password is not permitted.
The internal password security is activated in the delivery state (empty database dump of the development).
Hereby the following settings are made:
-
Advanced password security: Activated
-
Case sensitivity: Activated
-
At least one number: Deactivated
-
At least one special character: Deactivated
-
Minimum Indication length: 12
-
Expiration of the password (days): 90
-
Warning of the expiration of the password (days): 7
-
Password history: 10
-
Number of unsuccessful attempts: 5
Force password change
The administrator can enforce new password guidelines for the users. The user must adjust his password in line with the password guidelines provided for a new login if the checkbox Change Password with Next Registration is selected.
The user will be relevantly informed if the password provided does not comply with the guidelines.
The field "Password Never Expires"
The settings regarding password validity and the warning of impending password invalidity will be circumvented for the configured user if this field is activated. This field is set to true for the TECH_USER employee by default. This field will have the same behavior as the field Change Password with Next Registration if it is added to the mask. These fields are visible only if the extended password security is activated.
Configuration of the login page in the Web Client
The new login page is only expected to be active from version 24.3 with the standard update. However, it can be explicitly activated from version 24.1 onwards, for example to use the authentication procedures available there (Open ID and SAML).
Activation of the login page
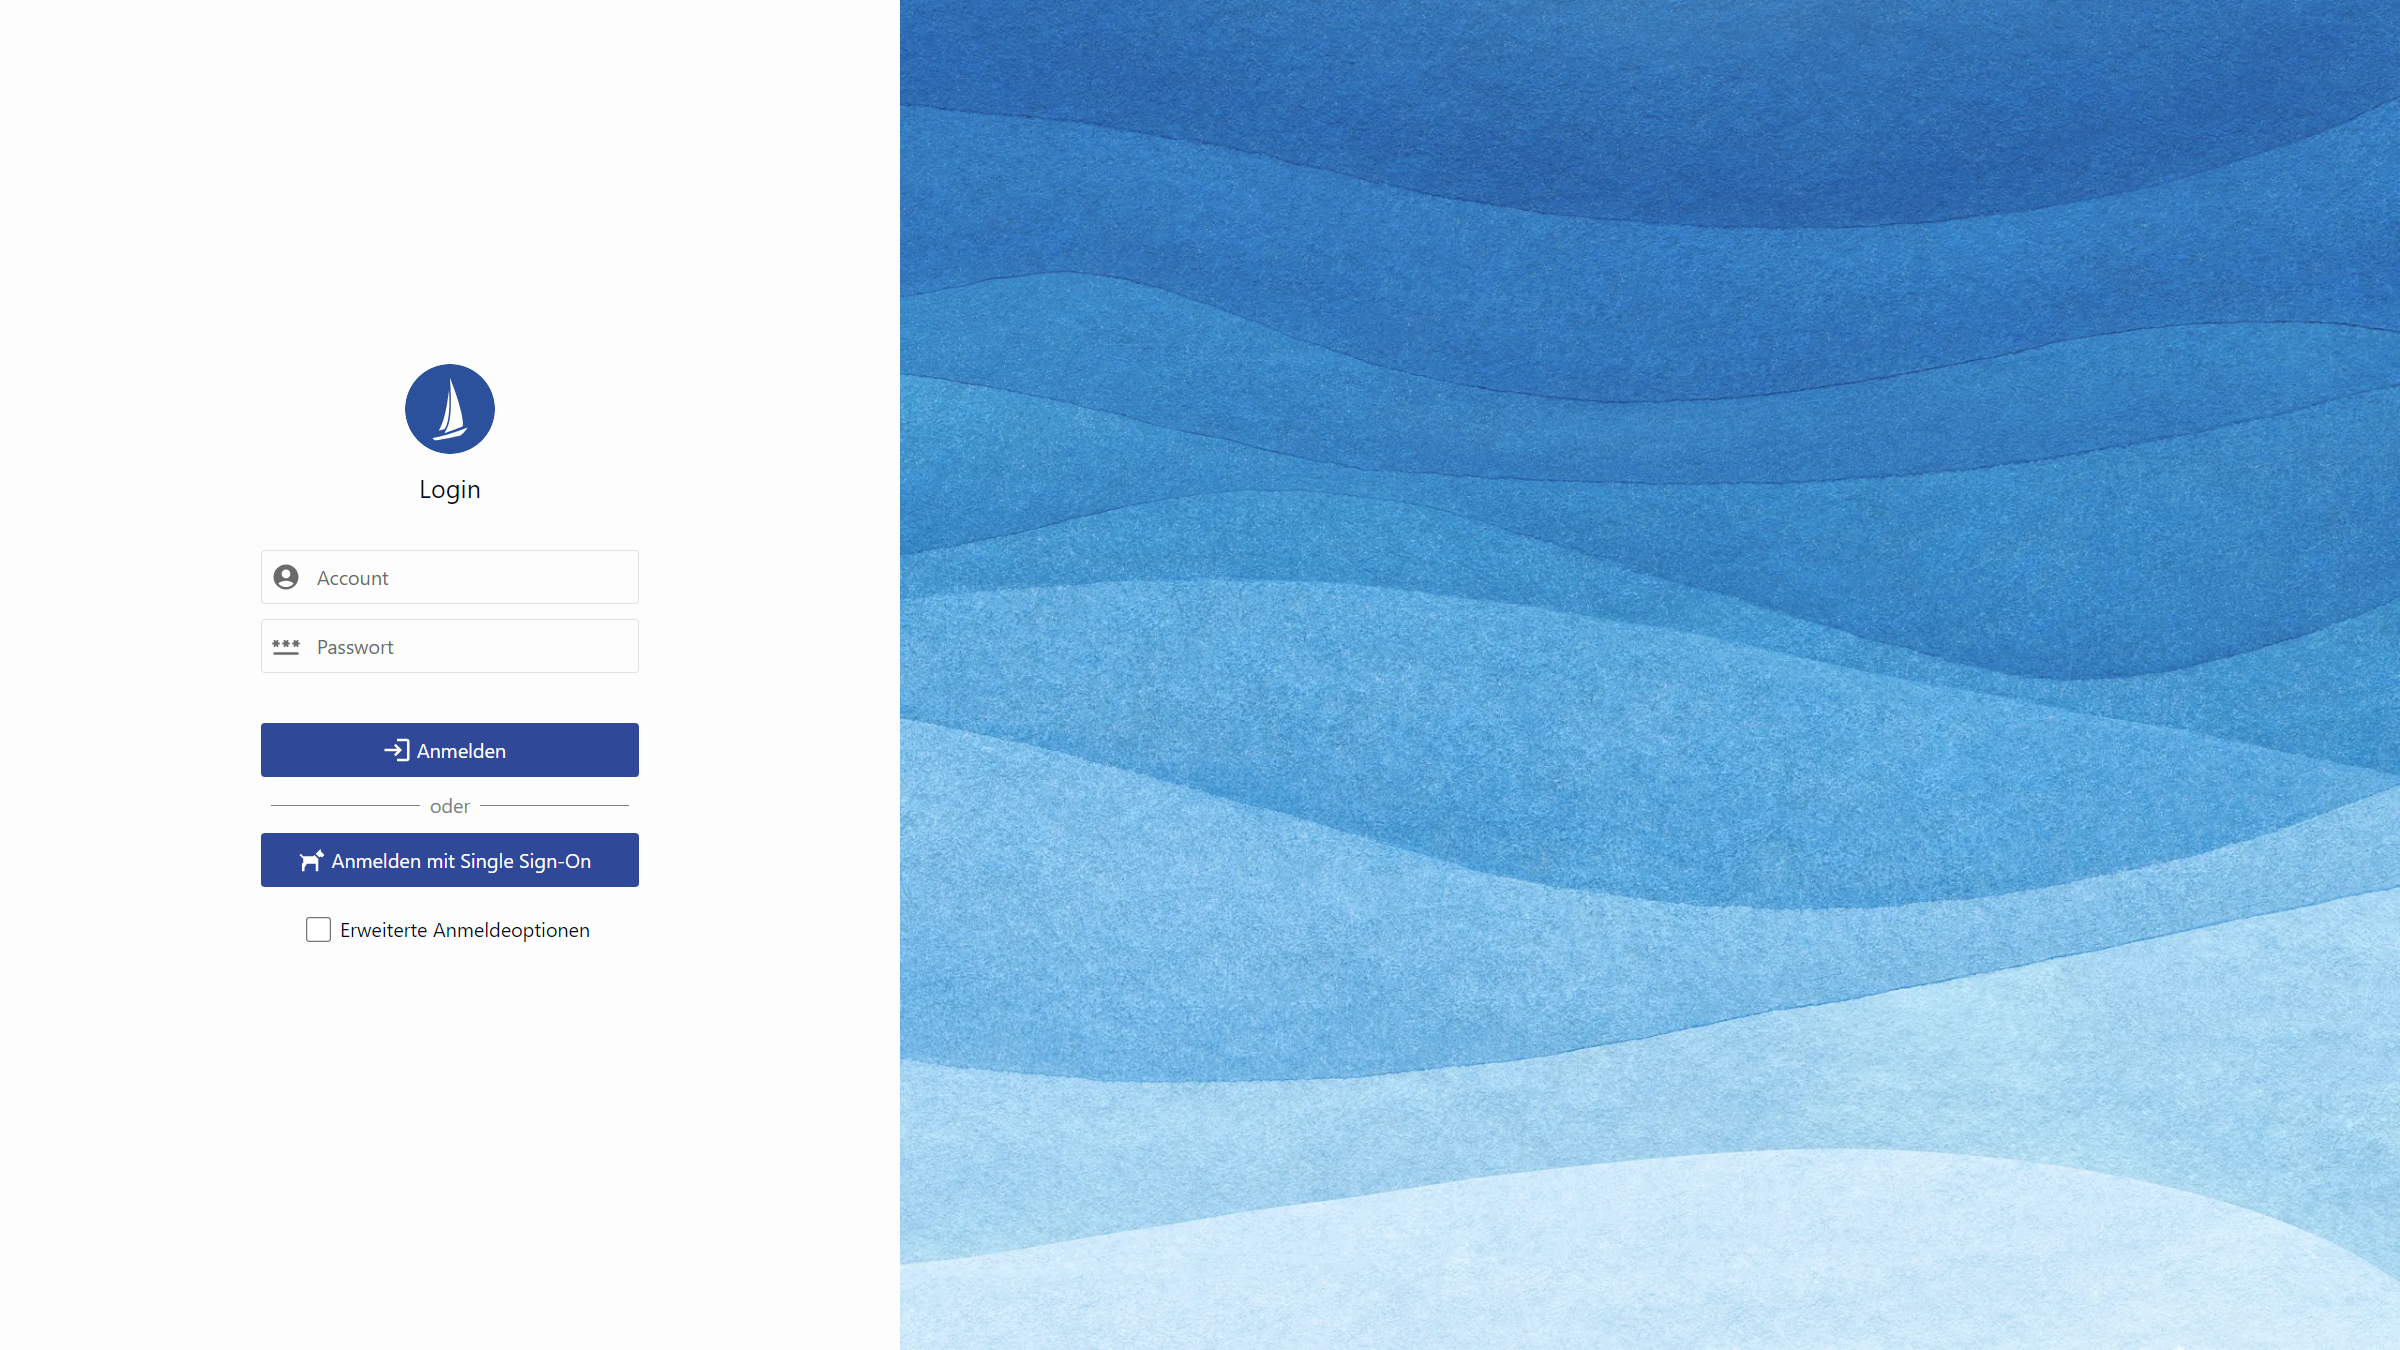
Several options and login services are available in the login dialog of the Web Client. The new mask can optionally be activated via a feature flag.
The following statements must be executed for this:
Activate the modern login page
INSERT INTO PropertyMapper( Pk, id, property, propertyValue, propertyType, principal, isCustomizing, CustLayer, Active, CreateDate, CreateUser, UpdateDate, UpdateUser, Status, RightPk, ClientNo, MassData)
VALUES ( 'LoginPage.ModernLoginPageEnabled', 'LoginPage.ModernLoginPageEnabled', '', 'true', 'SYSTEM', '', 'false', 'CN', 'true', getDate(), 'TECH_USER', getDate(), 'TECH_USER', null, null, null, 0)
Deactivate the legacy login page (only applies if you have also activated the modern one)
INSERT INTO PropertyMapper( Pk, id, property, propertyValue, propertyType, principal, isCustomizing, CustLayer, Active, CreateDate, CreateUser, UpdateDate, UpdateUser, Status, RightPk, ClientNo, MassData)
VALUES ( 'LoginPage.LegacyLoginPageEnabled', 'LoginPage.LegacyLoginPageEnabled', '', 'false', 'SYSTEM', '', 'false', 'CN', 'true', getDate(), 'TECH_USER', getDate(), 'TECH_USER', null, null, null, 0)
Depending on whether or which SSO login service is used, an additional button for Single Sign-on is available on the new login mask in addition to the login with account and password.
Configuration of the login services
With the new login page, the possible login services have been expanded. The respective configurations can be found in the links below.
Auto-login is no longer possible! The user must log in to the CRM system by entering the login information or clicking on the Single Sign-on button.
|
Symbol |
Description of the login service |
|---|---|
|
|
Direct login to the operator's system |
|
|
SAML → Single Sign-on with SAML 2.0 |
|
|
OpenID → Single Sign-on with OpenID Connect |
|
|
Kerberos → Kerberos-Login |
|
|
Microsoft |
Design and branding
Customers who want to design the application according to the company CI can adjust the following elements:
-
Color scheme of the login components (e.g. buttons)
-
Logo image above the login screen
-
the image on the right-hand side of the login screen (background picture)
-
Fav icon in the browser tab
In the first step, the overload still has to be carried out at two different points. This will be changed as part of the redesign of the admin console, so that there will be a central place to customize the login page.
Adjustment of the color scheme
The color scheme of the login page consists of five overridable colors. To override the colors, the application variable "LoginPage.UiBranding" must be set. This can be selected from the proposal list via "Admin console > Customizing > Application variable > New".
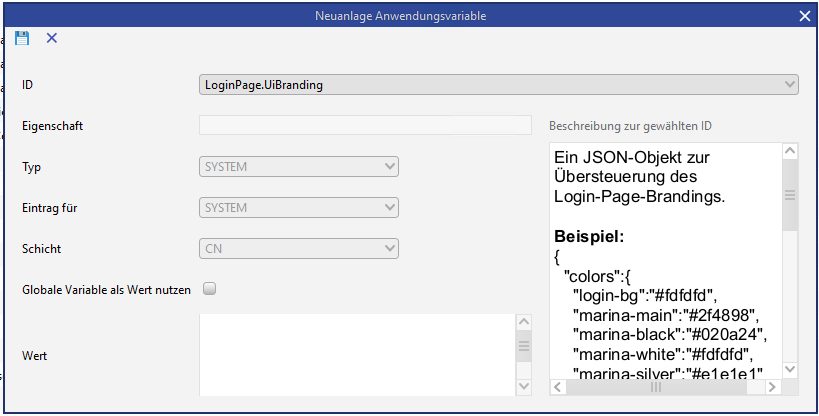
A JSON object in which the colors are defined in Hex code must be stored as the value of the variable. Example value with the standard color codes:
{
	"colors" : {
		"login-bg"          : "#ffffff",
		"marina-main"       : "#2f4898",
		"marina-black"      : "#020a24",
		"marina-white"      : "#fdfdfd",
		"marina-silver"     : "#e1e1e1"
	}
}
If only one value is to be adjusted, only this value must be listed:
{
	"colors" : {
		"marina-main"       : "#2f4898"
	}
}
The assignment of the respective color categories is shown in the following illustration.
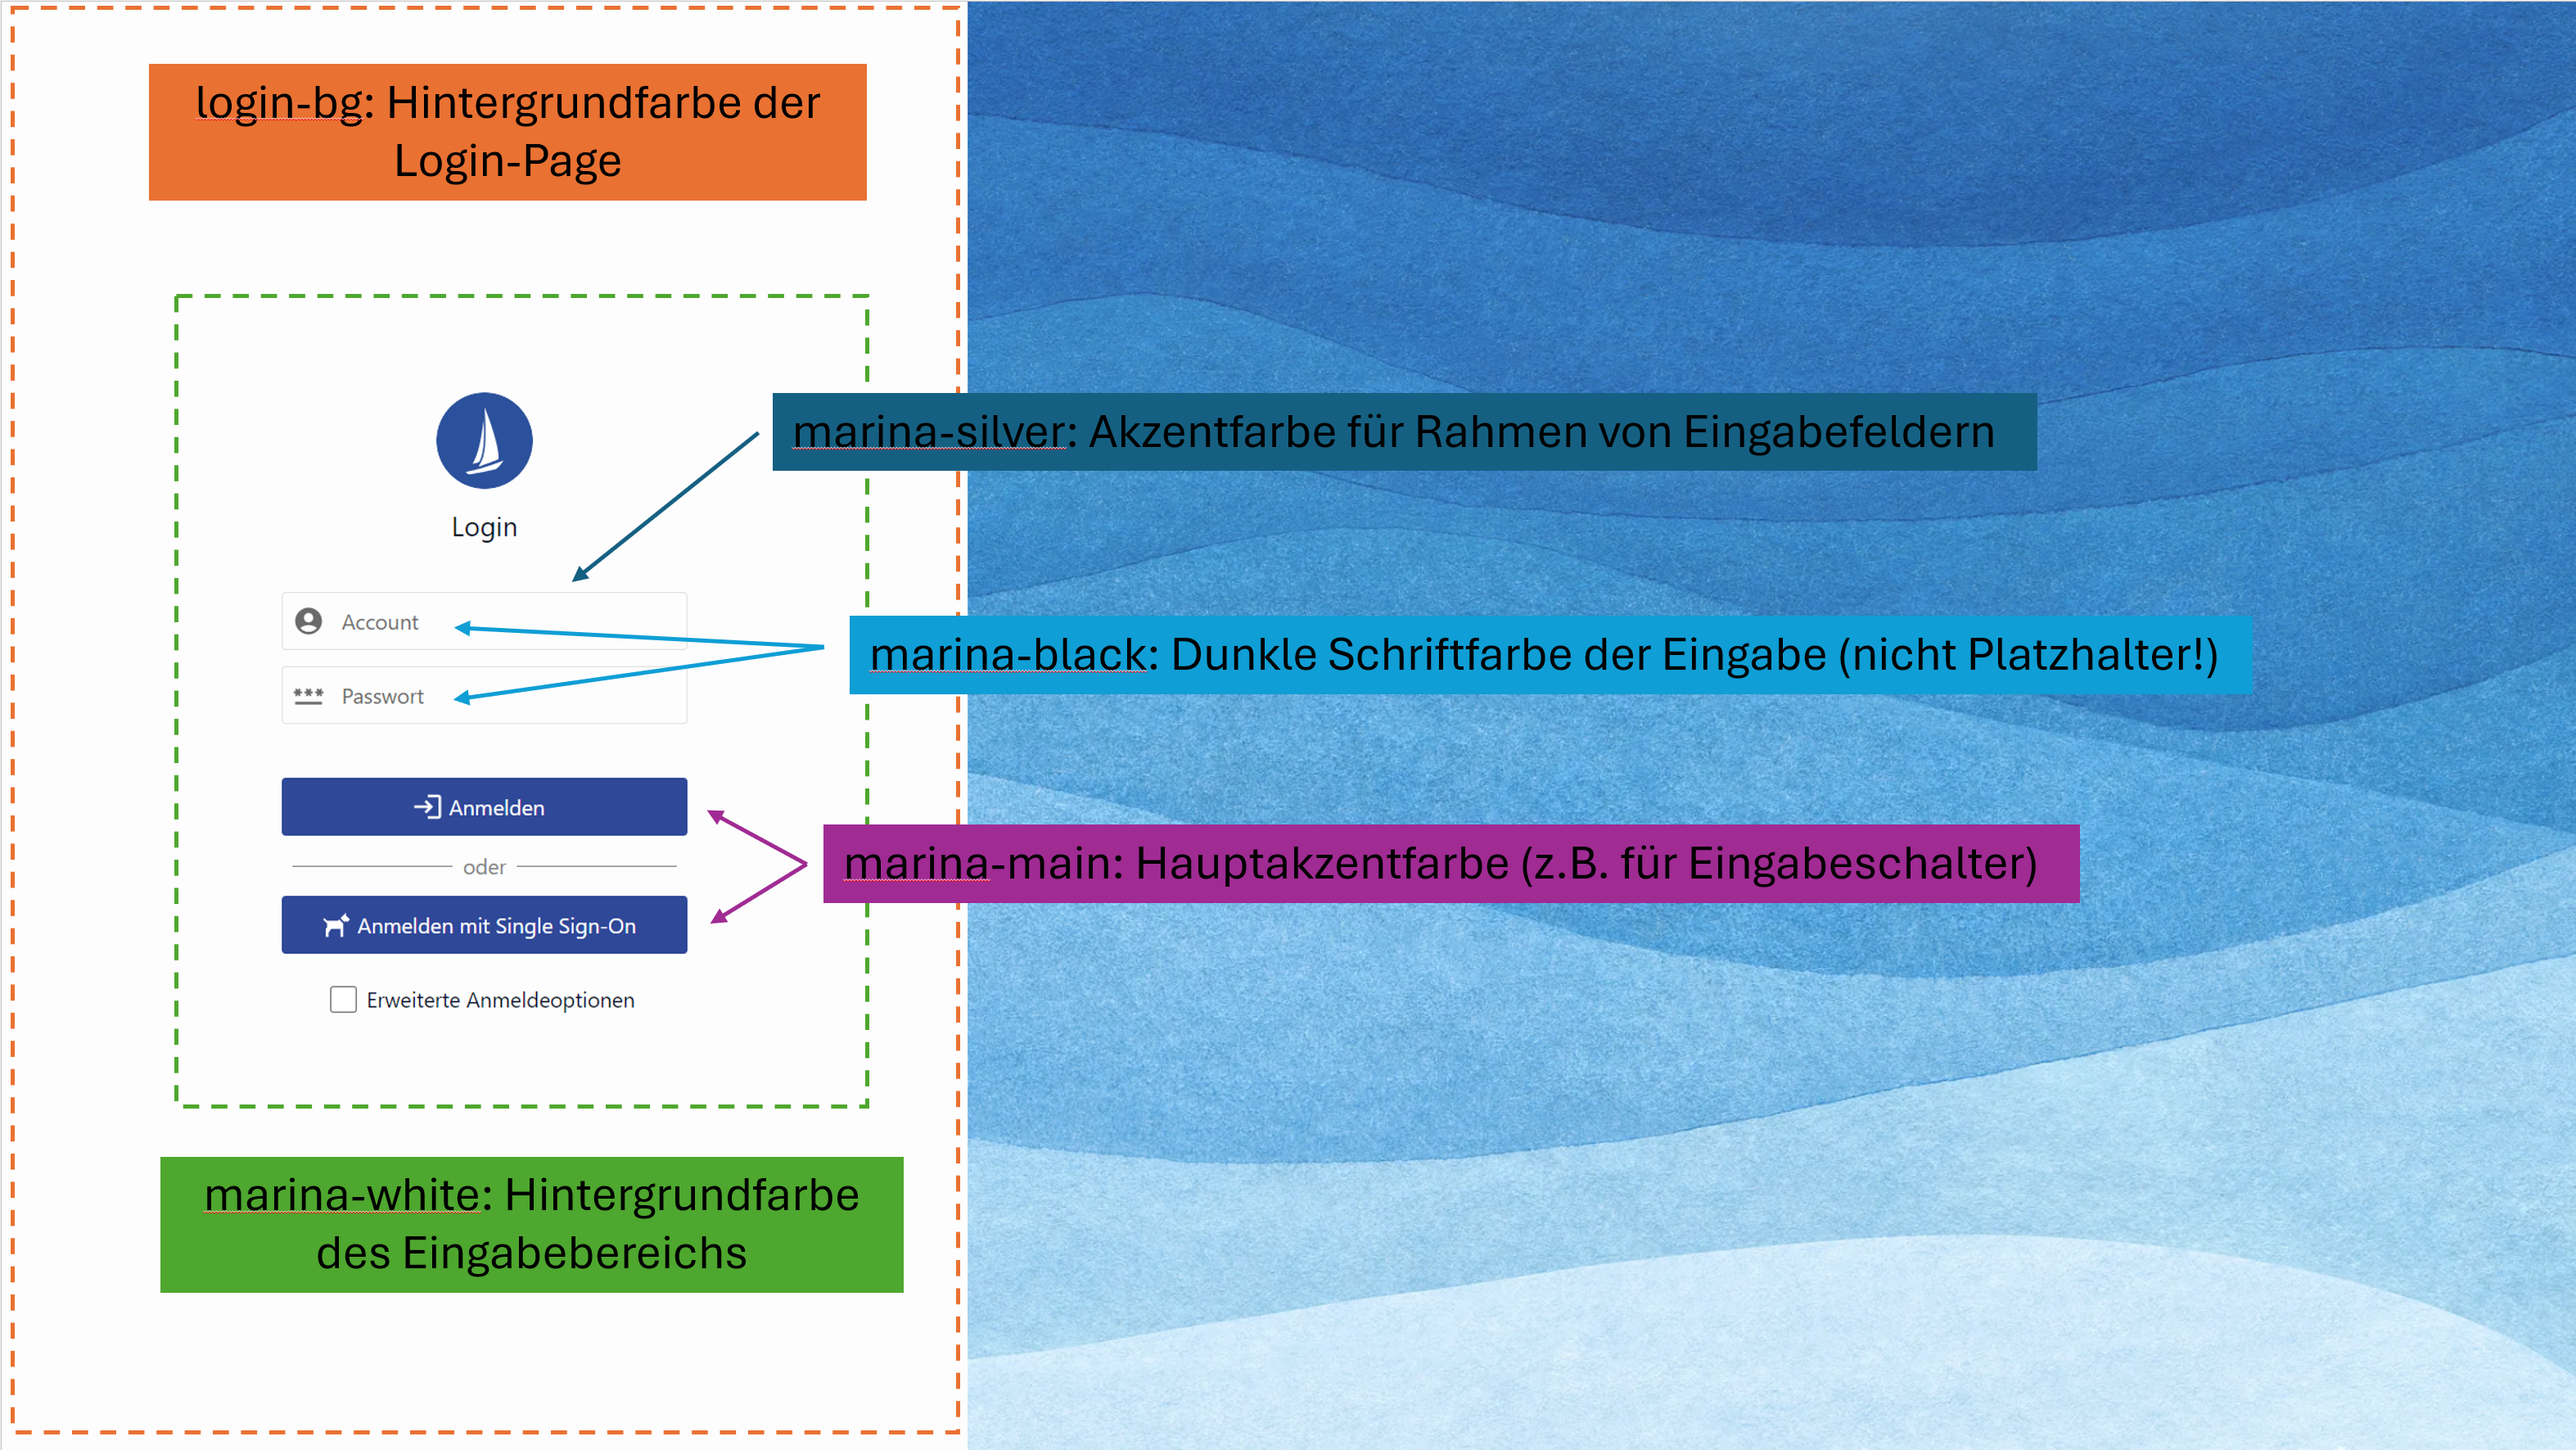
After adding or changing the application variable, the adjustments to the color codes of the login page take effect immediately. When the login page is called up again, the currently defined colors are visible.
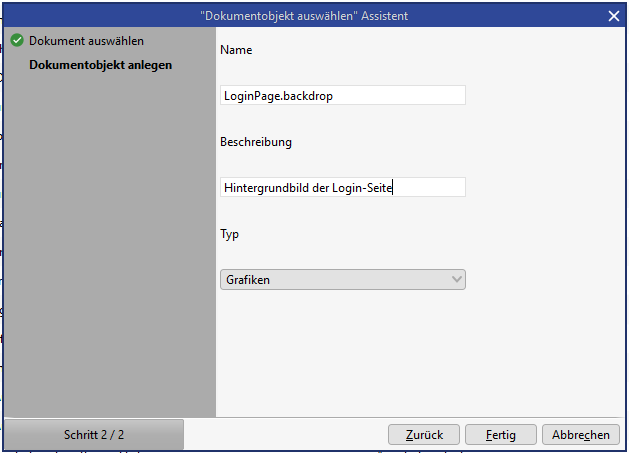
Customizing the background picture
To override the standard background picture, a document object entry must be created. This can be created under "Admin console > Document integration > Document object management > New". When creating, the name "LoginPage.backdrop" and the type "Graphics" must be selected. The description can be stored as required.
After creating the entry, the server cache should be emptied. In addition, the browser cache should also be emptied so that the result is not loaded before a previously filled cache entry expires.
After creating the entry, the server cache should be emptied. In addition, the user's browser cache must also be emptied so that the new background picture is also visible to the user, as the graphics are cached in the browser cache.
This note also applies to the customization of the logo and the fav icon!
Customization of the logo
The same procedure as for adjusting the background picture can be used to override the logo. Only "LoginPage.logo" needs to be selected as the name. The logo is displayed scaled to 72x72px. For reasons of efficiency, you should therefore make sure you choose the right size logo in advance.
Customization of the fav icon
The same procedure can be used to override the fav icon as for adjusting the background picture. You only need to select "LoginPage.favicon" as the name. The icon should be in "ico" format and have a size of 16x16px.